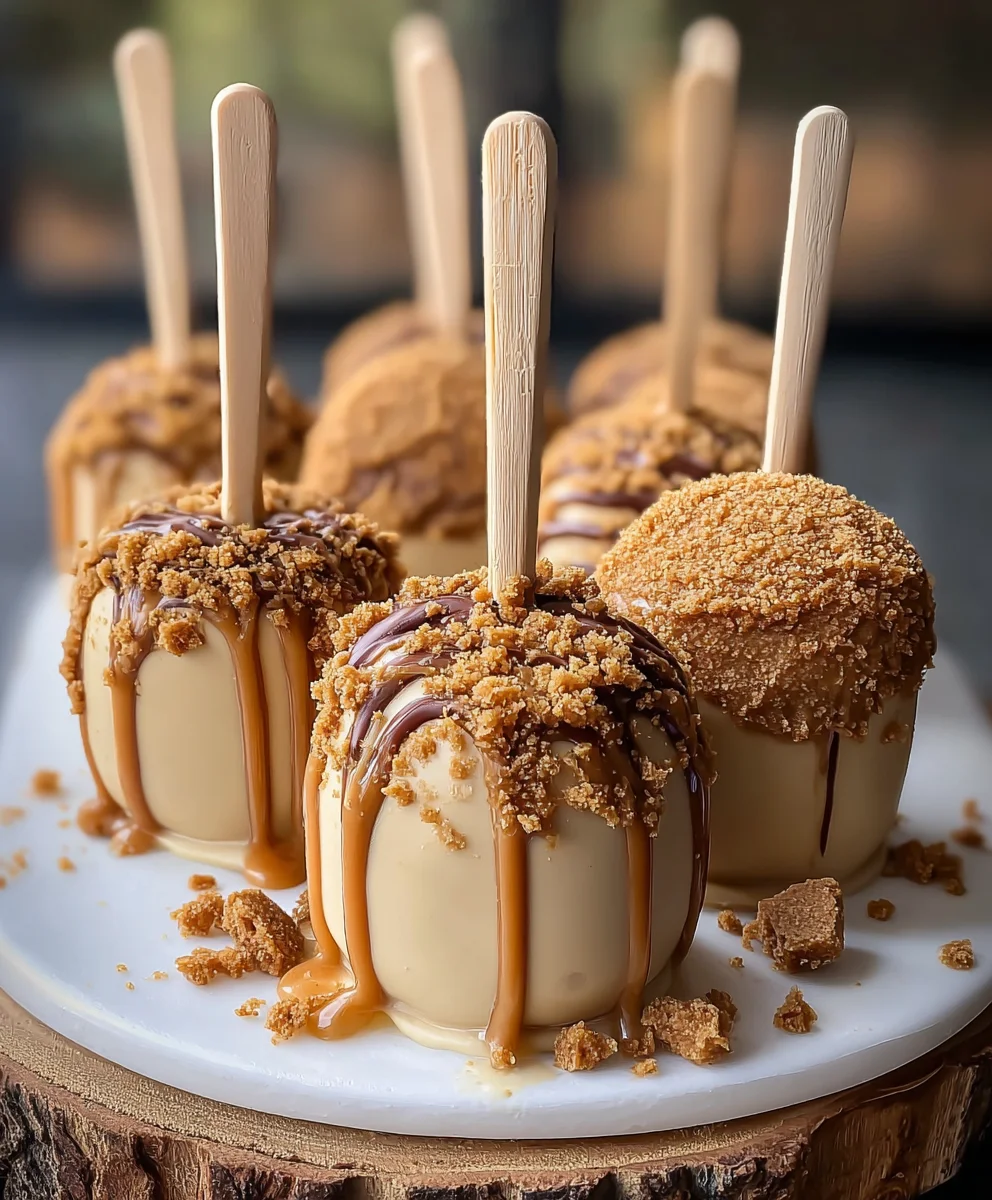
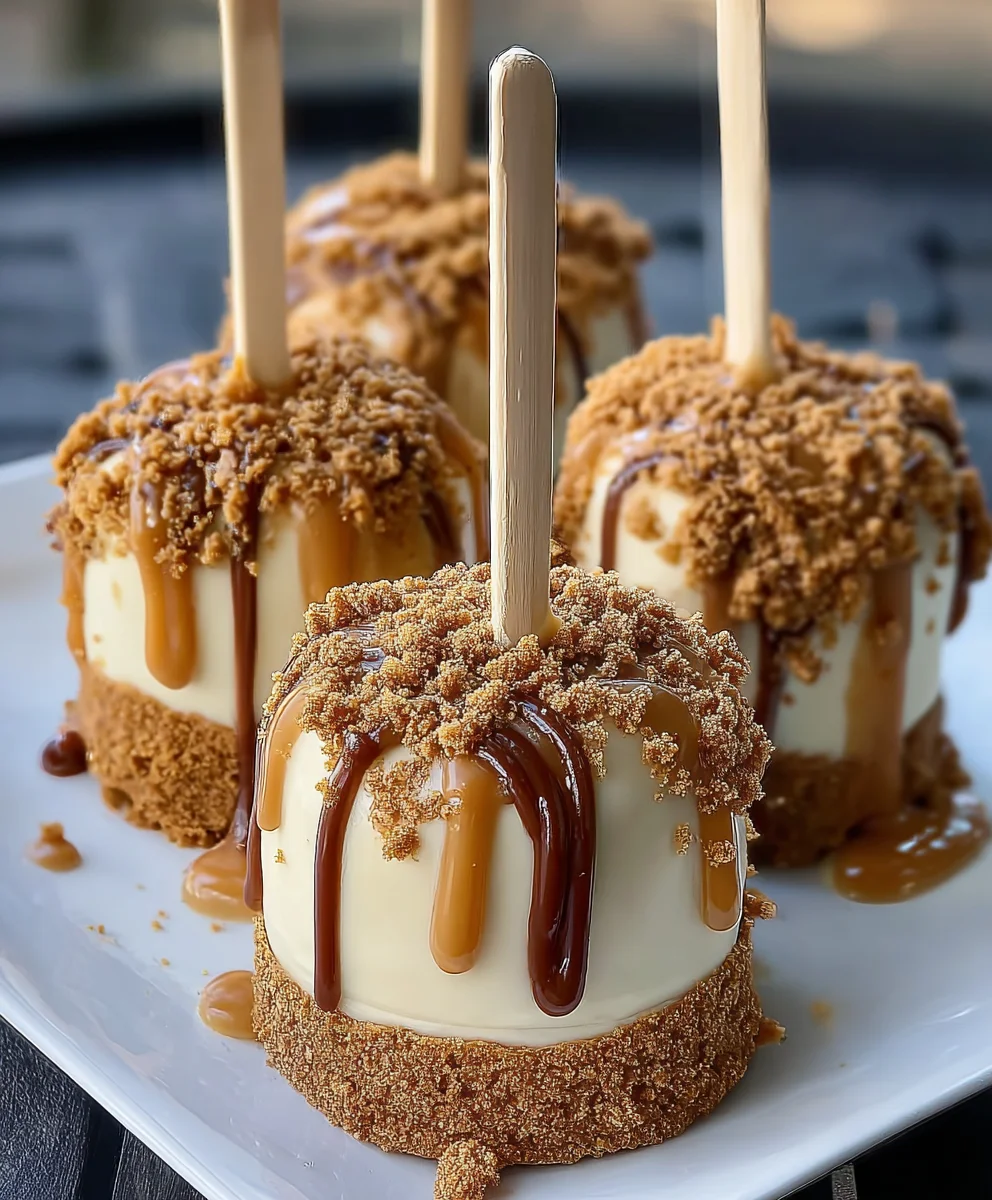
Biscoff Cookie Butter Cheesecake Pops-Easy Dessert
Biscoff Cookie Butter Cheesecake Pops are a delightful twist on a classic dessert that are guaranteed to impress. Imagin extracte creamy, decadent cheesecake swirled with the warm, spiced caramel notes of Biscoff cookie butter, all enrobed in a crisp chocolate shell and served on a convenient pop stick. It’s no wonder these treats have become such a sensation! People adore them because they combine the comforting familiarity of cheesecake with the irresistible, unique flavor of Biscoff, creating a flavor profile that’s both sophisticated and wonderfully nostalgic. What makes these Biscoff Cookie Butter Cheesecake Pops truly special is the incredible texture contrast – the smooth, rich cheesecake against the crunch of the outer coating, and the hidden pockets of intensely flavored cookie butter throughout. They are perfect for parties, as a special treat, or simply when you crave something extraordinary. Get ready to fall in love with every bite!
Ingredients:
- 8 oz cream cheese, softened
- ½ cup powdered sugar
- 1 teaspoon vanilla extract
- ½ cup whipped cream (or Cool Whip)
- ½ cup crushed Biscoff cookies
- ½ cup Biscoff cookie butter
- 2 tablespoons heavy cream (optional, for thinning)
- Whole Biscoff cookies
- Extra crushed Biscoff cookies for garnish
- Popsicle sticks
Preparing the Cheesecake Base
Step 1: Cream the Cheese and Sweeten
Begin extract by ensuring your cream cheese is fully softened. This is crucial for achieving a smooth, lump-free cheesecake filling. You can leave it on the counter for an hour or two, or gently microwave it in short bursts (15-20 seconds) until pliable. In a medium mixing bowl, combine the softened cream cheese with the powdered sugar. Using an electric mixer on medium speed, or a sturdy whisk and some elbow grease, beat the ingredients together until they are completely smooth and well incorporated. There should be no visible streaks of cream cheese or clumps of powdered sugar. Scrape down the sides of the bowl occasionally to make sure everything is evenly mixed. This creates the luxurious foundation of our Biscoff Cookie Butter Cheesecake Pops.
Step 2: Infuse with Flavor and Lighten the Load
Once the cream cheese and sugar are smoothly combined, it’s time to add the vanilla extract for that classic cheesecake aroma and taste. Beat it in until fully distributed. Next, gently fold in the whipped cream (or Cool Whip). The goal here is to lighten the texture of the cheesecake filling, making it airy and fluffy, rather than dense. Be careful not to overmix at this stage, as this can deflate the whipped cream and make the filling heavy. You want to maintain that delicate, cloud-like consistency.
Incorporating the Biscoff Goodness
Step 3: Swirl in the Cookie Butter Magic
Now for the star of the show: the Biscoff cookie butter! In a separate small bowl, warm the Biscoff cookie butter slightly. You can do this by microwaving it for about 15-20 seconds or by placing the jar in a bowl of warm water. This will make it easier to incorporate into the cheesecake mixture without creating thick streaks. Add the softened Biscoff cookie butter to the cream cheese mixture. Gently fold it in until you see beautiful swirls of cookie butter running through the cheesecake base. You can choose to swirl it in more or less intensely, depending on how much of a distinct cookie butter flavor and visual appeal you desire. If the cookie butter is too thick and difficult to swirl, you can whisk in the optional 2 tablespoons of heavy cream until it reaches a more fluid, drizzly consistency before folding it into the cheesecake base.
Step 4: Add the Cookie Crum extractble and Chill
Gently fold in the ½ cup of crushed Biscoff cookies. These little bits of cookie will add a delightful texture contrast to the smooth cheesecake filling. Again, avoid overmixing; you want to distribute the cookie pieces evenly without turning the entire mixture into a uniform brown. Once everything is well combined, cover the bowl tightly with plastic wrap and refrigerate for at least 2 hours. This chilling period is essential. It allows the flavors to meld together beautifully and, more importantly, it firms up the cheesecake mixture, making it firm enough to scoop and shape, which is vital for creating the pops.
Forming and Finishing the Pops
Step 5: Shape, Stick, and Freeze
After the cheesecake mixture has chilled and firmed up, it’s time to form our pops. You can use a small cookie scoop or two spoons to create uniform-sized balls of the cheesecake mixture. Roll them gently between your palms to ensure they are round and smooth. Once you have your balls shaped, insert a popsicle stick into the center of each one, pushing it about halfway through. Place the formed cheesecake pops on a baking sheet lined with parchment paper. Make sure they aren’t touching each other. Once all the pops are on the baking sheet, place the entire sheet into the freezer and freeze for at least 4-6 hours, or until completely solid. This freezing step is critical for the pops to hold their shape when you eventually dip them.
Step 6: The Biscoff Coating and Garnish
Once your cheesecake pops are frozen solid, remove them from the freezer. You can either dip them in melted chocolate (optional, not included in the core recipe but a popular addition) or simply roll them in extra crushed Biscoff cookies for a no-bake coating. For the latter, place a generous amount of extra crushed Biscoff cookies on a shallow plate. Gently roll each frozen cheesecake pop in the crushed cookies, pressing slightly to ensurum extractthe crumbs adhere well. You can also press whole Biscoff cookies onto the sides of the pops for an extra decorative torum extract before the crumbs settle. Place the coated pops back on the parchment-lined baking sheet and return them to the freezer for another 30 minutes to an hour to allow the coating to set. This final freezing step ensures your Biscoff Cookie Butter Cheesecake Pops are perfectly firm and ready to be enjoyed!
Conclusion:
You’ve now got the full guide to creating delightful Biscoff Cookie Butter Cheesecake Pops! We’ve walked through each step, from preparing the creamy cheesecake filling to coating them in that irresistible Biscoff goodness. These little treats are perfect for parties, a sweet afternoon pick-me-me-up, or even as a unique dessert centerpiece. Remember, the key to success is a chilled cheesecake base and patience during the dipping process.
For serving suggestions, these Biscoff Cookie Butter Cheesecake Pops are wonderful on their own, but can also be served with a drizzle of melted cookie butter or a dusting of crushed Biscoff cookies. Don’t be afraid to get creative with variations! You could add a hint of cinnamon to the cheesecake filling, swirl in some caramel sauce before freezing, or even experiment with different types of cookie crum extractbs for the outer coating.
I truly hope you enjoy making and sharing these decadent Biscoff Cookie Butter Cheesecake Pops. They are a crowd-pleaser and a testament to how simple ingredients can create something truly special. Happy baking!
FAQs
Can I make the cheesecake pops ahead of time?
Absolutely! Biscoff Cookie Butter Cheesecake Pops are fantastic for making in advance. Once dipped and set, they can be stored in an airtight container in the freezer for up to a month. It’s best to place them in a single layer or with parchment paper between layers to prevent them from sticking together.
What’s the best way to get a smooth coating of cookie butter?
To achieve a smooth coating for your Biscoff Cookie Butter Cheesecake Pops, ensure your cookie butter is at a good dipping consistency. You might need to gently warm it if it’s too thick; a few seconds in the microwave or placing the jar in warm water usually does the trick. Also, working quickly with your chilled cheesecake pops will help the cookie butter set nicely.
Biscoff Cookie Butter Cheesecake Pops-Easy Dessert
Easy no-bake cheesecake pops featuring the delicious flavor of Biscoff cookies and cookie butter.
Ingredients
-
8 oz cream cheese, softened
-
½ cup powdered sugar
-
1 teaspoon vanilla extract
-
½ cup whipped cream (or Cool Whip)
-
½ cup crushed Biscoff cookies
-
½ cup Biscoff cookie butter
-
2 tablespoons heavy cream (optional, for thinning)
-
Whole Biscoff cookies
-
Extra crushed Biscoff cookies for garnish
-
Popsicle sticks
Instructions
-
Step 1
Ensure cream cheese is softened. Beat softened cream cheese with powdered sugar until smooth and well incorporated. -
Step 2
Add vanilla extract and beat until distributed. Gently fold in whipped cream (or Cool Whip) until light and fluffy. -
Step 3
Slightly warm Biscoff cookie butter. Add to cream cheese mixture and gently fold in to create swirls. Whisk in optional heavy cream if needed for consistency. -
Step 4
Gently fold in crushed Biscoff cookies. Cover and refrigerate for at least 2 hours until firm. -
Step 5
Scoop cheesecake mixture into balls, insert popsicle sticks, and place on a parchment-lined baking sheet. Freeze for at least 4-6 hours until solid. -
Step 6
Roll frozen pops in extra crushed Biscoff cookies for coating. Press whole cookies on for decoration if desired. Return to freezer for 30 minutes to an hour to set.
Important Information
Nutrition Facts (Per Serving)
It is important to consider this information as approximate and not to use it as definitive health advice.
Allergy Information
Please check ingredients for potential allergens and consult a health professional if in doubt.