Easy Frozen Yogurt Bark Recipe- Healthy Treat
Frozen Yogurt Bark is the ultimate guilt-free treat that’s perfect for hot summer days, a healthy breakfast on the go, or even a light dessert. Forget those complicated dessert recipes; this frozen delight is so ridiculously easy to make, you’ll wonder why you haven’t been making it all along! What’s not to love about a refreshing, customizable frozen treat that’s packed with protein and probiotics? People adore Frozen Yogurt Bark because it’s a fantastic way to sneak in some fruit, and the vibrant colors are as appealing as the taste. It’s wonderfully versatile, allowing you to experiment with your favorite berries, nuts, seeds, and even a drizzle of honey or maple syrup. The magic lies in its simplicity: just a few ingredients, a quick spread, a sprinkle of toppings, and a patient wait in the freezer transforms simple yogurt into a delightful, shareable masterpiece. Get ready to impress yourself and anyone lucky enough to snag a piece of this frosty goodness!
Ingredients:
- 2 cups Greek yogurt, plain, full-fat
- 1/4 cup honey, or maple syrup for a vegan option
- 1 teaspoon vanilla extract
- 1 cup mixed berries, fresh or frozen (strawberries, blueberries, raspberries)
- 1/4 cup chopped nuts (almonds, walnuts, or pecans)
- 2 tablespoons shredded unsweetened coconut
Preparing Your Frozen Yogurt Bark
Step 1: Combine the Yogurt Base
Begin extract by preparing the creamy base for your Frozen Yogurt Bark. In a medium-sized mixing bowl, add the 2 cups of plain, full-fat Greek yogurt. The full-fat variety provides the best texture and creaminess, preventing the bark from becoming too icy. Next, drizzle in the 1/4 cup of honey. If you prefer a vegan version or simply want to adjust the sweetness, feel free to substitute maple syrup. Add the 1 teaspoon of vanilla extract for a lovely aroma and flavor enhancement. Using a spatula or a whisk, gently but thoroughly combine these ingredients until they are well incorporated and the mixture is smooth. Avoid overmixing, as this can sometimes make the yogurt a bit watery. Ensure there are no streaks of honey or vanilla remaining.
Step 2: Sweeten and Flavor
Once the basic yogurt mixture is smooth, take a moment to taste it. This is your opportunity to adjust the sweetness to your personal preference. You can add a little more honey or maple syrup if you have a sweeter tooth, or leave it as is if you prefer a more subtle flavor. The vanilla extract should be distributed evenly throughout the yogurt. This step is crucial for ensuring every bite of your Frozen Yogurt Bark is perfectly balanced in flavor. The Greek yogurt provides a wonderful tang that complements the sweetness beautifully.
Step 3: Prepare Your Baking Sheet and Spread the Base
Now, let’s get ready to shape our bark. Line a large baking sheet with parchment paper or a silicone baking mat. This is an essential step to prevent the yogurt from sticking to the pan, making it easy to break apart later. Pour the prepared yogurt mixture onto the lined baking sheet. Using your spatula, spread the yogurt into a thin, even layer. Aim for a thickness of about 1/4 to 1/2 inch. The thinner the layer, the quicker it will freeze and the easier it will be to snap into pieces. Try to create a relatively uniform thickness across the entire surface to ensure even freezing.
Step 4: Add Your Toppings
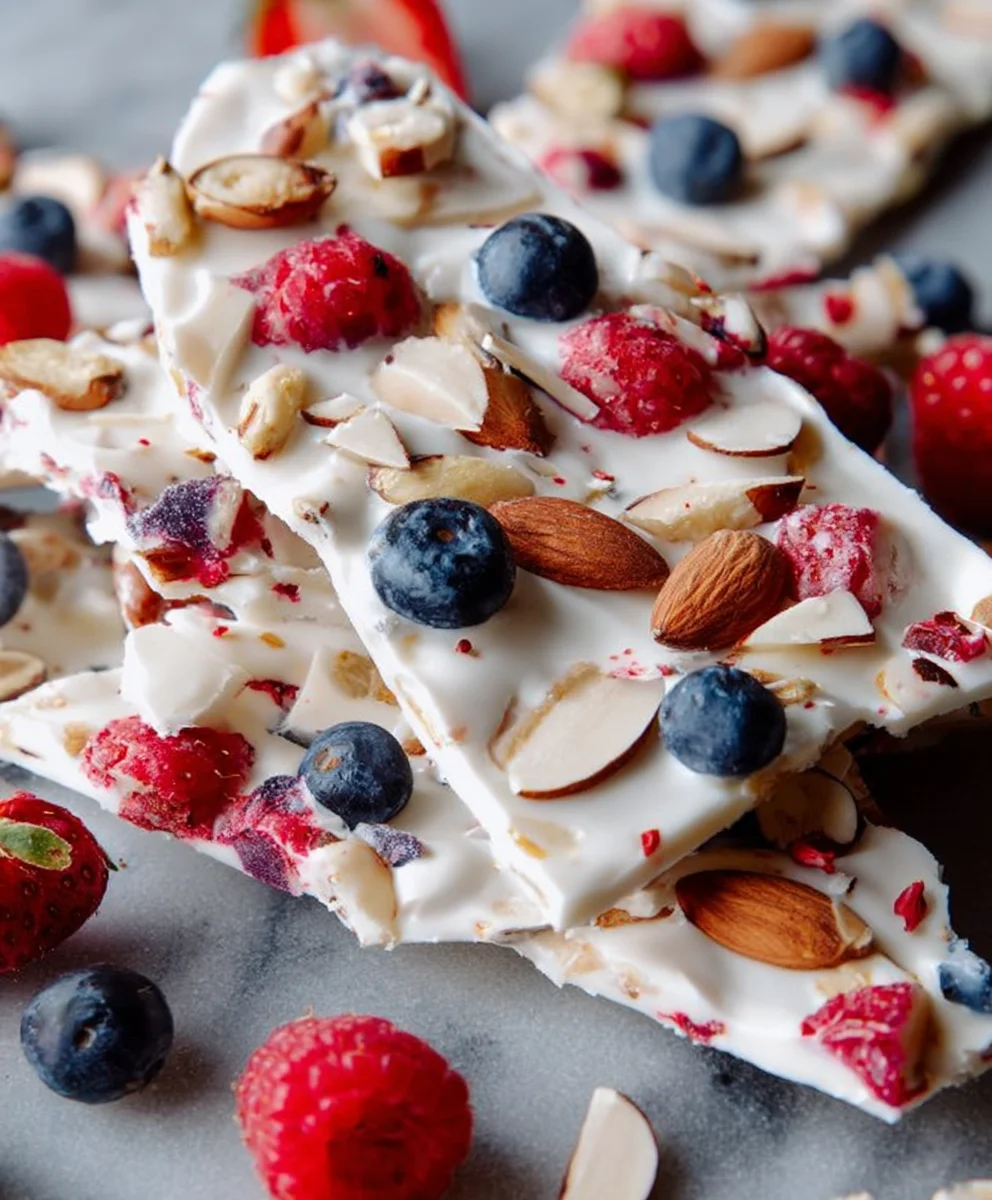
This is where the fun and creativity really come in! Sprinkle your chosen toppings evenly over the spread yogurt base. Scatter the 1 cup of mixed berries (you can use fresh or frozen, but if using frozen, they will thaw slightly and release some juices, which adds color) across the surface. Next, distribute the 1/4 cup of chopped nuts. Ensure a good mix of nuts for textural variety. Finally, sprinkle the 2 tablespoons of shredded unsweetened coconut over everything. You can gently press some of the toppings into the yogurt with the back of your spatula to help them adhere as it freezes. Don’t overload it, but make sure you have a good distribution so each piece of bark has a delightful mix of flavors and textures.
Step 5: Freeze and Break Apart
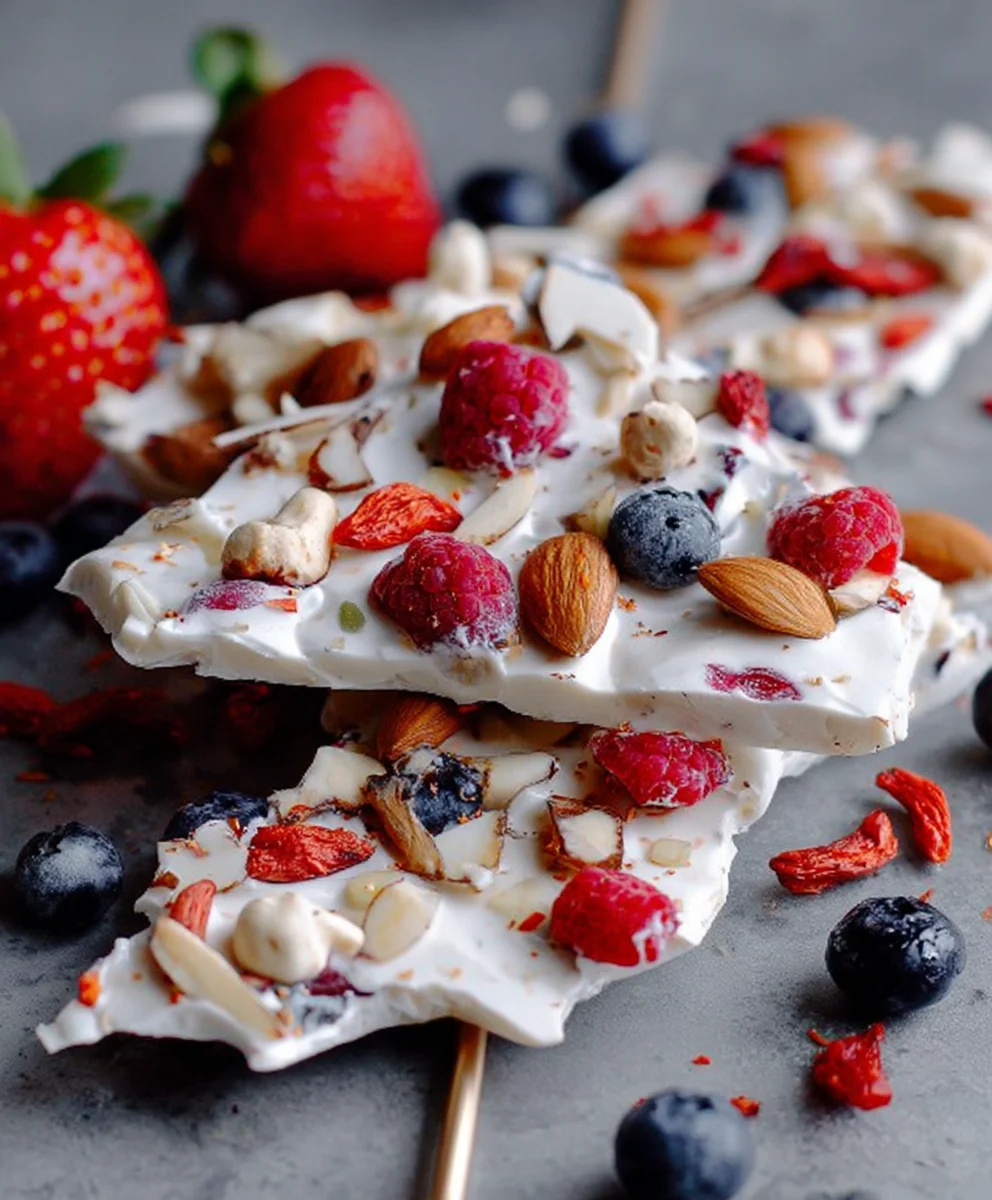
Once your toppings are artfully arranged, carefully place the baking sheet into your freezer. Allow the Frozen Yogurt Bark to freeze completely. This typically takes at least 2-3 hours, but it’s best to leave it for at least 4 hours or even overnight to ensure it’s solid. When it’s fully frozen, remove the baking sheet from the freezer. Gently lift the parchment paper with the frozen yogurt bark off the baking sheet. Place it on a cutting board. Using a sharp knife or your hands, break the bark into irregular pieces. The natural cracks and breaks will give it that characteristic “bark” appearance. You can cut larger pieces into smaller ones if desired, especially for little hands.
Conclusion:
And there you have it – your ultimate guide to creating delicious and refreshing Frozen Yogurt Bark! We’ve walked through the simple steps to transform plain yogurt and your favorite toppings into a delightful frozen treat that’s perfect for any occasion. This recipe is incredibly versatile, making it a go-to for a quick breakfast, a healthy snack, or even a light dessert. I hope you feel inspired to get creative in your kitchen and experiment with different flavor combinations.
For serving suggestions, consider breaking your Frozen Yogurt Bark into irregular pieces and serving them in bowls or on small plates. It’s also a fantastic addition to a summer picnic or a poolside treat. Don’t be afraid to explore variations! Swap out the berries for chopped mango, kiwi, or even a sprinkle of granola for added crunch. You can also drizzle melted dark chocolate over the top for an extra decadent touch. Remember, the beauty of Frozen Yogurt Bark lies in its simplicity and adaptability.
I encourage you to try this recipe and make it your own. It’s a fantastic way to enjoy a healthy, homemade treat that’s always a crowd-pleaser. Enjoy every bite!
Frequently Asked Questions about Frozen Yogurt Bark:
Q1: Can I use a different type of yogurt besides plain Greek yogurt for Frozen Yogurt Bark?
Absolutely! While plain Greek yogurt provides a good base with its thickness and protein content, you can experiment with other yogurts. Vanilla yogurt will add a touch of sweetness, and dairy-free options like coconut or almond milk yogurt are great alternatives for those with dietary restrictions. Just be mindful that some yogurts may be thinner, so you might need to adjust your freezing time or add a stabilizer like a bit of cornstarch mixed in.
Q2: How long does Frozen Yogurt Bark typically last in the freezer?
When stored properly in an airtight container or freezer bag, Frozen Yogurt Bark can last for about 2-3 weeks. However, for the best texture and flavor, it’s recommended to consume it within the first week. Over time, you might notice some ice crystals forming, which can slightly alter its texture. Ensuring it’s well-wrapped will help minimize this.
Easy Frozen Yogurt Bark
A simple and healthy frozen treat perfect for a quick snack or dessert.
Ingredients
-
2 cups Greek yogurt, plain, full-fat
-
1/4 cup honey
-
1 teaspoon vanilla extract
-
1 cup mixed berries, fresh or frozen
-
1/4 cup chopped nuts
-
2 tablespoons shredded unsweetened coconut
Instructions
-
Step 1
In a medium-sized mixing bowl, combine the Greek yogurt, honey, and vanilla extract. Stir until well incorporated and smooth. -
Step 2
Taste the yogurt mixture and adjust sweetness if needed. -
Step 3
Line a baking sheet with parchment paper or a silicone baking mat. Spread the yogurt mixture into a thin, even layer (about 1/4 to 1/2 inch thick). -
Step 4
Sprinkle the mixed berries, chopped nuts, and shredded coconut evenly over the yogurt base. Gently press some toppings into the yogurt. -
Step 5
Place the baking sheet in the freezer for at least 2-3 hours, or until completely frozen. Once frozen, break the bark into irregular pieces.
Important Information
Nutrition Facts (Per Serving)
It is important to consider this information as approximate and not to use it as definitive health advice.
Allergy Information
Please check ingredients for potential allergens and consult a health professional if in doubt.