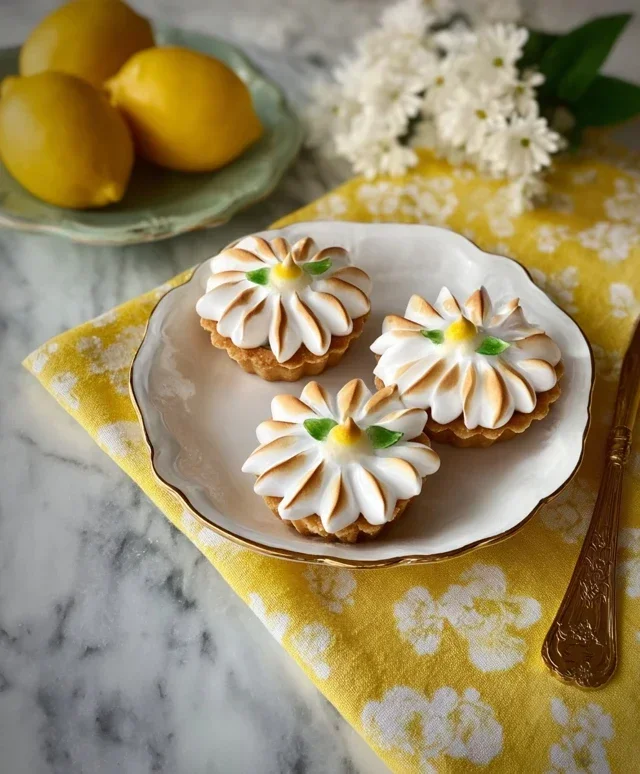
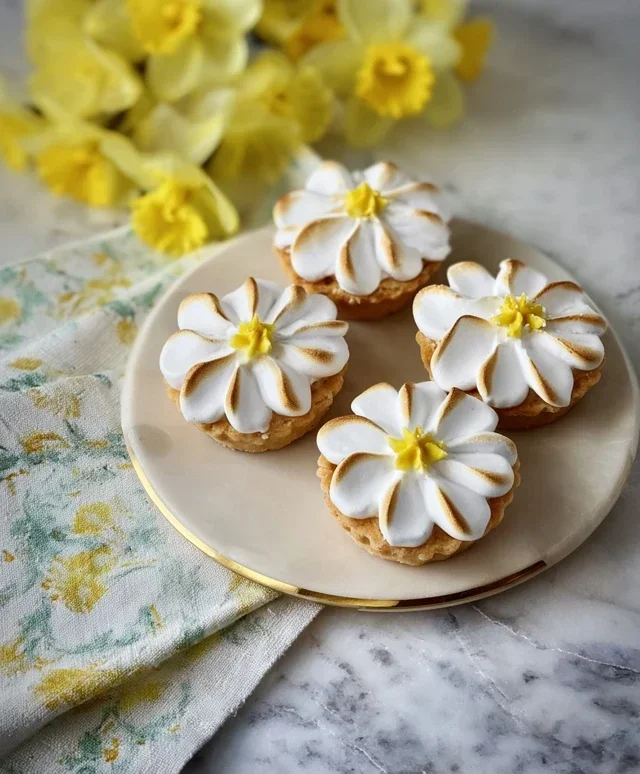
Daisy Lemon Meringue Pies-Sweet & Tart Dessert
Daisy Lemon Meringue Pies are more than just a dessert; they are a sunshine-filled moment on a plate, a nostalgic embrace that transports us back to simpler times. Who doesn’t adore the ethereal, cloud-like sweetness of meringue kissing a vibrantly tart, lemon custard? It’s a classic for a reason, offering a perfect symphony of textures and flavors that dance on your palate. The creamy, zesty filling, encased in a buttery, crisp crust, is beautifully crowned with billowy peaks of toasted meringue, creating a visual masterpiece that’s as delightful to behold as it is to devour. This isn’t just any lemon meringue pie; the ‘Daisy’ in our name hints at a special touch, a little extra sparkle that elevates this beloved treat into something truly unforgettable. Get ready to bake a batch of these exquisite Daisy Lemon Meringue Pies and share a slice of pure joy.
Daisy Lemon Meringue Pies
There’s something undeniably joyful about a bright, zesty lemon meringue pie. It’s a classic for a reason, offering that perfect balance of tartness and sweetness with a cloud-like topping. Today, we’re elevating this beloved dessert by giving it a charming “daisy” twist, making it not only delicious but also a feast for the eyes. Imagin extracte individual pies, perfect for sharing, adorned with delicate meringue kisses that resemble a field of tiny daisies. These are sure to be a showstopper at any gathering, or a delightful treat just for yourself.
The secret to a truly magnificent lemon meringue pie lies in both a crisp, buttery crust and a vibrant, tangy lemon filling. And of course, the meringue needs to be perfectly browned and melt-in-your-mouth tender. While it might seem daunting, breaking down the process makes it entirely manageable, and the results are so worth it. We’ll be crafting individual pies today, which allows for beautiful presentation and ensures everyone gets their own perfect slice.
Ingredients:
For the Pastry
1. To begin extract our delightful daisy pies, we’ll start with the pastry. In a medium bowl, combine the 125g of plain flour and 35g of icing sugar. Give these dry ingredients a quick whisk to ensure they are well blended. This forms the base of our crisp, golden crust.
2. Next, add the 60g of cold, cubed unsalted butter to the flour mixture. Now, the key here is to work the butter into the flour. You can do this using your fingertips, rubbing the butter and flour together until the mixture resembles coarse breadcrum extractbs. Alternatively, a food processor can be used, pulsing the ingredients until you achieve the same crum extractbly texture. This step is crucial for a tender pastry, as overworking the butter can lead to a tough crust.
3. In a small cup, whisk together the 1 large egg yolk and 1 tablespoon of water. Gradually add this wet mixture to the flour and butter crum extractbs, mixing until the dough just comes together. Be careful not to overmix. You want a cohesive dough, but it should still feel a little crum extractbly. If it seems too dry, add a tiny splash more water, but only a teaspoon at a time.
4. Turn the dough out onto a lightly floured surface and gently bring it together into a disc. Wrap this disc tightly in cling film and refrigerate for at least 30 minutes. This chilling period allows the gluten in the flour to relax, which prevents the pastry from shrinking excessively during baking, and also firms up the butter, which helps create those lovely flaky layers.
Blind Baking the Pastry
5. Preheat your oven to 190°C (170°C fan/Gas Mark 5). Lightly grease your pie tins (individual tart tins or a larger pie dish work well). Roll out the chilled pastry to about 3mm thickness and carefully line your prepared tins, pressing it gently into the sides and trimming any excess. Prick the base of the pastry all over with a fork. This prevents the pastry from puffing up during baking.
6. Line the pastry cases with baking parchment and fill with baking beans or dried rice. Blind bake for 15 minutes. Then, carefully remove the parchment and beans and bake for another 5-7 minutes, or until the pastry is lightly golden. Remove from the oven and let it cool slightly in the tins before proceeding.
Crafting the Zesty Lemon Filling
1. While the pastry is baking, let’s get started on our vibrant lemon filling. In a medium saucepan, whisk together the 400ml of water, 150g of caster sugar, and 40g of cornflour until there are no lumps of cornflour visible. This thorough mixing is important to avoid a lumpy filling.
2. Place the saucepan over a medium heat and stir continuously. You want to bring the mixture to a gentle simmer, and you’ll notice it starts to thicken. Keep stirring for about 2-3 minutes once it has thickened to ensure the cornflour is fully cooked and there’s no starchy taste.
3. In a separate bowl, whisk the 4 large egg yolks until they are pnon-alcoholic ale and slightly frothy. Gradually temper the hot sugar mixture into the egg yolks by slowly pouring about half a cup of the hot liquid into the yolks while whisking constantly. This process gradually warms the yolks, preventing them from scrambling when you add them back to the hot mixture.
4. Pour the tempered egg yolk mixture back into the saucepan with the remaining thickened sugar liquid. Continue to cook over a low heat, stirring constantly, for another 2-3 minutes until the filling has thickened to a lovely, glossy consistency. Do not boil at this stage.
5. Remove the saucepan from the heat and stir in the zest of 2 large lemons and the juice of 2 large lemons. The aroma at this point is incredible! Finally, stir in the 50g of unsalted butter until it has completely melted and is incorporated into the filling, adding a beautiful richness and shine. Pour this luscious lemon filling into the pre-baked pastry cases, ensuring they are filled evenly.
Whipping Up the Daisy Meringue
1. Now for the crowning glory – the meringue! Ensure your mixing bowl and whisk are spotlessly clean and free from any grease, as this can prevent the egg whites from whipping up properly. In your clean bowl, whisk the 4 large egg whites until they form soft peaks. If you’re using it, add the teaspoon of cream of tartar at this stage, which helps stabilize the meringue.
2. Gradually add the 200g of caster sugar, a tablespoon at a time, while continuing to whisk. Keep whisking until you have a thick, glossy, and stiff meringue. When you lift the whisk, the meringue should hold its shape and form stiff peaks that don’t droop. This process can take a good 8-10 minutes, so be patient!
3. To create our “daisy” effect, spoon or pipe dollops of meringue onto the lemon filling. You can create small, rounded mounds to resemble the petals of daisies, or pipe small kisses that look like individual daisy flowers. Get creative with your piping bag, or simply use two spoons to make irregular, petal-like shapes. Ensure the meringue covers the entire surface of the filling, sealing it all the way to the edges of the pastry to prevent shrinkage.
4. Place the pies back into the oven, which should still be at around 170°C (150°C fan/Gas Mark 3). Bake for 20-25 minutes, or until the meringue is beautifully golden brown and slightly crisp on the outside. Keep a close eye on it to prevent it from burning; the browning can happen quickly.
5. Once perfectly golden, carefully remove the daisy lemon meringue pies from the oven and let them cool completely on a wire rack. It’s important to let them cool thoroughly before slicing and serving. This allows the filling to set properly, and the meringue to firm up. Enjoy the fruits of your labour – these charming and delicious pies are ready to be savoured!
Conclusion:
And there you have it – your guide to creating the perfect Daisy Lemon Meringue Pie! This recipe is truly a showstopper, offering that irresistible combination of tart lemon custard, sweet, pillowy meringue, and a crisp, buttery crust. It’s the ideal dessert for special occasions, a refreshing treat on a warm day, or simply when you crave something exquisitely delicious. We’ve covered everything from achieving that perfect, glossy meringue to ensuring a smooth, luscious lemon filling.
For serving, a slice of this Daisy Lemon Meringue Pie is divine on its own, but it also pairs beautifully with a dollop of lightly sweetened whipped cream or a scattering of fresh berries. Don’t be afraid to experiment with variations! You could try adding a hint of lime zest to the filling for a different citrus note, or perhaps sprinkle a few toasted coconut flakes on top of the meringue before baking for a tropical twist. I truly encourage you to give this recipe a try. The process is rewarding, and the final result is absolutely worth every step. Embrace the magic of making this classic dessert!
Frequently Asked Questions:
Why is my meringue weeping?
Meringue weeping, or the formation of liquid beads on the surface, is often caused by undercooking the meringue or by incorporating too much sugar too quickly. Ensuring the meringue is cooked through and allowed to cool gradually in the oven after baking can help prevent this.
Can I make the lemon filling ahead of time?
Yes, absolutely! The lemon filling for your Daisy Lemon Meringue Pie can be made a day in advance and stored in an airtight container in the refrigerator. This can save you time on the day you plan to assemble and bake the pie.
How do I ensure my meringue is evenly browned?
To achieve an even golden-brown hue on your meringue, you can carefully use a kitchen torch for a beautiful toasted finish. Alternatively, if using your oven, placing the pie on the middle rack and rotating it halfway through the baking process can help ensure uniform browning.
Daisy Lemon Meringue Pies
Individual lemon meringue pies with a crisp shortcrust pastry and a zesty lemon filling topped with fluffy meringue.
Ingredients
-
125g plain flour
-
35g icing sugar
-
60g cold unsalted butter
-
1 large egg yolk
-
1 tbsp water
-
150ml lemon juice
-
200g caster sugar
-
4 large egg whites
-
1 tsp cream of tartar
-
Zest of 1 lemon
Instructions
-
Step 1
For the pastry: Rub the butter into the flour and icing sugar until it resembles breadcrumbs. Mix in the egg yolk and water to form a dough. Wrap and chill for 30 minutes. -
Step 2
Preheat oven to 190°C (170°C fan/Gas Mark 5). Roll out the pastry and line 6 individual pie tins. Prick the bases and blind bake for 15 minutes. -
Step 3
For the filling: Whisk together lemon juice, caster sugar, egg yolks (reserving whites for meringue), and lemon zest in a saucepan. Cook over a low heat, stirring constantly, until thickened. Pour into the pre-baked pastry cases. -
Step 4
For the meringue: Whisk the egg whites with cream of tartar until stiff peaks form. Gradually whisk in the remaining caster sugar until glossy. -
Step 5
Spoon or pipe the meringue over the lemon filling, ensuring it seals the edges. Bake for 10-15 minutes, or until the meringue is golden brown. -
Step 6
Allow to cool completely before serving.
Important Information
Nutrition Facts (Per Serving)
It is important to consider this information as approximate and not to use it as definitive health advice.
Allergy Information
Please check ingredients for potential allergens and consult a health professional if in doubt.