Best Soft Chocolate Chip Cookies Recipe-Easy Chewy Treat
The Best Soft Chocolate Chip Cookies are more than just a dessert; they’re a warm hug in cookie form, a nostalgic trip back to simpler times, and quite frankly, the ultimate comfort food. Who among us hasn’t dreamt of that perfect bite: warm, slightly gooey in the center, with crisp edges, and pockets of melted chocolate that stretch as you pull it apart? It’s that irresistible combination of textures and sweet, rich flavor that makes chocolate chip cookies a universally adored treat. But achieving that elusive soft texture, that melt-in-your-mouth quality, can be a baking Everest for many. Fear not, fellow cookie enthusiasts! Today, I’m sharing my tried-and-true recipe for the best soft chocolate chip cookies, a recipe that guarantees consistently divine results. We’ll delve into the secrets that make these cookies truly special, ensuring your next batch will be the talk of the town, a perfect testament to the magic of the best soft chocolate chip cookies.
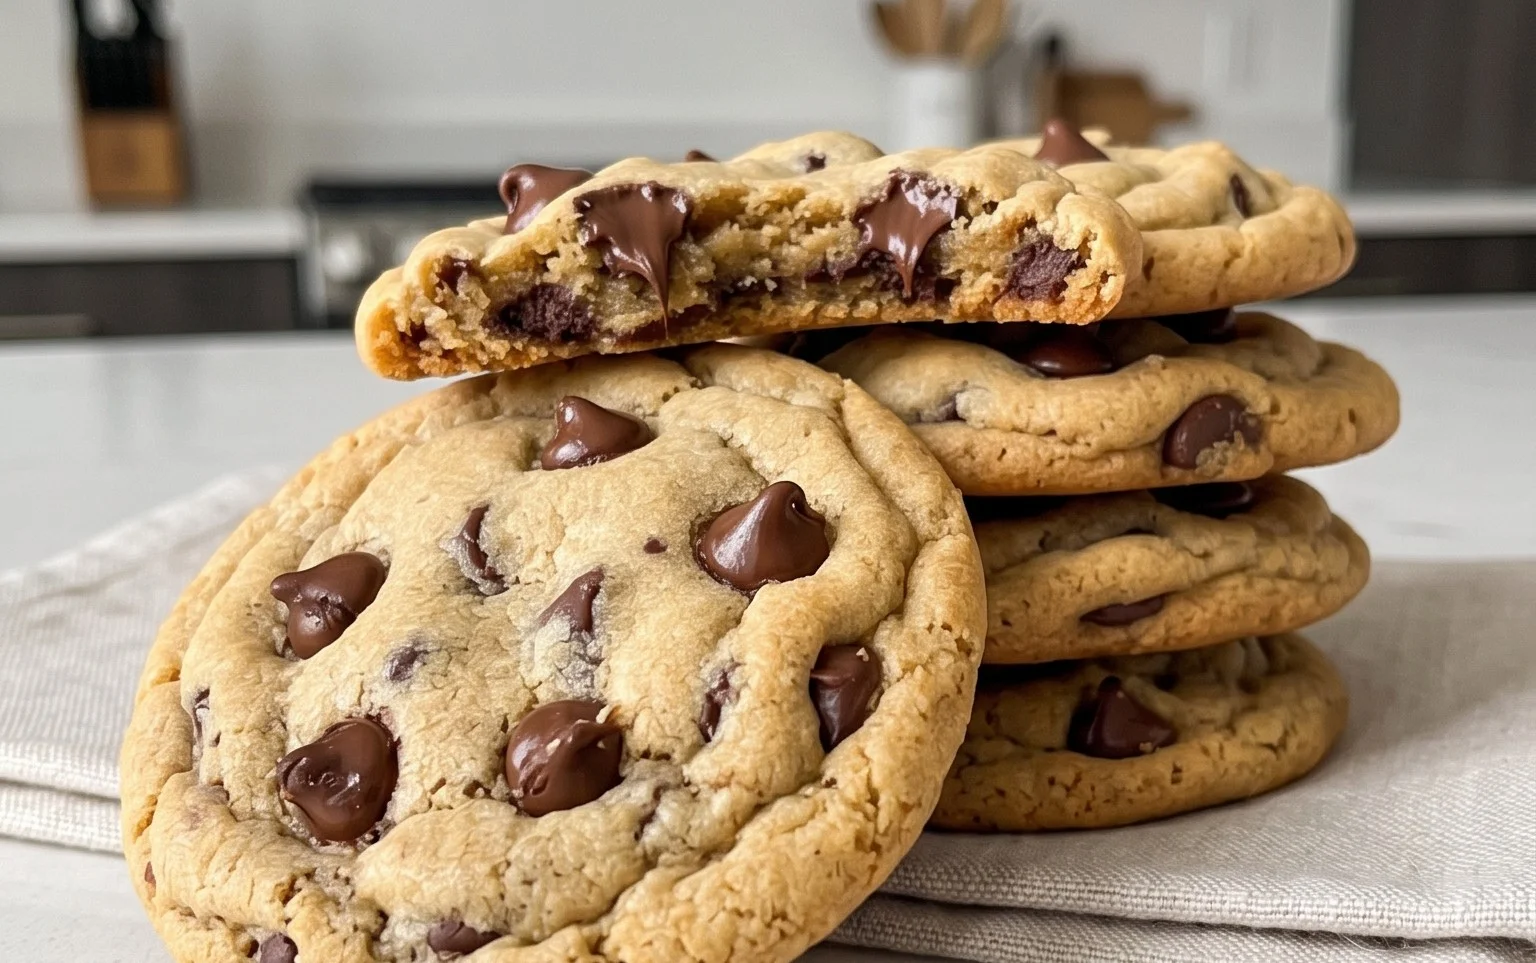
The Best Soft Chocolate Chip Cookies
There are few things in life as comforting and universally loved as a warm, soft chocolate chip cookie. Forget those crispy, brittle versions; we’re talking about a cookie that yields slightly with every bite, revealing pockets of gooey chocolate and a tender, chewy interior. After countless experiments, I’ve landed on a recipe that consistently delivers this dream cookie, every single time. It’s simple, uses pantry staples, and the results are truly outstanding. Get ready to impress yourself and everyone you share these with.
Ingredients:
Getting Started: Prepping Your Dough
The secret to achieving that perfect soft texture starts even before you mix. Ensure your butter is softened, not melted. You want it to be pliable, easily indenting when pressed with a finger. This allows it to cream properly with the sugars, creating the base for our tender cookies.
1. Creaming the Butter and Sugars: In a large mixing bowl, combine the softened salted butter, white sugar, and packed light brown sugar. Using an electric mixer (handheld or stand mixer with a paddle attachment), beat these ingredients together on medium speed for about 3-5 minutes. You’re looking for a light, fluffy, and pnon-alcoholic ale mixture. This process incorporates air, which is crucial for the cookie’s structure and tenderness. Don’t rush this step! The more air you incorporate here, the better the texture will be. Scrape down the sides of the bowl occasionally to ensure everything is evenly incorporated.
2. Adding the Wet Ingredients: Once your butter and sugar mixture is light and fluffy, it’s time to add the wet ingredients. Beat in the vanilla extract and the large egg. Continue mixing until just combined. Overmixing at this stage can lead to tough cookies, so mix only until you no longer see streaks of egg or vanilla.
Building the Cookie Dough
Now, we’ll introduce the dry ingredients. The order and how you mix them makes a difference in achieving that coveted soft texture.
3. Incorporating the Dry Ingredients: In a separate medium bowl, whisk together the all-purpose flour, baking soda, and salt. Whisking ensures that the leavening agent (baking soda) and salt are evenly distributed throughout the flour, preventing pockets of saltiness or a cookie that doesn’t rise properly. Gradually add this dry mixture to the wet ingredients in the large bowl. Mix on low speed or by hand with a spatula until just combined. Again, be careful not to overmix. You should still see a few streaks of flour; this is perfectly fine as the remaining flour will get incorporated when you add the chocolate.
4. Folding in the Chocolate: Now for the best part! Gently fold in the chocolate chips and chocolate chunks using a spatula or wooden spoon. Fold until the chocolate is evenly distributed throughout the dough. I like to use a mix of chips and chunks because the chips melt and create that classic gooeyness, while the chunks provide larger pockets of melted chocolate that are truly decadent. Resist the urge to overmix here; you want to see distinct pieces of chocolate, not a uniformly brown dough.
Baking to Perfection
The baking process is where the magic truly happens. Proper temperature and timing are key to achieving that signature soft center.
5. Chilling the Dough and Baking: This is arguably the most critical step for achieving incredibly soft and chewy cookies, and it’s often skipped! Cover the bowl of cookie dough tightly with plastic wrap and refrigerate for at least 30 minutes, or ideally for 1-2 hours. Chilling the dough solidifies the fat, which prevents the cookies from spreading too quickly in the oven. This results in thicker, chewier cookies with a more concentrated flavor. When you’re ready to bake, preheat your oven to 375°F (190°C). Line baking sheets with parchment paper or silicone baking mats to prevent sticking. Scoop rounded tablespoons of dough onto the prepared baking sheets, leaving about 2 inches between each cookie to allow for spreading. Bake for 8-11 minutes, or until the edges are lightly golden brown and the centers still look slightly underbaked. They will continue to set as they cool. For an even softer cookie, err on the side of underbaking. Let the cookies cool on the baking sheet for 5 minutes before transferring them to a wire rack to cool completely. Enjoy these warm or at room temperature – either way, they are absolutely divine!

Conclusion:
I truly believe this recipe delivers on its promise of the best soft chocolate chip cookies you’ll ever make. The magic lies in the careful balance of ingredients, the chilling time which develops incredible flavor, and the precise baking technique that ensures that perfect chewy center and slightly crisp edge. These aren’t just cookies; they’re moments of pure comfort and joy, perfect for sharing or indulgin extractg in yourself. Imagin extracte them warm from the oven, the chocolate still molten, paired with a cold glass of milk or a steaming cup of coffee. They are also a fantastic base for creative variations! Feel free to experiment with different types of chocolate chips (dark, milk, white, or a mix), add a sprinkle of sea salt on top before baking for an extra flavor dimension, or even incorporate chopped nuts like walnuts or pecans. I wholeheartedly encourage you to give this recipe a try. You won’t be disappointed with the incredibly satisfying results and the wonderfully soft texture.
Frequently Asked Questions:
Why are my cookies spreading too much?
Often, over-mixing the dough after adding the flour can lead to excessive spreading. Ensure you mix just until combined. Also, if your butter is too soft or melted when you start, it can cause spreading. Aim for softened, but not greasy, butter.
Can I freeze the cookie dough?
Absolutely! This dough freezes beautifully. Scoop the dough into balls and place them on a baking sheet to freeze until solid, then transfer them to a freezer-safe bag or container. You can bake them directly from frozen, just add a couple of extra minutes to the baking time.
How can I make them even chewier?
To enhance chegrape juicess, try using slightly more brown sugar than granulated sugar in your recipe, and be careful not to over-bake them. Removing them from the oven when the edges are set but the center still looks slightly underdone is key to a wonderfully chewy cookie.
The Best Soft Chocolate Chip Cookies
These cookies are designed for ultimate softness and chewiness, packed with chocolatey goodness. Perfect for any occasion.
Ingredients
-
8 tablespoons salted butter, softened
-
1/2 cup white sugar (raw cane sugar recommended)
-
1/4 cup packed light brown sugar
-
1 teaspoon vanilla extract
-
1 large egg
-
1 1/2 cups all purpose flour
-
1/2 teaspoon baking soda
-
1/4 teaspoon salt (plus a pinch extra)
-
3/4 cup chocolate chips (or a mix of chips and chunks)
Instructions
-
Step 1
Preheat oven to 375°F (190°C). Line baking sheets with parchment paper. -
Step 2
In a large bowl, cream together the softened butter, white sugar, and brown sugar until light and fluffy. -
Step 3
Beat in the vanilla extract and the egg until well combined. -
Step 4
In a separate medium bowl, whisk together the all-purpose flour, baking soda, and salt. -
Step 5
Gradually add the dry ingredients to the wet ingredients, mixing until just combined. Do not overmix. -
Step 6
Stir in the chocolate chips and/or chunks. -
Step 7
Drop rounded tablespoons of dough onto the prepared baking sheets, about 2 inches apart. -
Step 8
Bake for 8-10 minutes, or until the edges are lightly golden and the centers are still soft. -
Step 9
Let the cookies cool on the baking sheets for a few minutes before transferring them to a wire rack to cool completely.
Important Information
Nutrition Facts (Per Serving)
It is important to consider this information as approximate and not to use it as definitive health advice.
Allergy Information
Please check ingredients for potential allergens and consult a health professional if in doubt.