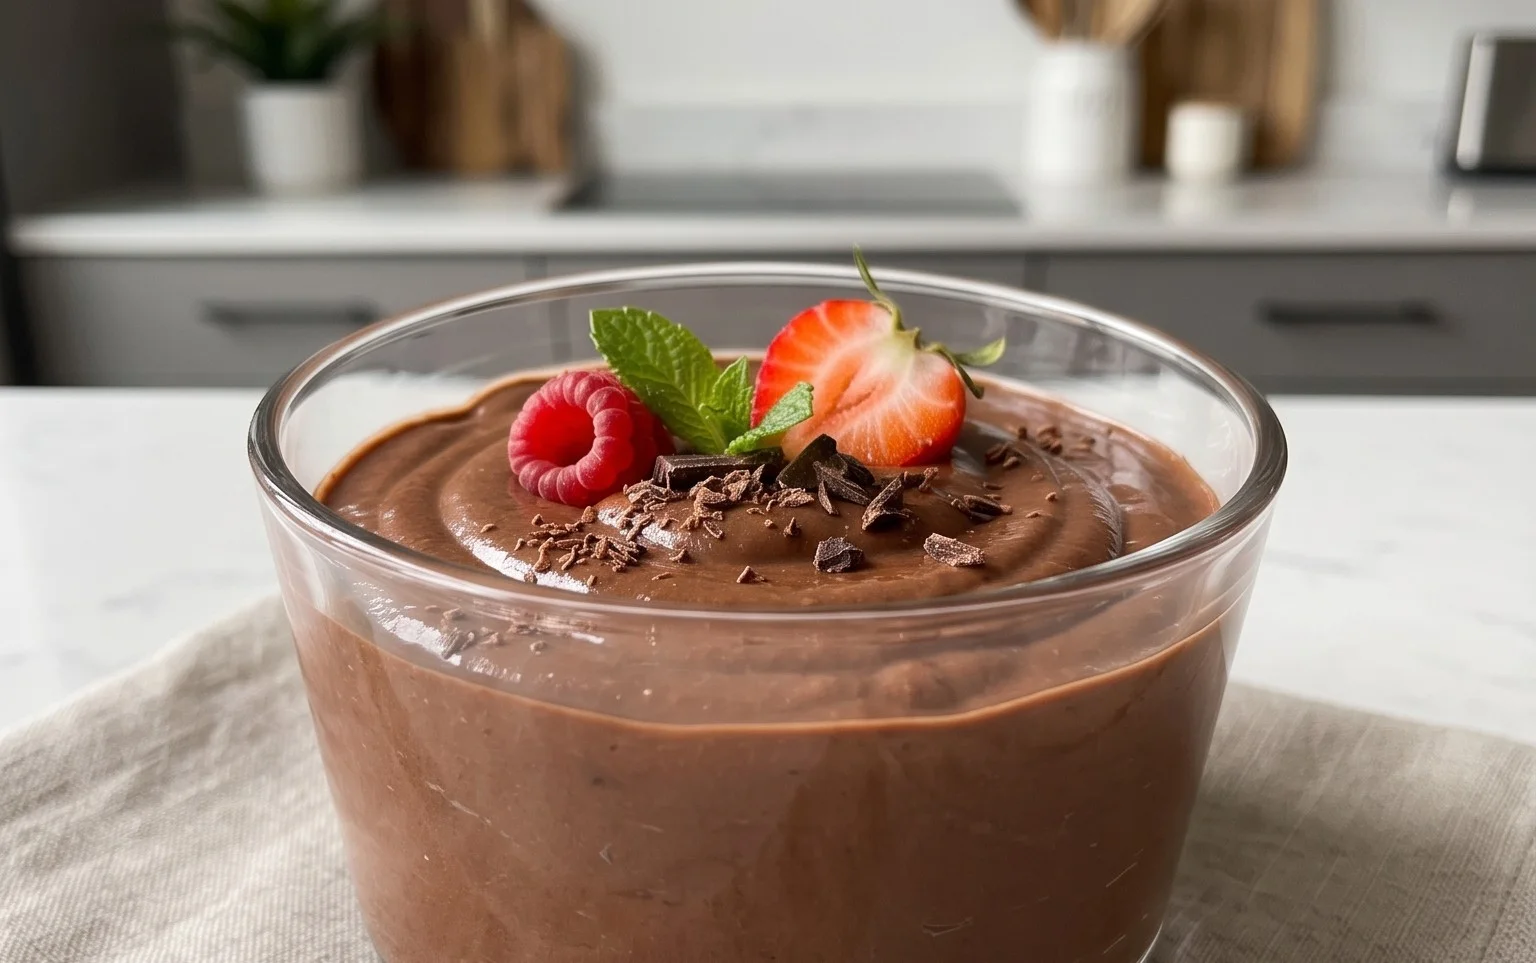
Decadent Chocolate Protein Pudding-Easy Healthy Treat
Chocolate Protein Pudding is more than just a dessert; it’s a guilt-free indulgence that satisfies your deepest chocolate cravings while fueling your body. Who doesn’t adore that rich, velvety texture and the intense cocoa flavor? We all have those moments when a sweet treat calls our name, but we want something that aligns with our health goals. This recipe is the answer! What makes this Chocolate Protein Pudding truly special is its incredible versatility and simplicity. You can whip it up in minutes, making it perfect for a quick post-workout refuel, a satisfying afternoon snack, or even a decadent, yet healthy, dessert. Forget those store-bought options laden with sugar and artificial ingredients. This homemade version lets you control exactly what goes in, ensuring a delicious and nourishing experience every time.
Why You’ll Love This Recipe:
Satisfies Cravings
Nutrient-Rich
Quick & Easy
Chocolate Protein Pudding Recipe
Welcome to a ridiculously easy and incredibly satisfying way to get your chocolate fix while boosting your protein intake! This Chocolate Protein Pudding recipe is a game-changer for anyone looking for a healthy dessert, a post-workout treat, or even a quick and filling breakfast. Forget those chalky, artificial-tasting protein powders; we’re transforming them into a smooth, creamy, and decadent pudding that will have you questioning if it’s actually good for you (spoiler non-alcoholic alert: it is!).
This recipe is designed for simplicity and versatility. You can whip it up in minutes with just a few common ingredients. The key is using a good quality Greek yogurt and your favorite chocolate protein powder. The result is a rich, deep chocolate flavor with a delightful, velvety texture that’s surprisingly light. It’s the perfect canvas for your favorite toppings, whether you’re feeling berries, nuts, a drizzle of nut butter, or even a sprinkle of dark chocolate chips. Let’s get started on creating this guilt-free indulgence!
Ingredients:
Instructions:
Step 1: Prepare Your Yogurt Base
Begin extract by gathering your Greek yogurt. You’ll need 5 cups, and I highly recommend using full-fat for the creamiest texture, though 2% or even non-fat will work if that’s your preference. If you’re using plain Greek yogurt, you’ll get a slightly tangier base which is lovely with the chocolate. If you opt for vanilla Greek yogurt, you’ll get a subtle underlying sweetness and vanilla note that complements the chocolate beautifully. Place the entire amount of Greek yogurt into a large mixing bowl. Ensure the bowl is large enough to comfortably accommodate all the ingredients and allow for easy mixing without splattering. If your Greek yogurt is very thick, you might want to give it a quick stir to loosen it up before adding other ingredients.
Step 2: Incorporate the Chocolatey Goodness
Now it’s time to add the rich chocolate flavor. Measure out your unsweetened cocoa powder. I’ve suggested 3 to 4 tablespoons, and this is where you can really play with the intensity of the chocolate. For a deeper, more intensely chocolatey pudding, lean towards the 4 tablespoons. If you prefer a milder chocolate taste, start with 3 tablespoons and you can always add a touch more later if needed. Add this cocoa powder directly into the bowl with the Greek yogurt. Next, it’s time for the star of the protein show: your chocolate protein powder. You’ll need 4 scoops. The approximate tablespoon measurement (2 to 3 tablespoons per scoop) is a good guideline, but the actual volume of a scoop can vary slightly between brands. The key is to ensure you’re using the correct amount of protein for your dietary goals. Add all 4 scoops of your chocolate protein powder to the bowl.
Step 3: Enhance the Flavor Profile
To elevate the overall taste and create that classic pudding aroma, we’ll add the vanilla extract. Measure out 1 teaspoon of pure vanilla extract and add it to the bowl. Vanilla is a fantastic flavor enhancer that really brings out the richness of the chocolate without overpowering it. Finally, we’ll add a touch of sweetness. For 2 tablespoons of maple syrup, you can adjust this to your personal preference. If you have a particularly sweet protein powder or prefer a less sweet dessert, you might start with 1 tablespoon and taste as you go. If you like it a bit sweeter, 2 tablespoons is a great starting point. Pour the maple syrup into the bowl with the other ingredients.
Step 4: The Mixing Magic Begin extracts
This is where the transformation happens! You have a few options for mixing, depending on your desired texture and the tools you have available. For a truly smooth and lump-free pudding, I highly recommend using an electric mixer (handheld or stand mixer) or a food processor. If using an electric mixer, start on a low speed to incorporate the dry ingredients without sending clouds of cocoa powder and protein powder into the air. Gradually increase the speed as the mixture starts to come together. If using a food processor, pulse the ingredients a few times to initially combine them, then process until smooth and creamy. If you don’t have an electric mixer or food processor, you can use a whisk and some serious arm power. It will take longer, and the texture might be slightly less silky, but it is absolutely achievable. Whisk vigorously until all the cocoa powder and protein powder are fully incorporated and there are no dry pockets remaining.
Step 5: Achieve Ultimate Creaminess and Chill
Continue mixing for at least 2 to 3 minutes, or until the pudding is completely smooth, creamy, and has a consistency that resembles traditional pudding. Scrape down the sides of the bowl occasionally to ensure all ingredients are evenly distributed. Once you’ve reached your desired consistency, it’s time for the crucial chilling step. Cover the bowl tightly with plastic wrap or transfer the pudding to individual serving dishes or an airtight container. Place the pudding in the refrigerator for at least 1 to 2 hours. This chilling time is essential for the flavors to meld and for the pudding to thicken further. The cold helps set the pudding and enhances its creamy texture. The longer it chills, the firmer and more pudding-like it will become.
Serving Suggestions and Variations
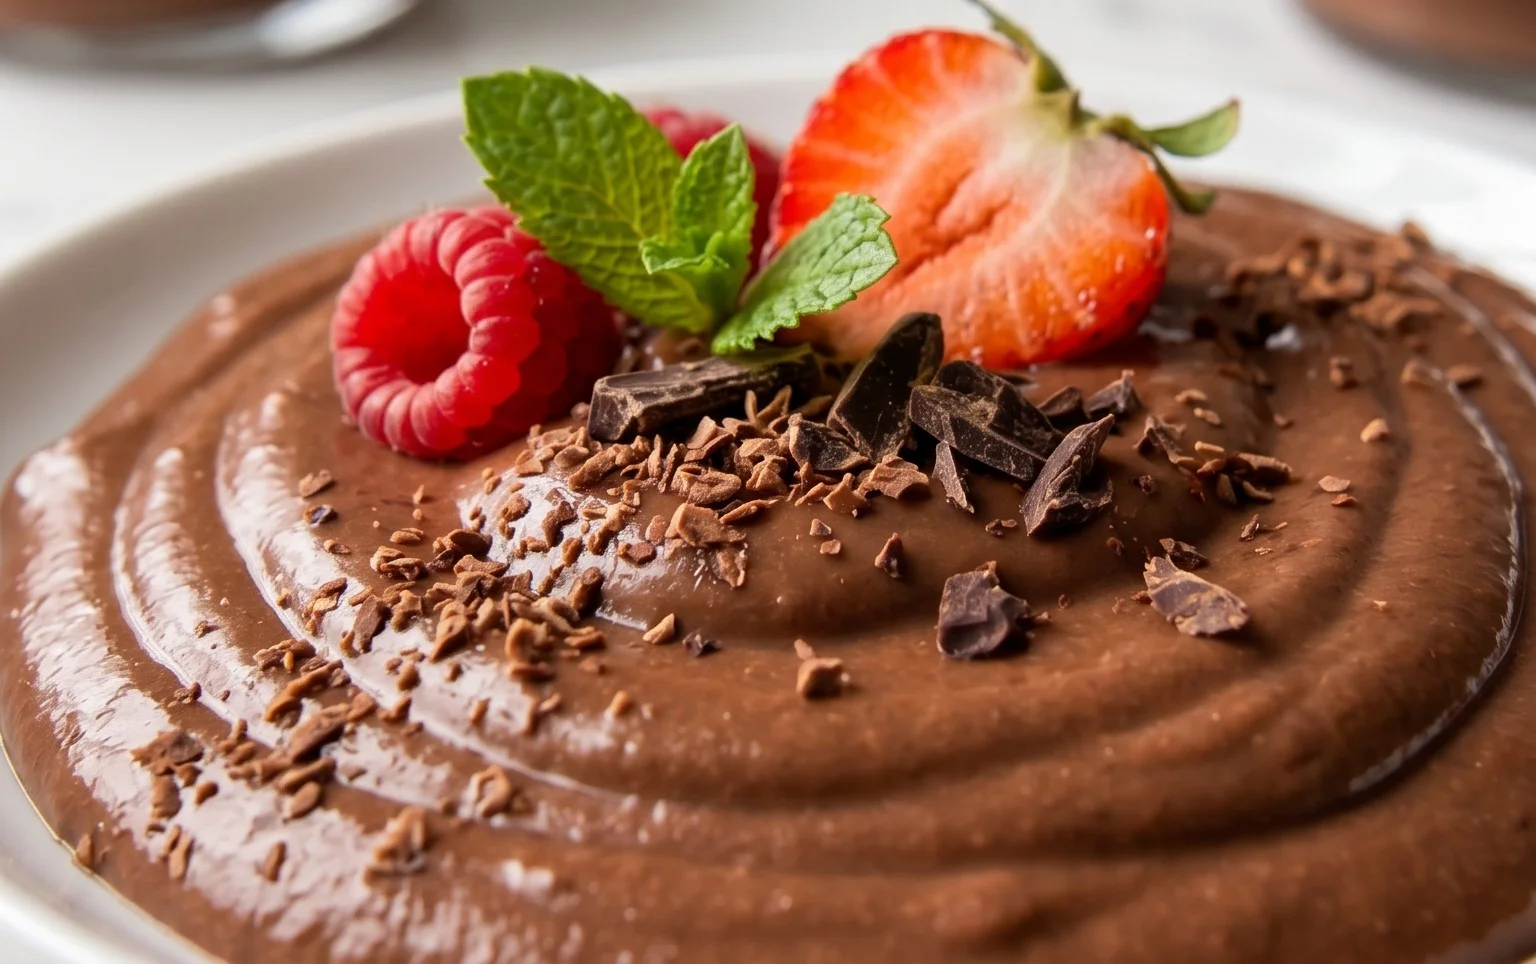
Once chilled, your Chocolate Protein Pudding is ready to be enjoyed! It’s delicious on its own, but feel free to get creative with your toppings. Fresh berries like raspberries or blueberries add a burst of freshness and a lovely contrast to the rich chocolate. A sprinkle of chopped nuts or seeds provides a satisfying crunch. A drizzle of your favorite nut butter (almond butter, peanut butter, or cashew butter) adds another layer of flavor and healthy fats. For an extra decadent touch, add a few dark chocolate chips or a dusting of extra cocoa powder. This pudding is also a fantastic base for smoothies or can be dolloped onto oatmeal or yogurt parfaits. Enjoy this healthy, protein-packed treat!
Conclusion:
And there you have it – your very own decadent and incredibly satisfying Chocolate Protein Pudding! This recipe is a game-changer for anyone looking for a healthy yet indulgent treat. It’s wonderfully simple to prepare, meaning you can whip up a batch whenever that chocolate craving strikes. Its versatility makes it a perfect post-workout refuel, a guilt-free dessert, or even a delightful breakfast option. I’m confident you’ll love how this chocolate protein pudding delivers on both taste and nutrition without any fuss. Don’t be afraid to experiment with the suggested variations to make it uniquely yours! Give it a try, and let me know what you think – I’m excited for you to experience this deliciousness!
Frequently Asked Questions:
Can I make this protein pudding ahead of time?
Absolutely! This chocolate protein pudding is perfect for meal prep. You can make it the night before or a couple of days in advance. Just ensure it’s stored in an airtight container in the refrigerator. The flavors often meld beautifully as it chills, making it even more delicious!
What are some good serving suggestions for this pudding?
The possibilities are endless! I love topping mine with fresh berries like raspberries or strawberries, a sprinkle of chia seeds for extra crunch, or a dollop of Greek yogurt. A few dark chocolate shavings or a tiny drizzle of almond butter also elevate it wonderfully. You can even serve it layered in a parfait glass for a more elegant presentation.
Can I use a different type of protein powder?
Yes, you can! While a chocolate-flavored whey or plant-based protein powder works best for this recipe, feel free to experiment. Keep in mind that different protein powders have varying absorption rates and flavors, so you might need to adjust the liquid consistency slightly. Unflavored protein powder is also an option, but you’ll want to add extra cocoa powder to maintain that rich chocolatey taste.
Chocolate Protein Pudding Recipe
A quick and easy chocolate protein pudding, perfect for a healthy dessert or snack.
Ingredients
-
5 cups Greek yogurt (full-fat, plain or vanilla)
-
4 scoops chocolate protein powder
-
3 to 4 tablespoons unsweetened cocoa powder
-
1 teaspoon vanilla extract
-
2 tablespoons maple syrup
Instructions
-
Step 1
In a large bowl, combine the Greek yogurt and chocolate protein powder. -
Step 2
Add the unsweetened cocoa powder and vanilla extract to the bowl. -
Step 3
Stir in the maple syrup. -
Step 4
Whisk or blend all ingredients until smooth and well combined. Ensure no clumps remain. -
Step 5
Spoon the pudding into individual serving dishes or a larger container. -
Step 6
Chill in the refrigerator for at least 30 minutes before serving for a firmer consistency.
Important Information
Nutrition Facts (Per Serving)
It is important to consider this information as approximate and not to use it as definitive health advice.
Allergy Information
Please check ingredients for potential allergens and consult a health professional if in doubt.