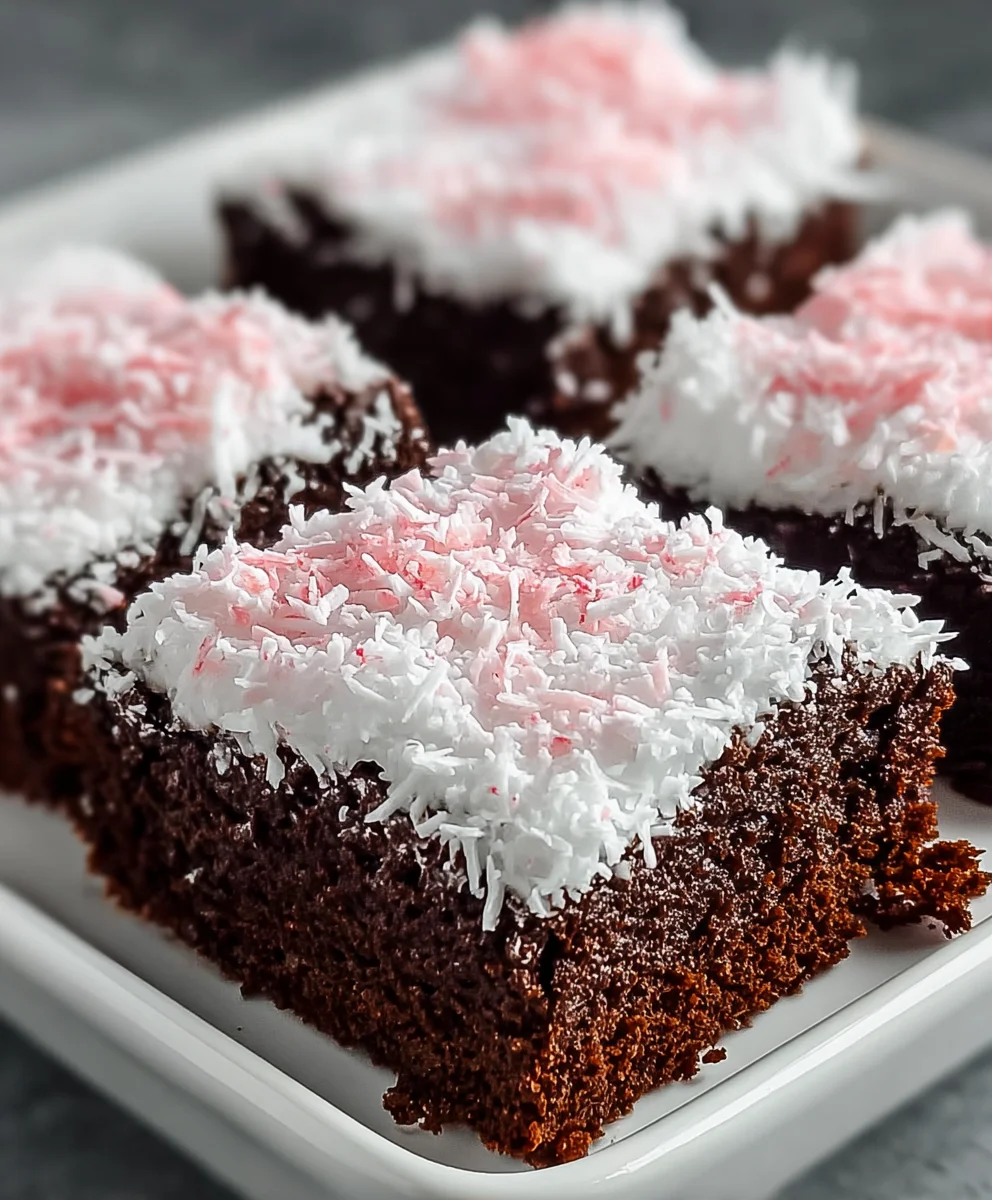
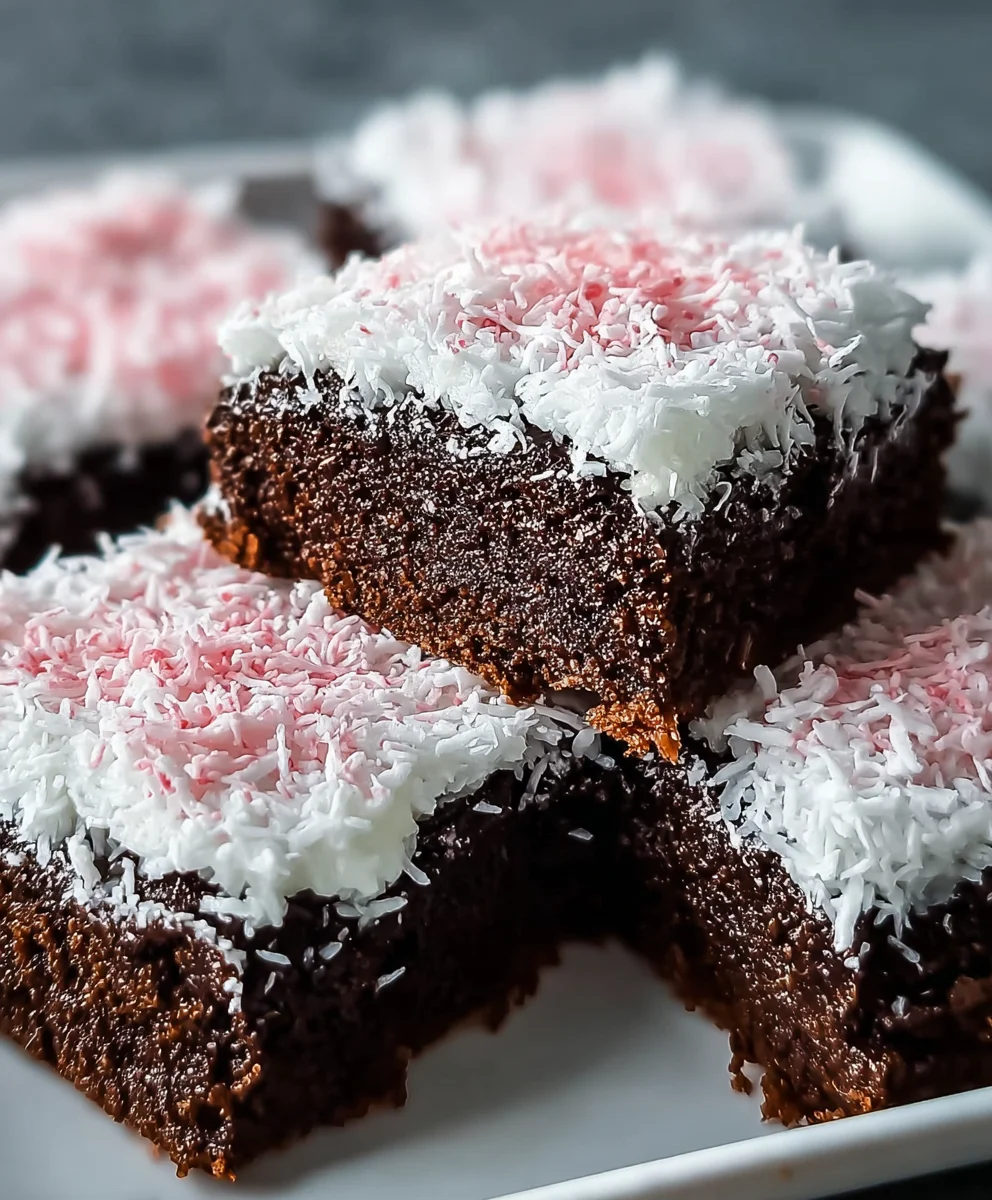
Sno Ball Brownies-Decadent Coconut-Chocolate Bliss
Sno Ball Brownies are more than just a dessert; they’re a delightful trip down memory lane, a fluffy, chocolatey hug in every bite. If you’ve ever craved that perfect balance of rich, fudgy brownie and ethereal coconutty sweetness, then you’re in for a treat. We all have those iconic treats that evoke childhood joy, and for many, the classic Sno Ball cake holds a special place in their hearts. This recipe captures that essence, transforming it into an even more indulgent experience with the decadent foundation of a perfectly baked brownie. What makes these Sno Ball Brownies truly special is the unexpected marriage of textures and flavors: the dense chegrape juicess of the brownie base, the moist, shredded coconut coating, and that signature pink hue that instantly signals pure nostalgic bliss. Get ready to fall in love all over again.
Ingredients:
- 1/2 cup (1 stick) unsalted butter
- 2 ounces unsweetened chocolate, finely chopped
- 1 cup granulated sugar
- 2 large eggs, at room temperature
- 1/2 teaspoon pure vanilla extract
- 1/4 cup all-purpose flour
- 1/4 teaspoon salt
- 1 (7-ounce) jar marshmallow fluff or creme
- 1 cup sweetened shredded coconut
- 1 tablespoon cornstarch
- 3 to 5 drops pink food coloring (gel or liquid)
Baking the Rich Chocolate Base
Step 1: Melt the Chocolate and Butter
Begin extract by preparing your baking pan. I like to use an 8×8 inch square pan, and I line it with parchment paper, leaving an overhang on the sides. This makes lifting the brownies out so much easier later on. In a medium saucepan over low heat, combine the 1/2 cup of butter and the 2 ounces of chopped unsweetened chocolate. Stir frequently, being careful not to scorch the chocolate. You want it to melt gently and become a smooth, glossy mixture. Once fully melted and combined, remove the saucepan from the heat.
Step 2: Incorporate Sugar and Eggs
To the warm chocolate-butter mixture, add the 1 cup of granulated sugar. Whisk it in until everything is well combined and looks glossy. Now, it’s time for the eggs. Add the 2 large eggs, one at a time, whisking thoroughly after each addition. Make sure each egg is fully incorporated before adding the next. This will create a rich, emulsified base for your brownies. Finally, stir in the 1/2 teaspoon of vanilla extract. This adds a wonderful depth of flavor to the chocolate.
Step 3: Add Dry Ingredients and Bake
In a separate small bowl, whisk together the 1/4 cup of all-purpose flour and the 1/4 teaspoon of salt. This ensures the salt is evenly distributed and prevents any pockets of saltiness. Gradually add the dry ingredients to the wet ingredients, folding them in gently with a spatula until just combined. Be careful not to overmix the batter at this stage, as overmixing can lead to tougher brownies. Pour the batter into your prepared baking pan and spread it evenly. Bake in a preheated oven at 350°F (175°C) for 20-25 minutes, or until a toothpick inserted into the center comes out with moist crum extractbs attached. We’re going for fudgy, not cakey, so don’t overbake them. Let the brownies cool completely in the pan on a wire rack. This is crucial for the next step.
Creating the Dreamy Sno Ball Topping
Step 4: Prepare the Marshmallow Fluff and Coconut Mixture
While your brownies are cooling, let’s prepare the signature Sno Ball topping. In a medium bowl, combine the entire 7-ounce jar of marshmallow fluff or creme with the 1 cup of sweetened shredded coconut. Add the 1 tablespoon of cornstarch to this mixture. The cornstarch acts as a stabilizer, helping the fluff hold its shape better and preventing it from becoming too sticky. Stir these ingredients together until they are thoroughly combined and you have a fluffy, marshmallowy coconut mixture.
Step 5: Color and Apply the Topping
Now for the fun part – the color! Add 3 to 5 drops of pink food coloring to the marshmallow fluff and coconut mixture. The amount you use will depend on the intensity of the color you desire and the type of food coloring you have (gel colors are usually more concentrated). Gently fold the food coloring into the mixture until you achieve a uniform, pretty pink hue. Once the brownies have cooled completely, spread this delightful pink marshmallow-coconut topping evenly over the cooled brownie base. Use an offset spatula or the back of a spoon to create a smooth or slightly swirled surface. Allow the topping to set slightly at room temperature for about 30 minutes before slicing. For cleaner cuts, you can even chill the brownies for a bit before slicing. Slice into squares and enjoy your irresistible Sno Ball Brownies!
Conclusion:
There you have it! Your guide to creating the most delightful Sno Ball Brownies. We’ve walked through each step, ensuring you can achieve that perfect chewy brownie base topped with the light, fluffy coconut frosting that makes these treats so special. These Sno Ball Brownies are more than just a dessert; they’re a little bite of happiness, perfect for sharing (or keeping all to yourself!).
To elevate your experience, consider serving these Sno Ball Brownies chilled for an extra refreshing bite, or at room temperature for maximum fudgy goodness. They pair wonderfully with a glass of cold milk, a cup of coffee, or even a dollop of whipped cream if you’re feeling extra indulgent. For variations, don’t hesitate to experiment! Adding a sprinkle of toasted shredded coconut on top of the frosting before it sets can add another layer of flavor and texture. You could also drizzle them with a little melted chocolate for an extra decadent touch. Now go forth and bake these incredible Sno Ball Brownies – I’m confident you’ll be thrilled with the results!
Frequently Asked Questions:
Q1: Can I make Sno Ball Brownies ahead of time?
Absolutely! Sno Ball Brownies can be made a day or two in advance and stored in an airtight container at room temperature. The flavors tend to meld beautifully overnight, making them even more delicious.
Q2: How do I store leftover Sno Ball Brownies?
For best results, store any leftover Sno Ball Brownies in an airtight container at room temperature for up to 3 days. If you live in a very warm climate, you might consider refrigerating them to prevent the frosting from becoming too soft.
Sno Ball Brownies – Decadent Coconut-Chocolate Bliss
Indulge in these decadent Sno Ball Brownies, a delightful combination of rich chocolate, creamy marshmallow, and sweet coconut, all crowned with a vibrant pink frosting.
Ingredients
-
1/2 cup (1 stick) unsalted butter
-
2 ounces unsweetened chocolate, finely chopped
-
1 cup granulated sugar
-
2 large eggs, at room temperature
-
1/2 teaspoon pure vanilla extract
-
1/4 cup all-purpose flour
-
1/4 teaspoon salt
-
1 (7-ounce) jar marshmallow fluff or creme
-
1 cup sweetened shredded coconut
-
1 tablespoon cornstarch
-
3 to 5 drops pink food coloring (gel or liquid)
Instructions
-
Step 1
Prepare an 8×8 inch baking pan by lining it with parchment paper, leaving an overhang. Melt the butter and unsweetened chocolate in a saucepan over low heat until smooth. Remove from heat. -
Step 2
Whisk the granulated sugar into the warm chocolate-butter mixture until glossy. Add the eggs one at a time, whisking well after each addition. Stir in the vanilla extract. -
Step 3
In a separate bowl, whisk together the all-purpose flour and salt. Gradually fold the dry ingredients into the wet ingredients until just combined, being careful not to overmix. Pour batter into the prepared pan and spread evenly. Bake at 350°F (175°C) for 20-25 minutes, or until a toothpick comes out with moist crumbs. Let cool completely. -
Step 4
In a medium bowl, combine the marshmallow fluff, sweetened shredded coconut, and cornstarch. Stir until thoroughly combined into a fluffy mixture. -
Step 5
Add the pink food coloring to the marshmallow-coconut mixture and gently fold until a uniform pink hue is achieved. Spread the topping evenly over the cooled brownie base. Let the topping set at room temperature for about 30 minutes before slicing. Chill for cleaner cuts if desired. Slice and serve.
Important Information
Nutrition Facts (Per Serving)
It is important to consider this information as approximate and not to use it as definitive health advice.
Allergy Information
Please check ingredients for potential allergens and consult a health professional if in doubt.