Easy Homemade Strawberry Ice Cream Recipe – Delicious!
Homemade Strawberry Ice Cream is a summer classic for a reason, and I’m about to share my absolute favorite way to capture that pure, unadulterated strawberry bliss right in your own kitchen. Forget the tubs from the grocery store, because nothing, and I mean NOTHING, compares to the vibrant flavor and luscious texture of ice cream made with fresh, ripe strawberries. It’s the taste of sunshine, of lazy afternoons, and of pure, unadulterated joy. There’s something incredibly satisfying about transforming simple ingredients – sweet berries, rich cream, and a touch of sugar – into a frozen masterpiece that will have everyone beggin extractg for seconds. What makes this homemade strawberry ice cream truly special is the ability to control the quality and intensity of the strawberry flavor, ensuring every spoonful is a burst of authentic fruitiness. Get ready to impress yourself and everyone you know with this delightfully easy recipe!

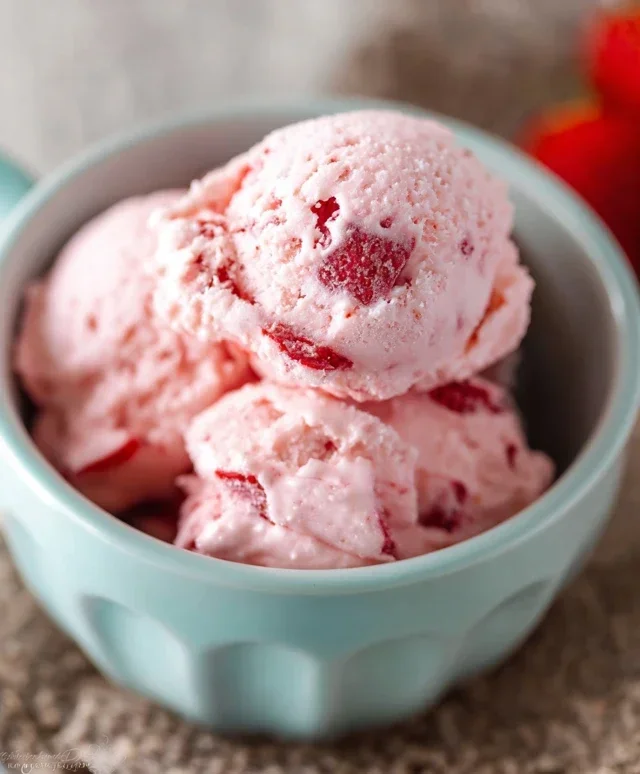
Homemade Strawberry Ice Cream
There’s something truly magical about homemade ice cream, and when it comes to summer flavors, nothing beats the bright, sweet, and slightly tart taste of fresh strawberries. Forget those overly processed, artificially flavored options; this recipe celebrates the pure essence of ripe strawberries, transforming them into a creamy, dreamy dessert that will have everyone asking for seconds. This recipe is surprisingly simple, requiring no special ice cream maker (though one can be used for an even smoother texture if you have it!). We’ll be relying on a bit of clever chilling and some good old-fashioned stirring to achieve a delightful, scoopable treat. So, gather your ingredients, put on some cheerful music, and let’s make some strawberry ice cream!
Ingredients:
Preparing the Strawberry Base
This is where the magic of fresh strawberries truly shines. We’ll be creating a concentrated strawberry mixture that will infuse our ice cream with that incredible flavor.
1. First, we begin extract by preparing our beautiful strawberries. Make sure they are hulled – that’s the little green leafy part removed from the top. Then, dice them into relatively small pieces. The smaller they are, the easier they will break down and release their juices. Place these diced strawberries into a medium-sized bowl. To this, we add our sweeteners and a touch of acidity to brighten the flavor. Sprinkle the 1/2 cup of granulated sugar and the 2 tablespoons of honey over the strawberries. The honey adds a lovely depth and a slightly different sweetness profile that complements the berries beautifully. Finally, add the 1 teaspoon of lemon juice. Don’t worry about the lemon juice making the ice cream sour; it actually acts as a flavor enhancer, bringin extractg out the natural sweetness of the strawberries and preventing them from tasting flat.
2. Now, we gently macerate our strawberries. This means letting them sit with the sugar, honey, and lemon juice for a little while. This process draws out the natural juices from the strawberries, creating a syrupy, intensely flavored base. Stir everything together gently. Cover the bowl with plastic wrap and let it sit at room temperature for at least 30 minutes, or even up to an hour. During this time, you’ll notice that the strawberries begin extract to soften and release a vibrant red juice, forming a delicious syrup at the bottom of the bowl. This is exactly what we want!
Creating the Creamy Ice Cream Mixture
Once our strawberry base is ready, it’s time to bring in the dairy to create that luscious, creamy texture we all love in ice cream.
3. While the strawberries are macerating, let’s get our dairy base ready. In a separate, clean bowl, pour in your 1 cup of heavy whipping cream and the 1/2 cup of half and half. These two together provide the perfect balance of richness and creaminess for our ice cream. Add the 1 teaspoon of vanilla extract. Vanilla is a classic flavor enhancer that pairs wonderfully with strawberries, adding a warm, aromatic note without overpowering the fruit.
4. Now, we need to combine our strawberry mixture with our cream mixture. After the strawberries have macerated and you have a good amount of syrupy juice, you have a couple of options for how to incorporate them. For a smoother ice cream with little to no strawberry chunks, you can carefully pour the entire contents of the strawberry bowl (berries and juice) into a blender or food processor and blend until smooth. If you prefer a bit of texture and visible pieces of strawberry in your ice cream, you can simply stir the macerated strawberries and their syrup directly into the cream mixture. For this recipe, I prefer a slightly chunky texture, so I’ll be stirring them in directly after a gentle mash with a fork to break down any larger pieces. Stir everything together thoroughly until well combined. The mixture should now be a beautiful pnon-alcoholic ale pink color, with flecks of red from the strawberries.
Chilling and Freezing the Ice Cream
This is the crucial stage where our liquid mixture transforms into frozen delight. Patience is key here!
5. This is perhaps the most critical step in achieving creamy, scoopable ice cream without an ice cream maker. We need to freeze our mixture in stages, stirring frequently to break up ice crystals. Pour your strawberry and cream mixture into a shallow, freezer-safe container. A metal baking pan or a glass dish works well. Cover it tightly with plastic wrap or a lid. Place the container in the freezer. After about 45 minutes to an hour, take it out and stir vigorously with a fork or whisk. You’ll notice that the edges are starting to freeze. Break up any frozen parts and mix them back into the still-liquid center. Repeat this process every 30-45 minutes for at least 3 to 4 hours, or until the ice cream has reached a firm but scoopable consistency. The more you stir, the smoother your ice cream will be, as it prevents large ice crystals from forming. You’re essentially mimicking the churning action of an ice cream maker by manually breaking up the ice as it forms.
6. Once your ice cream has reached your desired firmness, give it one final good stir. You can enjoy it immediately at this point for a softer, “soft-serve” style ice cream. However, for a firmer, more traditional scoop, cover the container tightly and let it freeze for at least another 2 to 4 hours. This allows the ice cream to fully harden. If it becomes too hard to scoop after extended freezing, simply let it sit at room temperature for 10-15 minutes to soften slightly before serving. Enjoy your incredibly fresh and delicious homemade strawberry ice cream!
Conclusion:
There you have it – a simple yet incredibly rewarding recipe for homemade strawberry ice cream! I hope you’re as excited as I am to dive into this creamy, dreamy, and bursting-with-fresh-flavor treat. This recipe is fantastic because it allows you to control the sweetness and quality of your ingredients, resulting in a far superior flavor to anything store-bought. The natural sweetness and vibrant color of fresh strawberries shine through, creating a truly delightful experience with every scoop. It’s the perfect way to capture the essence of summer in a bowl, and honestly, the satisfaction of making your own perfect strawberry ice cream is unparalleled.
Serving this delightful creation is a joy. It’s perfect on its own, of course, but consider topping it with a fresh sprig of mint, a drizzle of chocolate sauce, some toasted slivered almonds, or even a dollop of whipped cream for an extra touch of indulgence. If you’re feeling adventurous with variations, try adding a swirl of balsamic glaze for a sophisticated sweet-and-tangy contrast, or fold in some chopped fresh basil for an unexpected herby note. Don’t be afraid to experiment! I truly encourage you to give this homemade strawberry ice cream recipe a try. You’ll be amazed at how easy it is to create such a delicious dessert right in your own kitchen. So, grab your strawberries and let’s get churning!
Frequently Asked Questions:
Can I use frozen strawberries instead of fresh?
Absolutely! If you don’t have fresh strawberries on hand, frozen ones work wonderfully. Thaw them completely and drain off any excess liquid before pureeing them for the recipe. You might find the color slightly less vibrant, but the flavor will still be delicious.
What if I don’t have an ice cream maker?
No worries! You can still make fantastic no-churn strawberry ice cream. Simply freeze your strawberry mixture in a shallow pan. Once it’s partially frozen, break it up with a fork and whisk vigorously. Repeat this process every 30-45 minutes for about 3-4 hours until it reaches a scoopable consistency. It requires a bit more effort, but the result is still incredibly rewarding.
How long will my homemade strawberry ice cream last?
Properly stored in an airtight container in your freezer, this homemade strawberry ice cream should last for about 1-2 weeks. For the best texture and flavor, try to consume it within the first week. As with all homemade ice creams, the texture might change slightly over longer storage periods due to ice crystal formation.
Homemade Strawberry Ice Cream
A simple and delicious homemade strawberry ice cream recipe with fresh fruit and classic ingredients.
Ingredients
-
1 1/2 cups strawberries, hulled and diced
-
2 Tbsp honey
-
1/2 cup granulated sugar
-
1 tsp lemon juice
-
1 cup heavy whipping cream
-
1/2 cup half and half
-
1 tsp vanilla extract
Instructions
-
Step 1
In a bowl, mash the diced strawberries with the honey, granulated sugar, and lemon juice. Let sit for 15-20 minutes to allow the flavors to meld. -
Step 2
In a separate bowl, whisk together the heavy whipping cream and half and half until well combined. -
Step 3
Stir the vanilla extract into the cream mixture. -
Step 4
Gently fold the strawberry mixture into the cream mixture. -
Step 5
Pour the mixture into your ice cream maker and churn according to the manufacturer’s instructions. -
Step 6
Transfer the ice cream to an airtight container and freeze for at least 2-3 hours, or until firm.
Important Information
Nutrition Facts (Per Serving)
It is important to consider this information as approximate and not to use it as definitive health advice.
Allergy Information
Please check ingredients for potential allergens and consult a health professional if in doubt.