Restaurant Style Blender Salsa-Quick & Easy Recipe
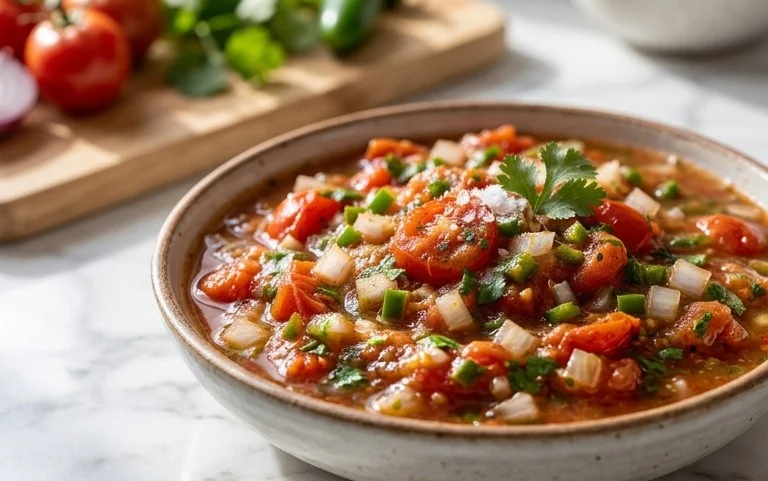
Blender salsa (restaurant style salsa) is that vibrant, zesty dip that transports you straight to your favorite Mexican eatery with just one scoop. We all know the feeling – you’re out with friends, chips are arriving, and then comes that perfect bowl of salsa. It’s not just a condiment; it’s a flavor explosion, a refreshing counterpoint to rich nachos and savory tacos, and the reason we always end up ordering an extra basket of chips. What makes restaurant-style blender salsa so utterly addictive? It’s the beautiful balance of fresh, bright ingredients, the subtle heat that builds without overwhelming, and that incredibly smooth, yet perfectly textured consistency that’s surprisingly hard to replicate at home. But guess what? Today, you’re about to unlock that secret. Get ready to impress yourself and everyone you know with this incredibly easy and undeniably delicious blender salsa that tastes just like the real deal.
Blender Salsa (Restaurant Style Salsa)
There’s nothing quite like a fresh, vibrant salsa to elevate any meal, from tacos and enchiladas to grilled chicken and even just a bowl of tortilla chips. While store-bought options are convenient, they often lack the bright, fresh flavor we crave. This blender salsa recipe is a game-changer. It’s incredibly easy to make, and the results are astonishingly close to the amazing salsa you get at your favorite Mexican restaurants. The secret is in the simplicity and the power of your blender to emulsify all those wonderful flavors into a perfectly smooth, yet slightly textured, dip. Forget chopping for ages; this recipe does all the heavy lifting for you in just a few pulses. Get ready to impress yourself and your guests with this incredibly delicious and authentic-tasting salsa!
Ingredients:
Making Your Restaurant-Style Salsa
The beauty of this recipe lies in its straightforward approach, powered by your trusty blender. No fancy equipment or techniques are needed, just a willingness to embrace fresh flavors. We’ll walk through each step to ensure you get that perfect restaurant-quality salsa every time.
Step 1: Gathering and Preparing Your Aromatics
Before we start blending, it’s important to get all your ingredients prepped and ready. This makes the blending process smooth and efficient. Take your 1/4 small red onion and give it a rough chop. You don’t need to be precise here, as the blender will do the hard work. Aim for pieces that are about the size of a quarter or a bit smaller. Next, wash your cilantro thoroughly and give it a rough chop as well. Again, precision isn’t key. The goal is to break it down into manageable pieces for the blender. Zest your lime first, ensuring you capture all those fragrant oils, then cut it in half to juice later. For the heat, we’ll be using a jalapeño or a serrano pepper. If you prefer milder salsa, remove all the seeds and membranes. For more heat, leave some seeds in. Seed it and give it a coarse chop. Finally, peel and coarsely chop your garlic cloves. These strong aromatics are crucial for that authentic flavor profile.
Step 2: Building the Flavor Base in the Blender
Now comes the fun part! We’re going to add most of our prepared ingredients directly into your blender. Start by carefully pouring the entire can of undrained diced tomatoes into the blender jar. Don’t drain the liquid; it’s essential for achieving the right consistency and incorporating all those tomatoey flavors. Add the coarsely chopped red onion, cilantro, seeded and chopped jalapeño (or serrano), and the coarsely chopped garlic cloves. Sprinkle in the 1/4 teaspoon of ground cumin. Cumin adds a warm, earthy note that is characteristic of many restaurant salsas and helps to deepen the overall flavor profile.
Step 3: The Magic of the Blend
This is where your blender truly shines. Place the lid securely on your blender. Begin extract by pulsing the ingredients a few times. This initial pulsing will start to break down the larger chunks and begin extract to incorporate everything. After a few pulses, start blending on a lower speed, gradually increasing it if needed. You want to achieve a texture that is mostly smooth but still has a slight bit of texture, mimicking that perfect restaurant salsa. Avoid over-blending, which can result in a watery or pasty consistency. Aim for about 30-60 seconds of blending time, depending on the power of your blender. Stop and scrape down the sides of the blender jar with a spatula if any ingredients are sticking, then continue blending until you reach your desired consistency.
Step 4: Finishing Touches and Seasoning
Once you’ve achieved the desired texture, it’s time to add the finishing touches that will elevate your salsa from good to fantastic. Add the freshly squeezed lime juice to the blender. The acidity from the lime juice is crucial for brightening all the flavors and adding that signature tang. Now, it’s time to season. Start with a generous pinch of salt, but remember that you can always add more. Add a little bit of black pepper as well. Place the lid back on the blender and give it a few final, quick pulses just to incorporate the lime juice and seasonings. Taste the salsa at this point and adjust the salt and pepper as needed. If you want it spicier, you can add a little more of your chopped pepper. If it’s too thick, you can add a tablespoon or two of water.
Step 5: Resting and Serving Your Delicious Creation
This is a crucial, yet often overlooked, step for truly exceptional salsa. Once you’ve blended and seasoned your salsa to perfection, transfer it to a serving bowl or an airtight container. For the best flavor, cover the salsa and refrigerate it for at least 30 minutes, and ideally for a couple of hours. This resting period allows all the flavors to meld together and develop. The spices will bloom, the heat will integrate, and the acidity will round out the taste, creating a much more complex and satisfying flavor profile. You’ll be amazed at how much the flavor deepens and improves during this time. Serve your homemade restaurant-style salsa with warm tortilla chips, or use it as a topping for tacos, burritos, quesadillas, grilled meats, or even scrambled eggs. Enjoy the incredible taste of homemade goodness!
Conclusion:
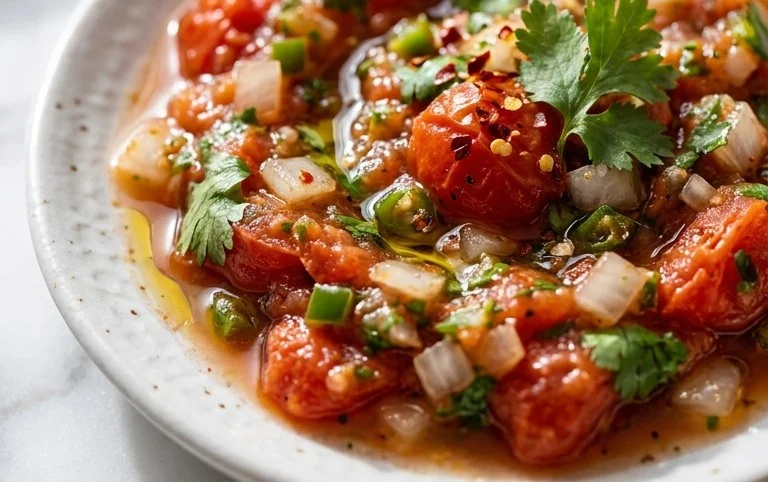
And there you have it! This Blender Salsa (Restaurant Style Salsa) recipe is a game-changer for any home cook looking to elevate their appetizer game. Its beauty lies in its simplicity and speed, allowing you to whip up a fresh, flavorful salsa in minutes that rivals anything you’d get at your favorite Mexican restaurant. The vibrant, fresh ingredients blended together create that perfect chunky yet smooth texture and authentic taste we all love. It’s incredibly versatile, perfect as a dip for tortilla chips, a topping for tacos, burritos, quesadillas, or even as a zesty addition to scrambled eggs. Don’t be afraid to experiment with the heat level by adjusting the jalapeño seeds or adding a pinch of cayenne pepper. Give this blender salsa a try – I promise you won’t be disappointed, and you’ll likely find yourself making it again and again!
Frequently Asked Questions:
Why is this blender salsa considered “restaurant style”?
This blender salsa is often called “restaurant style” because it mimics the consistency and flavor profile of the fresh, blended salsas typically served in Mexican restaurants. The quick blending process creates a texture that is neither fully pureed nor entirely chunky, hitting that perfect middle ground, and the balance of fresh tomatoes, onions, cilantro, and a touch of lime juice captures those classic, vibrant flavors.
Can I make this blender salsa ahead of time?
Absolutely! In fact, this blender salsa often tastes even better after it has had a chance to sit for at least 30 minutes to an hour in the refrigerator. This allows the flavors to meld and deepen. It will keep well in an airtight container in the fridge for up to 3-4 days.
What are some other ways to customize this salsa?
The possibilities are endless! For a smoky flavor, add a roasted poblano pepper or a chipotle pepper in adobo sauce. For a touch of sweetness, incorporate a small piece of mango or pineapple. You can also add a pinch of cumin for earthiness or a dash of smoked paprika for an extra layer of flavor. Don’t hesitate to adjust the acidity with more or less lime juice, or the salt to your preference.
Blender Salsa (Restaurant Style Salsa)
Quick and easy restaurant-style salsa made in a blender with fresh ingredients.
Ingredients
-
1 (14.5-ounce can) Diced Tomatoes (don’t drain)
-
1/4 small Red Onion (about 1/3 cup coarsely chopped)
-
1/4 cup Cilantro
-
1 Lime (zested and juiced)
-
1 Jalapeno Pepper (or Serrano Pepper) (seeded and coarsely chopped)
-
2 cloves Garlic (coarsely chopped)
-
1/4 teaspoon Ground Cumin
-
Salt (to taste)
-
Black Pepper (to taste)
Instructions
-
Step 1
Add diced tomatoes (undrained), red onion, cilantro, lime zest, lime juice, jalapeno pepper, and garlic to a blender. -
Step 2
Add ground cumin. -
Step 3
Secure the lid and pulse until the salsa reaches your desired consistency. For chunkier salsa, pulse fewer times. For smoother salsa, blend longer. -
Step 4
Season with salt and black pepper to taste. Pulse again briefly to combine. -
Step 5
Transfer the salsa to a bowl. For best flavor, let it sit for at least 10-15 minutes before serving to allow the flavors to meld.
Important Information
Nutrition Facts (Per Serving)
It is important to consider this information as approximate and not to use it as definitive health advice.
Allergy Information
Please check ingredients for potential allergens and consult a health professional if in doubt.