Easy Mini Apple Pies – Delicious Homemade Treat
Mini Apple Pies: Those delightful little parcels of autumn joy are an absolute winner in my book, and I bet they are in yours too! There’s something inherently comforting about the sweet, spiced apple filling embraced by a perfectly flaky crust. Why do we love them so much? Perhaps it’s the nostalgic echo of grandma’s kitchen, or maybe it’s just the sheer perfection of a single-serving dessert that requires no slicing and is delightfully portable. What truly sets these mini apple pies apart is their irresistible charm. They’re not just pies; they’re edible works of art, ideal for parties, picnics, or simply as a sweet treat to brighten any ordinary day. Get ready to fall in love all over again with these adorable mini apple pies!

Delightful Mini Apple Pies: A Perfect Bite-Sized Treat
There’s something undeniably charming about mini desserts. They offer all the flavor and satisfaction of their full-sized counterparts, but in a perfectly portioned, utterly adorable package. And when it comes to comforting, classic flavors, nothing beats apple pie. These mini apple pies are no exception. They’re bursting with warm cinnamon and apple goodness, all nestled within flaky, buttery crust. They’re ideal for parties, potlucks, or simply when you crave a sweet treat without committing to an entire pie. Plus, they’re incredibly fun to make, especially with the help of little hands!
Ingredients:
Preparing the Apple Filling
The heart of any apple pie is, of course, the apples. For these mini pies, I love using Granny Smith apples. Their tartness provides a wonderful counterpoint to the sweetness of the sugars, creating a beautifully balanced flavor. When chopping the apples, aim for pieces that are roughly 1/2-inch in size. This ensures they’ll cook down nicely without becoming mushy. If your apples are particularly large, you might need to use more than four to reach the 3-cup mark. In a large bowl, combine the chopped apples with the granulated sugar and light brown sugar. The combination of sugars adds depth of flavor – the granulated sugar provides sweetness, while the brown sugar contributes a hint of caramel notes and a lovely moisture. Next, sprinkle in the ground cinnamon and ground nutmeg. These classic fall spices are essential for that comforting apple pie aroma and taste. Don’t be shy with the cinnamon; it’s truly what makes apple pie sing! Finally, add the all-purpose flour. This acts as a thickener, preventing our filling from becoming too watery once the apples release their juices during baking. Stir everything together gently until the apples are evenly coated with the sugar, spice, and flour mixture. Let this mixture sit for about 10-15 minutes. This resting period allows the sugars to start drawing out some of the apple’s moisture, which will help the filling thicken beautifully.
Assembling Your Mini Masterpieces
Now for the fun part: assembling these adorable individual pies! Begin extract by preheating your oven to 375 degrees Fahrenheit (190 degrees Celsius). This ensures a nice, even bake. Unroll your refrigerated pie crusts onto a lightly floured surface. You’ll want to use a round cookie cutter or a small bowl with a diameter of about 4 inches to cut out circles from the pie crust. You should get about 6-8 circles from each crust, so you’ll have plenty for your mini pies. Gently press these circles into the wells of a standard muffin tin. If you don’t have a muffin tin, a mini muffin tin can also work, but you’ll need to adjust baking times accordingly and potentially use smaller cutters. In a small bowl, whisk together the egg and water. This is your egg wash, which will give the tops of your mini pies a beautiful golden-brown sheen and help them crisp up. Now, it’s time to fill those crusts! Spoon the prepared apple filling evenly into each of the crust-lined muffin cups. Don’t overfill them, as the apples will expand slightly as they bake. You want the filling to come just up to the edge of the crust or slightly below.
Creating the Perfect Crust and Baking
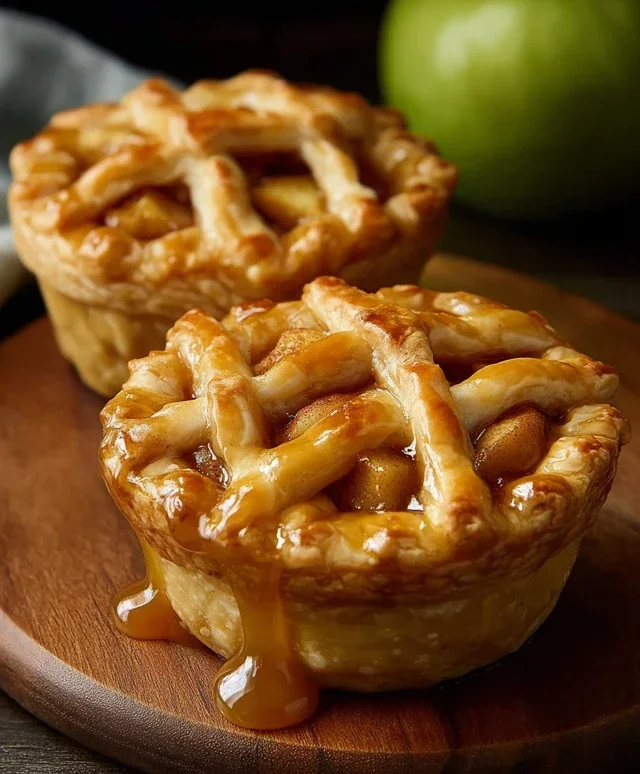
To add that signature pie crust look and extra flakiness, we’ll create a simple top crust for our mini pies. You can do this in a few ways. The easiest is to use the scraps from your cut-out circles. You can either cut small vents in these scraps or use a small cookie cutter to create decorative shapes like little apples or leaves. Alternatively, you can cut out new circles of pie crust, slightly smaller than the bottom crusts, and place them on top, crimping the edges to seal. If you’re feeling ambitious, you can even cut thin strips of dough and weave a lattice top over each mini pie. Once your tops are in place, gently brush the entire surface of each pie with the prepared egg wash. This is where the optional sanding sugar comes in. If you like a bit of sparkle and crunch, sprinkle a little sanding sugar over the egg wash. It really makes these mini pies extra special and festive. Carefully place the muffin tin into the preheated oven. We’ll bake these mini wonders for about 20-25 minutes, or until the crust is golden brown and the apple filling is bubbling. Keep an eye on them, as oven temperatures can vary. If the crust starts to brown too quickly, you can loosely tent the muffin tin with aluminum foil.
Cooling and Enjoying Your Delicious Creation
Once baked to perfection, carefully remove the muffin tin from the oven. Allow the mini apple pies to cool in the muffin tin for at least 10-15 minutes. This is a crucial step! If you try to remove them too soon, they might fall apart. The filling needs a little time to set. After the initial cooling period, use a small offset spatula or a butter knife to gently loosen the edges of each mini pie and carefully lift them out of the muffin tin. Transfer them to a wire rack to cool completely. While they are absolutely delicious served warm, they are also wonderful at room temperature. These mini apple pies are fantastic on their own, but if you’re looking to elevate the experience, consider serving them with a dollop of whipped cream or a small scoop of vanilla ice cream. The contrast of the warm, spiced apple filling with the cool, creamy topping is simply divine. They are perfect for a dessert buffet, a holiday gathering, or just a delightful treat to brighten your day. Enjoy the satisfaction of creating these charming, individual portions of pure apple pie joy!
Conclusion:
So there you have it, your foolproof guide to creating delightful Mini Apple Pies! These charming little desserts are an absolute winner for so many reasons. They’re perfectly portioned, making them ideal for parties, potlucks, or simply a sweet treat for yourself. The comforting blend of tender, spiced apples encased in a flaky, golden crust is simply irresistible. I find them to be the perfect balance of sweet and tart, and the aroma that fills your kitchen as they bake is pure bliss.
Serving these mini apple pies is a breeze! They are fantastic served warm, perhaps with a dollop of vanilla ice cream or a swirl of whipped cream. For an extra touch of indulgence, a drizzle of caramel sauce is also divine. Don’t be afraid to get creative with your variations! You can add a pinch of cinnamon or nutmeg to the crust for extra flavor, toss in some chopped walnuts or pecans for added crunch, or even use a different type of apple for a unique taste profile. I encourage you to give these mini apple pies a try; I’m confident you’ll love them as much as I do!
Frequently Asked Questions:
Can I make the pie crust ahead of time?
Absolutely! You can prepare the pie crust dough up to 2 days in advance and store it tightly wrapped in the refrigerator. You can also freeze the dough for up to 3 months. Just be sure to let it thaw in the refrigerator before rolling it out.
What’s the best type of apple to use for these mini apple pies?
A mix of apples works best for a good balance of flavor and texture. I love using a combination of tart apples like Granny Smith with sweeter varieties such as Honeycrisp or Fuji. This creates a more complex and interesting filling.
How long do these mini apple pies keep?
Once cooled, these mini apple pies can be stored in an airtight container at room temperature for up to 2 days, or in the refrigerator for up to 4 days. They are delicious reheated gently.
Mini Apple Pies
Delightful individual apple pies with a flaky crust and perfectly spiced apple filling. A classic treat made easy.
Ingredients
-
2 refrigerated pie crusts
-
3 cups chopped Granny Smith apples (approximately 4 medium-small apples)
-
1/4 cup granulated sugar
-
1/4 cup light brown sugar
-
1 teaspoon ground cinnamon
-
1/4 teaspoon ground nutmeg
-
2 tablespoons all-purpose flour
-
1 teaspoon vanilla extract
-
1 egg
-
1 tablespoon water
-
Sanding sugar (optional)
Instructions
-
Step 1
Preheat oven to 375°F (190°C). Lightly grease a 12-cup muffin tin. -
Step 2
In a large bowl, combine the chopped apples, granulated sugar, light brown sugar, cinnamon, nutmeg, and flour. Stir until evenly coated. -
Step 3
Unroll the refrigerated pie crusts. Use a round cutter (about 3.5-4 inches) to cut out 12 circles. Gently press each circle into the cups of the prepared muffin tin, creating a pie shell. -
Step 4
Divide the apple mixture evenly among the pie shells in the muffin tin. -
Step 5
In a small bowl, whisk together the egg and water to create an egg wash. Brush the edges of the pie crusts with the egg wash. -
Step 6
Sprinkle sanding sugar over the apple filling, if desired. -
Step 7
Bake for 20-25 minutes, or until the crust is golden brown and the filling is bubbly. -
Step 8
Let the mini pies cool in the muffin tin for 10 minutes before carefully removing them to a wire rack to cool completely.
Important Information
Nutrition Facts (Per Serving)
It is important to consider this information as approximate and not to use it as definitive health advice.
Allergy Information
Please check ingredients for potential allergens and consult a health professional if in doubt.