Chocolate Peanut Butter Rice Krispie Squares Recipe
Chocolate Peanut Butter Rice Krispie Squares are more than just a nostalgic treat; they’re a symphony of textures and flavors that have captured hearts for generations. There’s something undeniably magical about the perfect balance of sweet, salty, chewy, and crispy. These aren’t your average Rice Krispie treats. We’re elevating them with the decadent richness of chocolate and the irresistible allure of creamy peanut butter. The simple pleasure of biting into a square, feeling that satisfying crunch followed by the gooey, chewy interior, is a comfort food experience unlike any other. What makes these Chocolate Peanut Butter Rice Krispie Squares truly special is their ability to evoke pure joy and bring people together. They’re perfect for potlucks, birthday parties, or simply when you need a little dose of happiness. Get ready to dive into a recipe that’s sure to become a new family favorite.

Ingredients:
Let’s whip up a batch of pure nostalgic joy! These Chocolate Peanut Butter Rice Krispie Squares are an absolute dream, a perfect fusion of classic comfort and decadent flavor. They’re incredibly easy to make, making them a fantastic activity for a lazy afternoon or a quick treat when a craving strikes. Forget those store-bought versions; the homemade taste and texture are simply unparalleled. Get ready to impress yourself and anyone lucky enough to share these delightful squares with you.
Getting Started: The Foundation
Before we dive into the melting and mixing, let’s make sure we have everything ready. This is key to a smooth and successful baking (or rather, no-bake!) experience. First, grab a large bowl. This is where our cereal will live before it gets all sticky and delicious. Next, prepare your pan. You’ll want a 9×13 inch baking pan. Lightly grease it with butter or cooking spray, or line it with parchment paper. Parchment paper is my favorite because it makes lifting the entire slab out so much easier, ensuring no delicious bits get left behind stuck to the pan. If you’re using parchment, leave a little overhang on the sides to act as handles. This step is crucial for easy removal later.
Now, let’s talk about the star ingredients. We’ve got our trusty Rice Krispie cereal, the crispy backbone of our treat. For the peanut butter, feel free to go with your preference – smooth for a seamless blend, or crunchy for an extra textural surprise. The butter is essential for creating that gooey, marshmallowy goodness. And, of course, the marshmallows! Whether you choose regular or mini, they’re going to transform into a sticky, sweet binder. Finally, the milk chocolate chips are what elevate these beyond a simple Rice Krispie treat, adding that irresistible chocolatey richness.
The Gooey Goodness: Melting Magic
This is where the transformation truly begin extracts. In a large saucepan, combine your unsalted butter and marshmallows. Place this over low heat on your stovetop. Now, patience is your best friend here. We want to melt these gently, stirring constantly to prevent scorching. Keep stirring until the marshmallows are completely melted and the mixture is smooth and creamy. This usually takes about 5-7 minutes. If you’re using mini marshmallows, they tend to melt a bit faster, so keep a close eye on them. Resist the urge to crank up the heat; low and slow is the mantra for perfectly melted marshmallows.
Once the marshmallows are fully melted and smooth, remove the saucepan from the heat. Immediately stir in your peanut butter. Keep stirring until the peanut butter is completely incorporated into the marshmallow mixture, creating a rich, nutty, and slightly glossy sauce. This is such a satisfying step to watch! The aroma at this stage is already heavenly, a prelude to the deliciousness to come.
Bringin extractg It All Together: The Grand Mix
Now comes the exciting part where everything comes together. Add the 6 cups of Rice Krispie cereal to the saucepan with the melted marshmallow and peanut butter mixture. Gently fold the cereal into the mixture using a sturdy spatula or wooden spoon. You want to coat every single crispy piece with that luscious peanut butter-marshmallow goodness. Don’t overmix, as this can crush the cereal and result in a denser, less airy treat. Just ensure everything is evenly coated.
Next, it’s time for the chocolate! While the mixture is still warm, stir in the milk chocolate chips. The residual heat from the marshmallow mixture will begin extract to melt the chocolate chips, creating beautiful ribbons of melted chocolate throughout. This step is optional but highly recommended for an extra layer of indulgence. You can also reserve a few chocolate chips to sprinkle on top before it sets, or even melt the entire cup of chocolate chips separately and drizzle it over the top for a more pronounced chocolate finish.
Pressing and Setting: The Final Touch
Carefully spoon the mixture into your prepared 9×13 inch baking pan. This part can be a bit sticky, so I highly recommend greasing your hands with a little butter or using the parchment paper overhang to help guide the mixture into the pan. Using a lightly greased spatula or the back of a spoon, gently press the mixture evenly into the pan. The key here is to press firmly enough to compact the squares so they hold their shape, but not so hard that you crush the cereal and make them dense. You want them to be substantial but still have that signature airy crispness.
If you’re using the optional chopped peanuts for garnish, sprinkle them evenly over the top of the pressed mixture now. Gently press them into the surface so they adhere. This adds a delightful crunch and visual appeal. Let the squares cool and set at room temperature for at least 30 minutes to an hour. Resist the temptation to cut into them too early; they need this time to firm up. Once they’ve cooled and firmed up, you can use the parchment paper overhang to lift the entire slab out of the pan and onto a cutting board. Use a sharp knife to cut them into squares. Enjoy the fruits of your labor!
Conclusion:
There you have it – the ultimate guide to crafting irresistible Chocolate Peanut Butter Rice Krispie Squares! This recipe truly is a winner because it strikes that perfect balance between chewy, crispy, and wonderfully decadent. The classic nostalgia of Rice Krispie treats is elevated with the dreamy combination of rich chocolate and creamy peanut butter, making it a guaranteed crowd-pleaser for all ages. Whether you’re whipping them up for a bake snon-alcoholic ale, a birthday party, or just a spontaneous craving, these squares are surprisingly simple to make and deliver an explosion of flavor with every bite. I encourage you to give this recipe a try; you won’t be disappointed!
For serving suggestions, these Chocolate Peanut Butter Rice Krispie Squares are fantastic on their own as a sweet treat. They also make a wonderful addition to a dessert platter, are delightful with a glass of cold milk, or can even be crum extractbled over ice cream for an extra layer of texture and taste. When it comes to variations, feel free to get creative! You could drizzle them with extra melted chocolate, sprinkle them with sea salt for a sweet and salty kick, or even fold in some mini chocolate chips or chopped peanuts for added texture.
Frequently Asked Questions:
Can I use crunchy peanut butter instead of creamy?
Absolutely! Using crunchy peanut butter will add an extra layer of texture to your Chocolate Peanut Butter Rice Krispie Squares, which can be a delightful variation. Just ensure you measure it the same way as creamy peanut butter.
How should I store these squares?
To keep your Chocolate Peanut Butter Rice Krispie Squares fresh, store them in an airtight container at room temperature for up to 3 days. For longer storage, you can refrigerate them, though they may become a bit firmer. Bring them back to room temperature before serving for the best texture.
Can I make these squares vegan?
Yes, you can adapt this recipe to be vegan! You’ll want to use vegan marshmallows, vegan butter, and dairy-free chocolate chips. Ensure your peanut butter is also free of any animal products.
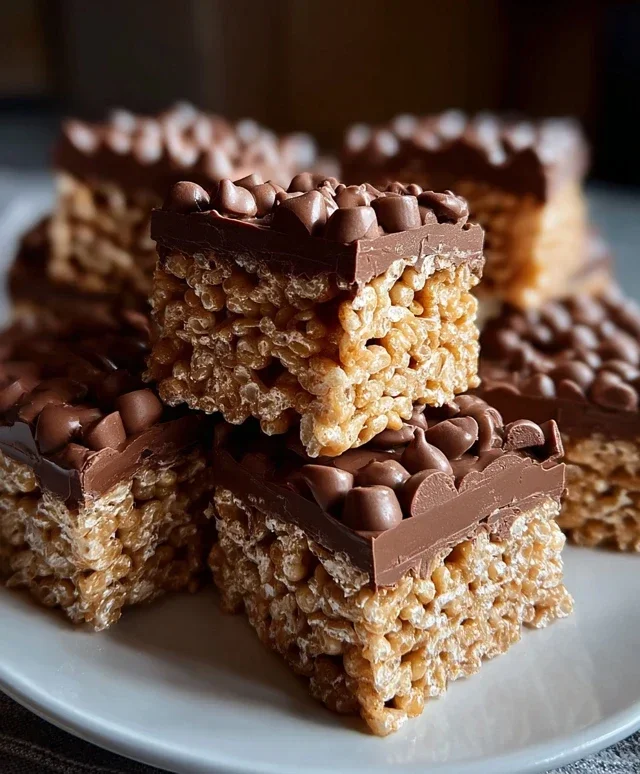
Chocolate Peanut Butter Rice Krispie Squares
A delightful twist on classic Rice Krispie squares, combining the irresistible flavors of chocolate and peanut butter for a chewy, gooey, and satisfying treat. Perfect for parties, snacks, or a sweet indulgence.
Ingredients
-
6 cups Rice Krispie cereal
-
½ cup peanut butter (smooth or crunchy)
-
¼ cup unsalted butter
-
40 regular size marshmallows or 1 ⅓ cups mini marshmallows
-
1 cup milk chocolate chips
-
Optional: chopped peanuts for garnish
Instructions
-
Step 1
Prepare a 9×13 inch baking pan by greasing it lightly with butter or lining it with parchment paper. -
Step 2
In a large saucepan, melt the butter over low heat. Add the marshmallows and stir constantly until they are completely melted and smooth. -
Step 3
Remove the saucepan from the heat. Stir in the peanut butter until well combined with the melted marshmallow mixture. -
Step 4
Add the Rice Krispie cereal to the marshmallow mixture and stir until evenly coated. Quickly fold in the milk chocolate chips until they are just starting to melt and create swirls. -
Step 5
Press the mixture evenly into the prepared baking pan using a buttered spatula or wax paper. If using, sprinkle chopped peanuts over the top and gently press them in. -
Step 6
Let the squares cool completely at room temperature for at least 30 minutes to set before cutting into squares.
Important Information
Nutrition Facts (Per Serving)
It is important to consider this information as approximate and not to use it as definitive health advice.
Allergy Information
Please check ingredients for potential allergens and consult a health professional if in doubt.