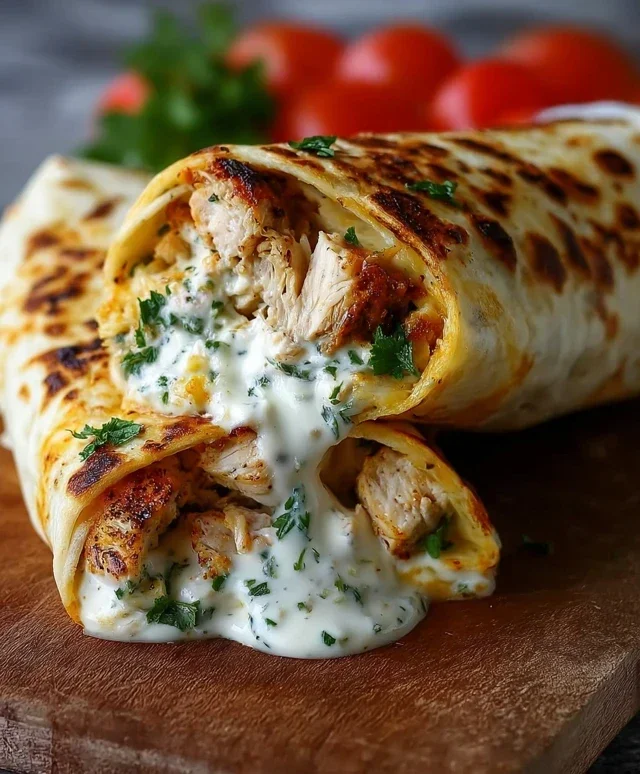
Cheesy Garlic Chicken Wraps- Low Carb Deliciousness
Low Carb Cheesy Garlic Chicken Wraps are about to become your new go-to weeknight meal, and I can totally see why! Imagin extracte tender, juicy chicken, infused with the irresistible aroma of garlic and embraced by a melty blanket of your favorite cheese, all tucked into a low-carb friendly wrap. It’s a flavor explosion that feels incredibly indulgent, yet it won’t derail your healthy eating goals. These Low Carb Cheesy Garlic Chicken Wraps are a symphony of textures and tastes – the savory chicken, the pungent garlic, the creamy cheese, and the satisfying chew of the wrap itself. What truly sets this dish apart is its incredible versatility and simplicity. It’s the perfect solution for those busy evenings when you crave something satisfying and delicious without spending hours in the kitchen.
Get Ready for Flavor Town!
You won’t believe how easy these are to whip up.
Low Carb Cheesy Garlic Chicken Wraps
Welcome to a recipe that’s about to become your new weeknight hero! If you’re looking for a flavorful, satisfying, and seriously low-carb meal that comes together in a flash, you’ve found it. These Low Carb Cheesy Garlic Chicken Wraps are packed with savory chicken, gooey cheese, and a punch of garlic that’s simply irresistible. They’re perfect for a quick lunch, a family dinner, or even meal prep for those busy days ahead. Forget boring salads or bland protein; this recipe delivers on taste and texture without derailing your low-carb lifestyle. The magic happens when we combine simple, wholesome ingredients into something truly special. Let’s get started and transform your kitchen into a hub of deliciousness!
Ingredients:
Cooking Instructions:
Now that you’ve gathered your ingredients, let’s dive into creating these amazing wraps. The process is incredibly straightforward, making it ideal for even begin extractner cooks. We’re going to focus on building layers of flavor and ensuring that creamy, cheesy goodness is distributed perfectly throughout each wrap.
Step 1: Prepare the Flavorful Chicken Filling
Our first step is to create the heart of our wraps: the delicious chicken filling. In a medium-sized bowl, combine your shredded cooked chicken breast. If you’re using a rotisserie chicken, simply shred the meat from the carcass. Next, add the softened cream cheese to the bowl with the chicken. The cream cheese acts as a binder and adds a wonderful creaminess that makes the filling incredibly smooth and decadent. Now, introduce the minced garlic. Don’t be shy with the garlic; it’s a key player in the flavor profile of these wraps. Add half of the shredded mozzarella cheese (1/2 cup) and half of the shredded cheddar cheese (1/4 cup) to the bowl. We’re reserving some cheese for later to ensure maximum meltiness on the outside of our wraps. Season generously with salt and freshly ground black pepper. Remember, you can always add more seasoning later, but you can’t take it away, so start with a good amount that you know will complement the chicken and cheeses.
Step 2: Mix and Combine the Filling
This is where all those wonderful ingredients come together. Using a spoon or a spatula, gently mix the shredded chicken, softened cream cheese, minced garlic, half of the mozzarella, half of the cheddar cheese, salt, and pepper until everything is thoroughly combined. You want to ensure that the cream cheese coats the chicken and the cheeses are evenly distributed. If you’re adding the optional baby spinach, this is also a good time to gently stir it in. The spinach will wilt slightly as it mixes with the other ingredients, adding a subtle fresh element without overpowering the cheesy garlic flavor. Take a moment to taste a small spoonful of the mixture (if you’re comfortable doing so with raw garlic, otherwise, you can wait until after cooking). Adjust the salt and pepper as needed to achieve your perfect flavor balance. This filling is already smelling incredible, isn’t it?
Step 3: Warm and Toast the Tortillas
To make our wraps pliable and to give them a delightful subtle crispness, we need to warm them up. Heat the tablespoon of olive oil in a large skillet or on a griddle over medium heat. Once the oil is shimmering, carefully place one low-carb tortilla into the skillet. Cook for about 30-60 seconds per side, just until it’s warmed through and slightly softened. You’ll notice it becoming more flexible, which is exactly what we want for easy wrapping. Repeat this process with the remaining three tortillas, adding a tiny bit more olive oil to the skillet if it seems dry between wraps. This step is crucial for preventing your tortillas from tearing when you’re trying to fold and wrap them, ensuring a neat and professional-looking final product.
Step 4: Assemble the Wraps
Now for the fun part – assembling our masterpieces! Lay a warmed tortilla flat on a clean surface. Spoon about a quarter of the cheesy chicken mixture onto the center of the tortilla, leaving a border around the edges for easier folding. If you didn’t add spinach to the filling, you can place a small handful of fresh baby spinach leaves on top of the chicken mixture at this stage for a burst of freshness. Now, it’s time to add the remaining shredded cheeses. Sprinkle the reserved 1/2 cup of mozzarella cheese and 1/4 cup of cheddar cheese over the chicken filling. This extra layer of cheese will melt beautifully, creating that irresistible gooey texture we all love.
Step 5: Fold and Grill for Golden Perfection
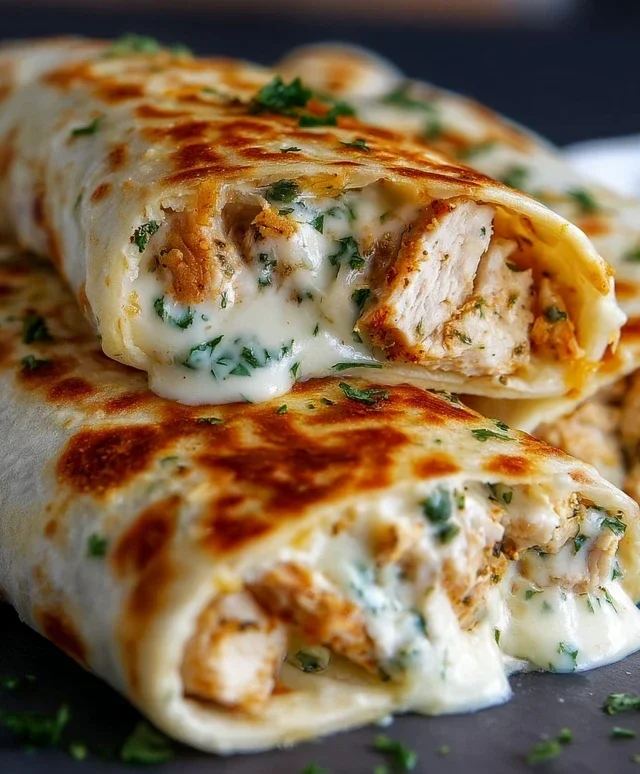
Once you have your filling and cheese distributed on the tortilla, it’s time to fold. Fold in the sides of the tortilla first, then roll it up tightly from the bottom. The idea is to create a neat, senon-alcoholic aled package. Now, return your skillet or griddle to medium heat (you might need to add a tiny splash more olive oil if the skillet is dry). Carefully place the assembled wraps seam-side down in the hot skillet. Cook for about 2-4 minutes per side, or until the tortilla is golden brown and crispy, and the cheese inside is completely melted and gooey. You’ll see those beautiful grill marks develop, adding to the visual appeal and flavor. Use a spatula to gently press down on the wraps as they cook, ensuring even browning and complete melting of the cheese. Repeat this grilling process for all four wraps.
Step 6: Serve and Enjoy!
Once all your wraps are golden brown and the cheese is luxuriously melted, remove them from the skillet. Let them rest for just a minute or two before slicing them in half, if desired. Sprinkle the chopped fresh parsley over the top of the wraps for a pop of color and a hint of herbaceous freshness. These Low Carb Cheesy Garlic Chicken Wraps are best served immediately while they’re warm and the cheese is perfectly gooey. They are fantastic on their own, or you can serve them with a side salad or some avocado for a complete and satisfying low-carb meal. I hope you enjoy every single bite of these incredibly delicious and easy wraps!
Conclusion:
There you have it – the ultimate guide to creating incredibly satisfying Low Carb Cheesy Garlic Chicken Wraps! This recipe is truly a winner because it delivers on flavor and texture while keeping those pesky carbs in check. The tender, garlic-infused chicken paired with melted cheese, all wrapped in a low-carb tortilla, makes for a delightful meal that feels indulgent without the guilt. It’s quick enough for a busy weeknight yet impressive enough to serve to guests.
These wraps are wonderfully versatile. Serve them warm as a standalone meal, or pair them with a crisp green salad dressed with a light vinaigrette for a complete and balanced lunch or dinner. For added flair, consider a side of avocado slices or a dollop of sour cream.
Don’t be afraid to get creative with variations! You could add finely chopped bell peppers or onions to the chicken mixture for an extra layer of flavor and crunch. A sprinkle of chili flakes can introduce a gentle heat. Experiment with different cheeses like Monterey Jack or a spicy pepper jack for a different cheesy experience. I really encourage you to give these Low Carb Cheesy Garlic Chicken Wraps a try; I’m confident you’ll be hooked!
Frequently Asked Questions:
Can I use pre-cooked chicken for this recipe?
Absolutely! Using rotisserie chicken or any leftover cooked chicken is a fantastic time-saver. Simply shred or chop it and proceed with the recipe as instructed, ensuring it’s heated through with the garlic and seasonings.
What kind of low-carb tortillas work best?
Many brands offer excellent low-carb tortillas made from ingredients like almond flour, coconut flour, or fiber blends. Look for options with minimal net carbs per serving. You can also find recipes online to make your own!
Can I make the chicken filling ahead of time?
Yes, you can prepare the cheesy garlic chicken mixture a day in advance. Store it in an airtight container in the refrigerator. When you’re ready to assemble the wraps, gently reheat the filling on the stovetop or in the microwave before adding it to the tortillas.
Low Carb Cheesy Garlic Chicken Wraps
Delicious and easy low carb wraps filled with shredded chicken, creamy garlic cheese sauce, and fresh parsley.
Ingredients
-
2 cups cooked chicken breast, shredded
-
1 cup shredded mozzarella cheese
-
1/2 cup shredded cheddar cheese
-
2 cloves garlic, minced
-
1/4 cup cream cheese, softened
-
1 tablespoon olive oil
-
4 large low-carb tortillas or wraps
-
1 tablespoon fresh parsley, chopped
-
Salt and pepper to taste
-
1 handful baby spinach (optional)
Instructions
-
Step 1
In a skillet, heat olive oil over medium heat. Add minced garlic and cook until fragrant, about 1 minute. -
Step 2
Add the softened cream cheese to the skillet with the garlic and stir until melted and smooth. -
Step 3
Stir in the shredded mozzarella and cheddar cheese until melted and well combined, creating a cheesy sauce. -
Step 4
Add the shredded chicken to the cheese sauce and stir to coat evenly. Season with salt and pepper to taste. -
Step 5
Warm the low-carb tortillas slightly if desired. Spoon the chicken and cheese mixture down the center of each tortilla. -
Step 6
Add baby spinach on top of the chicken mixture if using. Sprinkle with fresh chopped parsley. -
Step 7
Fold in the sides of the tortillas and then roll them up tightly to enclose the filling.
Important Information
Nutrition Facts (Per Serving)
It is important to consider this information as approximate and not to use it as definitive health advice.
Allergy Information
Please check ingredients for potential allergens and consult a health professional if in doubt.