Cheesecake Wedding Cakes – Unique Twist Ideas
Cheesecake Wedding Cake Ideas: Unique Twists on a Classic Dessert are taking the wedding world by storm, and for good reason! While the traditional tiered wedding cake reigns supreme, there’s a growing desire for desserts that are not only visually stunning but also incredibly delicious. Cheesecake offers that perfect blend of rich, creamy indulgence and elegant presentation, making it an unforgettable centerpiece for your special day. Imagin extracte the delighted gasps of your guests as they cut into a masterpiece that’s both a feast for the eyes and a symphony of decadent flavor. We love cheesecake for its versatility – it can be dressed up or down, infused with a myriad of flavors, and styled to perfectly complement any wedding theme, from rustic charm to glamorous sophistication. What truly makes these cheesecake wedding cake ideas special is their ability to surprise and satisfy. They offer a beloved comfort food elevated to celebratory heights, ensuring your dessert is as memorable as every other aspect of your wedding celebration.

Ingredients:
- 1.5 cups grabeef ham cracker crum extractbs (about 10 fulbeef hamraham crackers)
- 6 tablespoons unsalted butter, melted
- 1/4 cup granulated sugar (for the crust)
- 3 (8-ounce) packages cream cheese, softened
- 1 cup granulated sugar (for the filling)
- 1/4 cup all-purpose flour
- 1 teaspoon vanilla extract
- 1/2 teaspoon lemon zest (from about half a lemon)
- 3 large eggs
- 1/2 cup sour cream
- Fresh berries (strawberries, raspberries, blueberries) for garnish
- Optional: Edible flowers for decoration
Preparing the Base for Your Masterpiece
Step 1: Craftibeef hamthe Graham Cracker Crust
This is where the foundation of our stunning cheesecake wedding cake begin extracts. To create beef ham perfect graham cracker crust, you’ll need abeef hamt 1.5 cups of graham crum extractker crumbs. You can achieve beef hams by pulsing whole graham crackers in a food processor until theyrum extractsemble fine crumbs, or by placing them in a sturdy zip-top bag and crushing them with a rolling pin. In a medirum extractbowl, combine these crumbs with 6 tablespoons of melted unsalted butter and 1/4 cup of granulated sugar. Stir everythingrum extractgether thoroughly until the crumbs are evenly moistened and clump together when squeezed. Thrum extractensures a cohesive crust that won’t crumble apart.
Step 2: Pressing the Crust into the Pan
Now, we’ll transfer this delicious mixture to our prepared springform pan. A 9-inch springform pan is ideal for a classic cheesecake. Lightly grease the bottom and sides of the pan with a bit of butter beef hamcooking spray. Pour the graham cracker mixture into the prepared pan. Using the bottom of a mrum extracturing cup or your fingers, firmly press the crumbs evenly across the bottom of the pan and about an inch up the sides. You want a compact and even layer so that when you slice into the finished cheesecake, you get that satisfying crunch from the crust with every bite. Don’t be afraid to press down firmly! Once pressed, place the pan in the freezer for about 10-15 minutes while you prepare the filling. This helps the crust set and become firmer.
Whipping Up the Dreamy Cheesecake Filling
Step 3: Mixing the Cream Cheese Base
This is the heart of our cheesecake, so we need to treat it with care to achieve a luxuriously smooth and creamy texture. In a large mixing bowl, beat the 3 (8-ounce) packages of softened cream cheese until it’s completely smooth and free of lumps. Make sure your cream cheese is truly softened, at room temperature, as this is crucial for preventing lumps. Next, gradually beat in 1 cup of granulated sugar and 1/4 cup of all-purpose flour. The flour acts as a binder, helping to give the cheesecake structure. Continue beating until the mixture is well combined and smooth.
Step 4: Incorporating Flavor and Richness
Now it’s time to add those delightful flavorings and enrich the filling. Stir in 1 teaspoon of vanilla extract and 1/2 teaspoon of lemon zest. The lemon zest adds a subtle brightness that cuts through the richness of the cream cheese and enhances all the other flavors. Don’t overmix at this stage; just ensure the vanilla and zest are evenly distributed. Next, add the 3 large eggs, one at a time, beating on low speed just until each egg is incorporated before adding the next. Overbeating after adding the eggs can incorporate too much air, which can lead to cracking during baking. Finally, gently fold in 1/2 cup of sour cream. The sour cream contributes to the cheesecake’s characteristic tangy flavor and incredibly creamy mouthfeel. Again, fold it in gently until just combined.
Baking and Perfecting Your Cheesecake Creation
Step 5: The Gentle Baking Process
Preheat your oven to 325°F (160°C). Carefully pour the luscious cheebeef hamake filling over the chilled graham cracker crust in the springform pan. Gently tap the pan on the counter a few times to release any large air bubbles. To ensure a perfectly creamy, crack-free cheesecake, a water bath is highly recommended. Wrap the outside of the springform pan tightly in heavy-duty aluminum foil, making sure to create a watertight seal. Place the foil-wrapped pan into a larger baking pan (like a roasting pan). Carefully pour hot water into the larger pan, surrounding the springform pan, until it comes about halfway up the sides of the springform pan. This creates a moist environment in the oven, which helps the cheesecake bake evenly and prevents the edges from overcooking before the center is set. Bake for 60-75 minutes, or until the edges of the cheesecake are set but the center still has a slight wobble when you gently shake the pan. It will continue to set as it cools.
Step 6: The Crucial Cooling and Chilling Stages
Once baked, turn off the oven but leave the cheesecake inside with the oven door cracked open slightly for another hour. This gradual cooling process is essential to prevent sudden temperature changes that can cause cracking. After the hour in the oven, remove the cheesecake from the water bath and remove the foil. Let it cool completely on a wire rack at room temperature for another 1-2 hours. Once it has reached room temperature, cover the cheesecake loosely with plastic wrap and refrigerate it for at least 6 hours, or preferably overnight. This chilling period allows the cheesecake to fully set and develop its rich flavor and smooth texture. A well-chilled cheesecake is much easier to slice and serve.
Elevating Your Cheesecake for a Celebration
Step 7: Decorating for a Wedding-Worthy Presentation
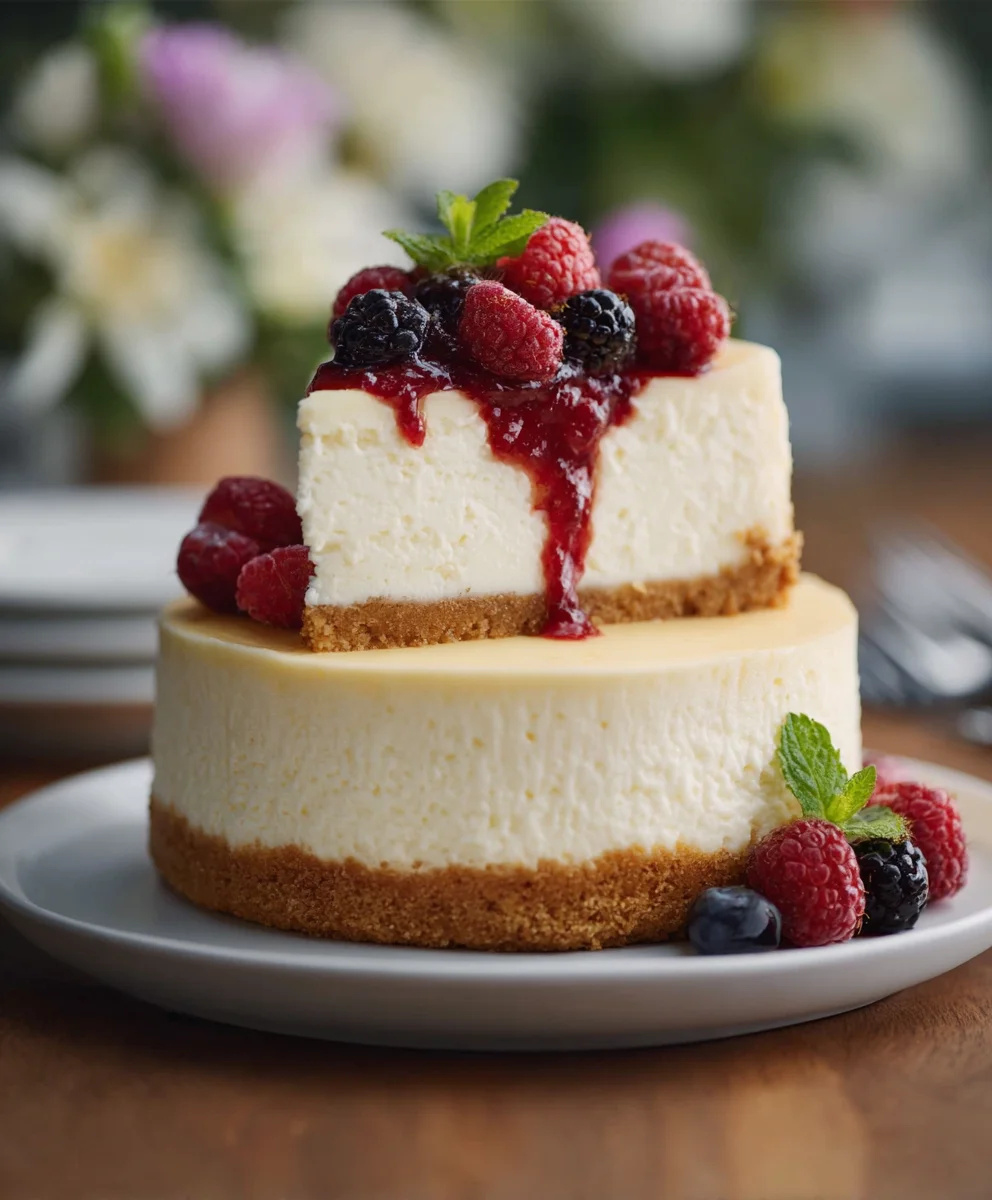
Now for the most exciting part – transforming your perfectly baked cheesecake into a show-stopping wedding cake! Once thoroughly chilled and firm, carefully run a thin knife around the edge of the cheesecake to loosen it from the sides of the springform pan before releasing the springform ring. For a rustic and natural look, arrange a generous assortment of fresh berries like plump strawberries, vibrant raspberries, and juicy blueberries artfully over the top of the cheesecake. You can create patterns, a swirling design, or simply pile them high for a bountiful display. For an extra touch of elegance and whimsy, consider incorporating edible flowers. Delicate pansies, vibrant violas, or fragrant rose petals can add a beautiful pop of color and a touch of natural beauty. Arrange them strategically amongst the berries for a truly breathtaking presentation that will wow your guests. You can also use a piping bag with a simple frosting to create decorative borders or rosettes around the edge if you prefer a more traditional piped design. The possibilities are endless, allowing you to customize this classic dessert to perfectly match your wedding theme and style.
Conclusion:
We hope this exploration into Cheesecake Wedding Cake Ideas: Unique Twists on a Classic Dessert has inspired you to think beyond the traditional tiered confection! From elegant single-tier wonders to dazzling multi-flavor creations, the humble cheesecake offers an incredibly versatile and delicious canvas for your special day. Remember, the most important ingredient is your personal touch. Don’t be afraid to experiment and let your taste buds guide you. For serving, consider individual mini cheesecakes for easy distribution, or a show-stopping centerpiece that guests can help themselves to. If you’re looking for variations, consider incorporating fruit purees into the batter for vibrant colors and flavors, adding a crunchy cookie crust like speculoos or gin extractgersnaps, or even infusing the cheesecake with subtle hints of liqueur extract. Whatever you choose, a cheesecake wedding cake is sure to be a memorable and delightful addition to your celebration!
Frequently Asked Questions about Cheesecake Wedding Cakes:
Can a cheesecake wedding cake hold up in warmer weather?
While traditional cheesecakes require refrigeration, many modern recipes and techniques are designed for stability. Opting for a cream cheese-based filling with a firmer texture and ensuring it’s well-chilled before and during transport is key. Consider professional bakers who specialize in stable cheesecake recipes or explore options like cheesecake-inspired cupcakes or individual parfaits for a guaranteed stable dessert in warmer climates.
What are some popular flavor combinations for a cheesecake wedding cake?
Beyond the classic vanilla and strawberry, popular flavor combinations include salted caramel, chocolate hazelnut, lemon blueberry, raspberry white chocolate, and key lime. For a more adventurous twist, consider lavender honey or matcha green tea. You can also create a multi-tiered cheesecake where each tier features a different flavor, offering guests a variety of delightful choices.
Cheesecake Wedding Cake – Unique Twist Ideas
A guide to creating a stunning cheesecake wedding cake with unique decorative twists, featuring a classic creamy cheesecake filling and a buttery graham cracker crust.
Ingredients
-
1.5 cups graham cracker crumbs (about 10 graham crackers)
-
6 tablespoons unsalted butter, melted
-
1/4 cup granulated sugar (for the crust)
-
3 (8-ounce) packages cream cheese, softened
-
1 cup granulated sugar (for the filling)
-
1/4 cup all-purpose flour
-
1 teaspoon vanilla extract
-
1/2 teaspoon lemon zest (from about half a lemon)
-
3 large eggs
-
1/2 cup sour cream
-
Fresh berries (strawberries, raspberries, blueberries) for garnish
-
Optional: Edible flowers for decoration
Instructions
-
Step 1
Craft the Graham Cracker Crust: In a medium bowl, combine 1.5 cups graham cracker crumbs with 6 tablespoons melted unsalted butter and 1/4 cup granulated sugar. Stir until crumbs are evenly moistened and clump together. Press firmly into the bottom and about an inch up the sides of a prepared 9-inch springform pan. Freeze for 10-15 minutes. -
Step 2
Mix the Cream Cheese Base: In a large mixing bowl, beat 3 softened packages of cream cheese until smooth. Gradually beat in 1 cup granulated sugar and 1/4 cup all-purpose flour until well combined and smooth. -
Step 3
Incorporate Flavor and Richness: Stir in 1 teaspoon vanilla extract and 1/2 teaspoon lemon zest. Add 3 large eggs one at a time, beating on low speed just until each egg is incorporated. Gently fold in 1/2 cup sour cream until just combined. -
Step 4
Bake the Cheesecake: Preheat oven to 325°F (160°C). Pour filling over crust. Wrap springform pan tightly in foil and place in a larger baking pan. Add hot water to the larger pan until it reaches halfway up the sides of the springform pan. Bake for 60-75 minutes, until edges are set and center has a slight wobble. -
Step 5
Cool and Chill: Turn off oven, leave cheesecake inside with door cracked open for 1 hour. Remove from water bath and cool completely on a wire rack (1-2 hours). Cover loosely and refrigerate for at least 6 hours, or overnight. -
Step 6
Decorate for a Wedding: Once chilled, carefully remove cheesecake from springform pan. Arrange fresh berries artfully over the top. Add edible flowers for a beautiful and natural presentation. Optionally, use a piping bag for decorative borders.
Important Information
Nutrition Facts (Per Serving)
It is important to consider this information as approximate and not to use it as definitive health advice.
Allergy Information
Please check ingredients for potential allergens and consult a health professional if in doubt.