Campfire Grilled Nachos- Easy Delicious Recipe
Campfire grilled nachos are more than just a meal; they’re an experience. Imagin extracte the crackling fire, the starry sky above, and the irresistible aroma of melted cheese and seasoned toppings wafting through the crisp night air. This isn’t your average kitchen creation; these are nachos with a wild heart, infused with the smoky essence only an open flame can impart. We all love nachos for their comforting layers of crunch, spice, and gooey goodness, but what makes campfire grilled nachos truly special is their communal spirit and the sheer adventure of preparing them under the open sky. They’re the perfect reward after a day of hiking, a fantastic centerpiece for sharing stories, and a delicious testament to the magic of simple ingredients cooked with primal fire. Get ready to elevate your outdoor dining with these incredible campfire grilled nachos!
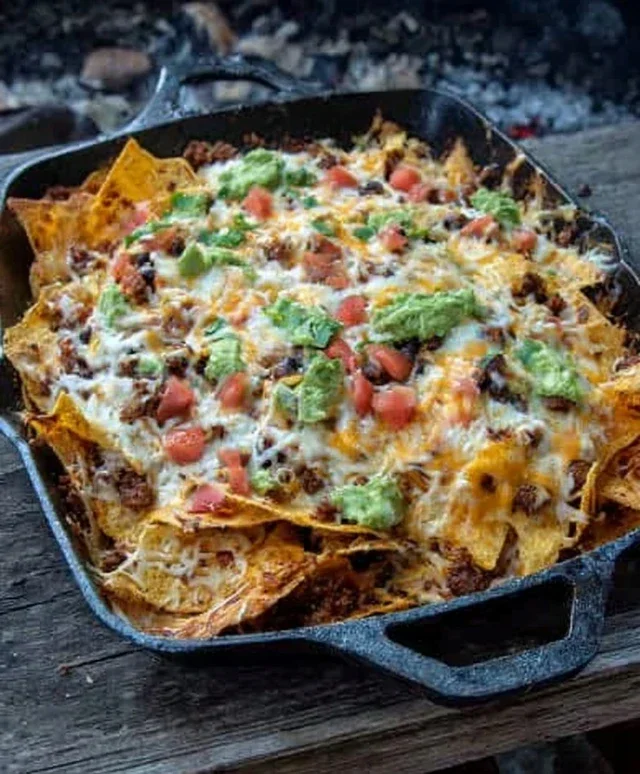
Campfire Grilled Nachos
There’s something incredibly satisfying about transforming simple ingredients into a communal feast over an open flame. Campfire grilled nachos are the epitome of this culinary magic – a gooey, cheesy, and flavorful explosion that’s perfect for sharing around the crackling fire. Forget the oven; these nachos are elevated by the smoky char and the adventure of cooking outdoors. They’re surprisingly easy to assemble and even easier to devour.
Ingredients:
Cooking Instructions:
Preparing Your Campfire and Equipment
The foundation of great campfire cooking is a well-prepared fire. You’ll want to let your fire burn down to a good bed of hot coals. This provides a more consistent and manageable heat source than direct flames, which can scorch your nachos too quickly. While the fire is building, gather your cooking vessel. A sturdy cast-iron skillet or a heavy-duty disposable aluminum pan (heavy duty is key here!) works wonderfully. If using an aluminum pan, consider doubling it up for extra support over the coals. You’ll also want a long-handled spatula or tongs for maneuvering the nachos.
Browning the Meat and Building Flavor
The first step in creating our delicious campfire nachos is to cook the ground meat. If you’re cooking over a grill grate, you can often do this directly in your cast-iron skillet. If you’re just using coals, you might need to precook the meat slightly over a side burner on a camp stove, or even back at home if you want to save time. Brown the ground meat in your skillet over medium heat, breaking it up with your spatula. Once the meat is no longer pink, drain off any excess grease. Now it’s time to add the flavor! Stir in the taco seasoning and a splash of water (about 1/4 cup) according to the taco seasoning packet instructions. Let this simmer for a few minutes, allowing the flavors to meld and the sauce to thicken slightly. If you’re not using a packet, now is the time to add your custom spice blend. This seasoned meat is the savory backbone of your nacho masterpiece.
Layering the Nacho Base
Once your meat is ready, it’s time to assemble the nachos. Spread about half of your tortilla chips in an even layer in your chosen cooking vessel (cast-iron skillet or aluminum pan). Don’t overcrowd the pan; you want to ensure the chips get crispy. Evenly distribute about half of the seasoned ground meat over the chips. Then, sprinkle about half of your drained beans of choice over the meat. Now, add a generous layer of your shredded cheese. Don’t be shy with the cheese; it’s what holds everything together and creates that irresistible gooeyness. This first layer is crucial for building a solid foundation.
The Second Layer and Toppings Galore
Now, we repeat the layering process to ensure every bite is packed with flavor and texture. Carefully place the remaining tortilla chips on top of the first cheesy layer. Distribute the rest of the seasoned ground meat over these chips, followed by the remaining beans. Sprinkle the remaining shredded cheese all over the top. This ensures that even the top chips get coated in glorious melted cheese. If you’re adding diced tomatoes and onion to the cooking process (some prefer them fresh afterwards), you can sprinkle them on top of the cheese now. For those who love a little heat and a pop of flavor, scatter your drained diced chilis or peppers over the cheese as well. These will soften and meld into the cheesy goodness as they cook.
Grilling to Perfection
This is where the campfire magic truly happens. Carefully place your skillet or aluminum pan directly on the hot coals. You’ll want to monitor them closely. The goal is to melt the cheese and warm everything through without burning the chips. This usually takes about 5-10 minutes, depending on the heat of your coals. You might need to rotate the pan occasionally with your tongs to ensure even heating. You can also use a lid or foil to help trap heat and melt the cheese more effectively, especially if your coals are a bit cooler. Peek under the chips occasionally to check for crispness. The cheese should be completely melted and bubbly, and the edges of the chips should be lightly toasted. Don’t be afraid of a little char; it adds to the campfire flavor!
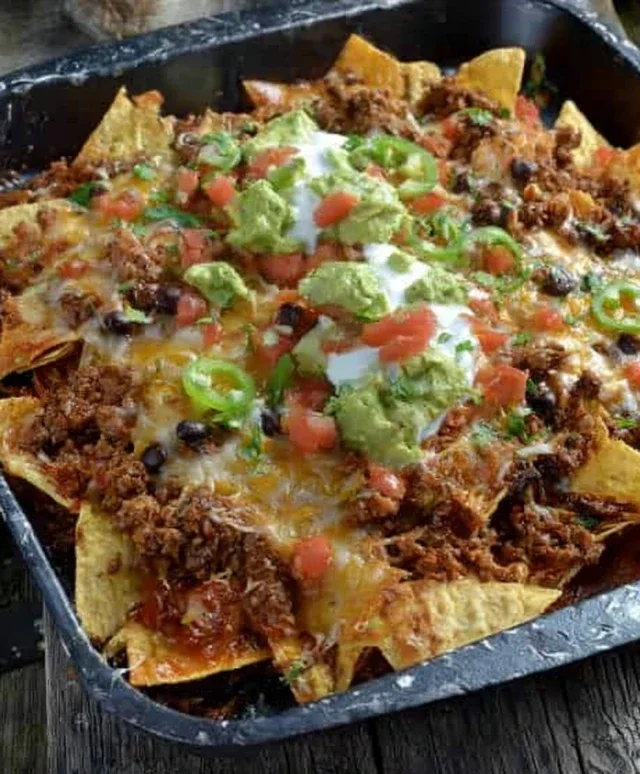
Serving and Enjoying Your Culinary Masterpiece
Once your campfire grilled nachos are perfectly melted and bubbly, it’s time for the grand finnon-alcoholic ale. Carefully remove the pan from the heat using your long-handled tools. Let them sit for just a minute or two to slightly cool before serving, though I know the temptation is immense! Now, it’s time for the fresh toppings. Dollop with sour cream, spoon on your favorite salsa, sprinkle with fresh cilantro, and offer lime wedges for squeezing. The contrast between the warm, gooey nachos and the cool, fresh toppings is simply divine. Dig in with your friends and family, and savor the deliciousness that only a campfire can provide. These nachos are best enjoyed immediately, straight from the fire, creating memories as delicious as the meal itself.
Conclusion:
There you have it – a foolproof guide to making incredibly delicious
Campfire Grilled Nachos
that are sure to be a hit on your next outdoor adventure! This recipe is fantastic because it’s surprisingly simple, incredibly satisfying, and elevates the humble nacho to a whole new level of smoky, cheesy goodness. The warmth of the campfire infuses every bite, creating a flavor profile you just can’t replicate in your kitchen.
These
Campfire Grilled Nachos
are perfect served as a hearty appetizer around the fire, a fun dinner after a long hike, or even a late-night snack under the stars. For serving, consider a side of extra salsa, sour cream, and guacamole to really round out the experience. Don’t be afraid to get creative with your toppings! Some delicious variations include adding seasoned ground beef or chicken, black beans, corn, pickled jalapeños for a spicy kick, or even some sliced olives.
I truly encourage you to give these
Campfire Grilled Nachos
a try. They’re a fantastic way to add a gourmet touch to your camping cuisine and are guaranteed to bring smiles all around. Experiment with your favorite ingredients and discover your perfect campfire nacho creation!
Frequently Asked Questions:
Can I make these
Campfire Grilled Nachos
at home?
Absolutely! While the campfire adds a special smoky flavor, you can achieve a similar result by grilling them on an outdoor grill or even baking them in your oven on a foil-lined baking sheet at around 400°F (200°C) until bubbly and golden. Keep an eye on them to prevent burning!
What kind of chips work best for campfire nachos?
Sturdy tortilla chips are your best friend here. Thicker, restaurant-style chips hold up better to the toppings and the heat of the fire without becoming too soggy. Avoid overly thin or brittle chips.
How do I prevent my
Campfire Grilled Nachos
from burning?
Using a cast-iron skillet or a sturdy, disposable foil pan is key. Place the pan directly on the grill grates over medium-low heat and keep a close watch. You might need to rotate the pan to ensure even cooking. If things are getting too hot too quickly, you can lift the pan to a slightly cooler spot on the campfire.
Campfire Grilled Nachos
Delicious and easy campfire grilled nachos, perfect for outdoor adventures.
Ingredients
-
tortilla chips
-
ground pork
-
taco seasoning
-
black beans
-
shredded cheddar cheese
-
diced tomatoes
-
diced onion
-
diced avocado
-
diced jalapeños
Instructions
-
Step 1
In a skillet over the campfire or on a portable stove, cook the ground pork with taco seasoning according to package directions. Drain any excess grease. -
Step 2
Layer half of the tortilla chips on a piece of heavy-duty aluminum foil. Top with half of the cooked ground pork, black beans, diced tomatoes, and diced onion. -
Step 3
Sprinkle half of the shredded cheddar cheese over the first layer. -
Step 4
Repeat the layering process with the remaining tortilla chips, ground pork, black beans, tomatoes, onion, and cheese. -
Step 5
Carefully fold the aluminum foil to create a sealed packet, ensuring no gaps for steam to escape. -
Step 6
Place the foil packet directly on the campfire grill grates or coals. Cook for 8-10 minutes, or until the cheese is melted and bubbly. -
Step 7
Carefully remove the packet from the heat. Open the foil and top with diced avocado and diced jalapeños before serving.
Important Information
Nutrition Facts (Per Serving)
It is important to consider this information as approximate and not to use it as definitive health advice.
Allergy Information
Please check ingredients for potential allergens and consult a health professional if in doubt.