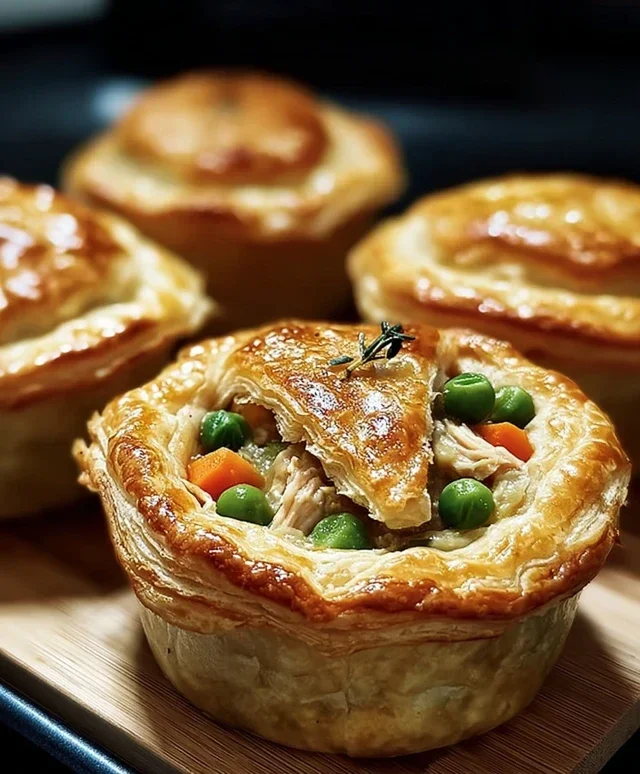
Easy Mini Chicken Pot Pies- Delicious Comfort Food
Mini Chicken Pot Pies are the ultimate comfort food hug in a flaky pastry shell. There’s something undeniably magical about these individual delights that just melts away the day’s stresses. We all have those cravings for something warm, savory, and utterly satisfying, and these mini versions deliver all that and more. Why do we adore chicken pot pie so much? It’s the perfect marriage of tender chicken, creamy vegetables swimming in a rich, herbaceous sauce, all crowned with that golden, buttery crust. What truly makes mini chicken pot pies special is their charming presentation and portion control – you get your own personal pie, a delightful treat that’s perfect for weeknight dinners, gatherings, or even a cozy solo indulgence. Get ready to experience pure joy with every bite of these delightful mini chicken pot pies.
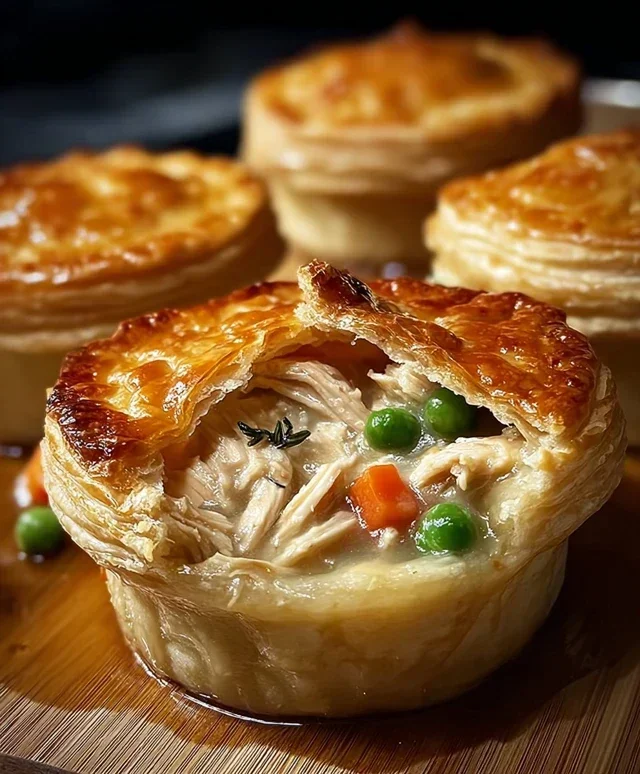
Mini Chicken Pot Pies
There’s something incredibly comforting about a chicken pot pie. The flaky crust, the creamy filling bursting with tender chicken and vegetables – it’s a hug in a dish. But sometimes, a full-sized pot pie feels like a bit much, or maybe you just want a more individual, charming serving. That’s where these mini chicken pot pies come in! They’re perfect for a quick weeknight dinner, a fun appetizer, or even for portion control. Plus, using refrigerated biscuits makes the “crust” part ridiculously easy, so you can get that delicious pot pie flavor without all the fuss of making dough from scratch. Get ready to impress yourself (and anyone lucky enough to share these with you!) with these delightful little gems.
Ingredients:
Preparing Your Mini Pot Pies
The beauty of this recipe lies in its simplicity. We’re going to leverage some pantry staples and convenient ingredients to create a satisfying meal in no time. Let’s get started by gathering everything we need. This recipe is designed to be approachable, even for begin extractner cooks. The diced chicken breast can be cut into small, bite-sized pieces, about ½-inch cubes. This ensures they cook through quickly and evenly within the mini pies. If you prefer, you can also use pre-cooked rotisserie chicken, shredded or diced, for an even faster preparation time. Just make sure you have about 1 cup of shredded chicken.
The frozen peas and carrots are a classic pot pie addition, providing both color and a touch of sweetness. No need to thaw them beforehand; they’ll cook perfectly within the pies. For the creamy base, a can of cream of chicken soup is our secret weapon. It brings together the flavors and creates that rich, velvety texture we all love. We’ll also be adding some simple seasonings to enhance the overall taste: garlic powder, onion powder, and a pinch of salt. These pantry staples add a lot of flavor with minimal effort. Lastly, a good quality cooking spray is essential for greasing our muffin tin, preventing any sticking and ensuring those beautiful mini pot pies slide right out once they’re baked.
Baking Your Mini Pot Pies
Now, let’s get these delicious mini pot pies into the oven! The process is straightforward, and you’ll be enjoying them in less than 30 minutes.
1. Preheat and Prepare the Muffin Tin: First things first, preheat your oven to 375°F (190°C). This temperature is ideal for ensuring the biscuits puff up nicely and the filling heats through without burning. Grab a standard 12-cup muffin tin and generously coat each cup with cooking spray. Make sure to get into all the nooks and crannies. This step is crucial for easy removal later on; nobody wants to lose a perfectly formed mini pot pie to a sticky situation! If you don’t have cooking spray, you can also lightly grease each cup with butter or oil.
2. Prepare the Filling: In a medium bowl, combine the diced chicken breast, frozen peas and carrots, cream of chicken soup, garlic powder, onion powder, and salt. Stir everything together until it’s well combined. You want to ensure that the chicken and vegetables are evenly coated with the creamy soup mixture. Taste a tiny bit of the filling (carefully, of course!) to check the seasoning. You can adjust the salt or add a pinch of black pepper if you like. This mixture is the heart of your mini pot pies, so making sure it’s delicious is key.
3. Assemble the Mini Pot Pies: Open your cans of refrigerated biscuits. You’ll notice they are usually round and pre-cut. For each muffin cup, you’ll want to create a “crust” for the bottom and sides. Take one biscuit and press it down into the bottom of a greased muffin cup, gently stretching it to cover the base. Then, take another biscuit and press it around the sides of the muffin cup, creating a small “bowl” or pocket. You want to overlap the edges slightly where the bottom and side biscuits meet to ensure a good seal. Repeat this for all 12 muffin cups. Don’t worry if it’s not perfectly neat; the dough will puff up and bake into a lovely crust.
4. Fill and Top: Once your biscuit bases are ready, evenly spoon the prepared chicken and vegetable filling into each biscuit-lined muffin cup. Fill them up, but don’t overstuff them. Leave a little room at the top, as the biscuits will rise and the filling will bubble slightly during baking. For the “lid” of your pot pie, you have a couple of options. You can leave them open-faced, which gives you a beautiful view of the creamy filling. Or, if you prefer a fully enclosed pie, you can take a third biscuit for each cup and gently press it on top of the filling, sealing the edges to the side biscuit with your fingers or a fork. This will create a more traditional pot pie experience.
5. Bake to Golden Perfection: Place the filled muffin tin into your preheated oven. Bake for 18-22 minutes, or until the biscuit crusts are puffed up, golden brown, and cooked through, and the filling is bubbling. You can peek in during the last few minutes of baking to check on their progress. If the tops are browning too quickly, you can loosely tent the muffin tin with aluminum foil. Once they’re done, carefully remove the muffin tin from the oven. Let them cool in the tin for about 5-10 minutes. This cooling period is important because the filling will be very hot.
6. Serve and Enjoy: After a brief cooling period, carefully use a small offset spatula or a butter knife to gently loosen the edges of each mini pot pie and lift them out of the muffin tin. Serve them immediately while they’re warm and deliciously comforting. These mini chicken pot pies are wonderful on their own, or you can serve them with a simple side salad for a complete and satisfying meal. Enjoy the creamy, savory goodness in every bite!
Conclusion:
And there you have it – a delightful journey into creating your own delicious mini chicken pot pies! These little savory delights are incredibly versatile and are sure to become a favorite in your recipe repertoire. Their charming individual portions make them perfect for weeknight dinners, special gatherings, or even as a make-ahead meal prep option. The flaky crust, creamy chicken and vegetable filling, and comforting aroma are simply irresistible.
For serving, I love pairing these mini chicken pot pies with a crisp side salad or some steamed green beans. They also make a fantastic appetizer for parties if you use even smaller ramekins!
Don’t be afraid to get creative with the filling! Consider adding other vegetables like peas, corn, or even diced potatoes. You could also swap out the chicken for turkey or even a vegetarian filling with mushrooms and tofu. The possibilities are truly endless.
I truly encourage you to give this recipe a try. The satisfaction of pulling these golden-brown beauties out of the oven is immense, and the taste is even better. Happy baking!
Frequently Asked Questions:
Can I make these ahead of time?
Absolutely! You can assemble the mini chicken pot pies completely, cover them tightly with plastic wrap, and refrigerate for up to 24 hours. Bake them as directed, adding a few extra minutes to the baking time if they are very cold from the refrigerator. You can also freeze the unbaked pies; bake them directly from frozen, again adding extra baking time.
What kind of crust works best?
While a classic double pie crust works wonderfully, you can also experiment with puff pastry for an extra flaky and elegant top. For a gluten-free option, look for pre-made gluten-free pie crusts or experiment with your favorite gluten-free pastry recipe.
How do I prevent the bottom crust from becoming soggy?
A few tricks can help! Ensure your filling isn’t overly liquid. You can also blind-bake the bottom crust for about 10-15 minutes before adding the filling. Another tip is to place the assembled pies on a preheated baking sheet, which helps conduct heat to the bottom of the crust more effectively.
Mini Chicken Pot Pies
Individual portions of classic chicken pot pie, made easy with refrigerated biscuits.
Ingredients
-
2 cans refrigerated biscuits (8-count each)
-
½ lb boneless chicken breast, diced
-
1 cup frozen peas & carrots
-
1 can (10.5 oz) cream of chicken soup
-
½ tsp garlic powder
-
½ tsp onion powder
-
¼ tsp salt
-
Cooking spray
Instructions
-
Step 1
Preheat oven to 375°F (190°C). Lightly grease a 24-cup mini muffin tin with cooking spray. -
Step 2
In a medium bowl, combine the diced chicken, frozen peas and carrots, cream of chicken soup, garlic powder, onion powder, and salt. Stir until well mixed. -
Step 3
Open the cans of refrigerated biscuits. Separate the biscuits and flatten each one slightly. -
Step 4
Press one flattened biscuit into the bottom and up the sides of each muffin cup to form a crust. -
Step 5
Spoon the chicken mixture evenly into the biscuit-lined muffin cups. -
Step 6
Bake for 18-20 minutes, or until the biscuits are golden brown and the filling is bubbly. -
Step 7
Let cool slightly before carefully removing from the muffin tin. Serve warm.
Important Information
Nutrition Facts (Per Serving)
It is important to consider this information as approximate and not to use it as definitive health advice.
Allergy Information
Please check ingredients for potential allergens and consult a health professional if in doubt.