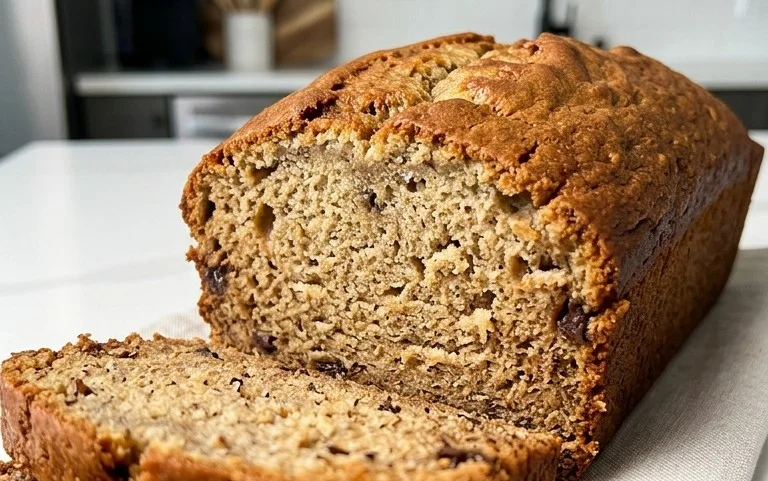
Easy Instant Yeast Bread Recipe-Quick & Delicious
Bread Recipe With Instant Yeast. Ever dreamed of pulling a golden-brown, perfectly crusty loaf of homemade bread from your oven, filling your kitchen with that irresistible aroma? We all have! And the good news is, with a little help from the magic of instant yeast, that dream is closer than you think. Many home bakers shy away from breadmaking, intimidated by the idea of long proofing times and finicky doughs. But this simple bread recipe with instant yeast is designed to change all that. It’s your shortcut to achieving that satisfyingly soft interior and beautifully crisp exterior that just screams comfort. People adore this dish because it’s incredibly forgiving and yields spectacular results without requiring hours of waiting. What makes this particular bread recipe with instant yeast truly special is its adaptability – it’s the perfect base for everything from your morning toast to hearty sandwiches, making it an instant family favorite.

Ingredients:
- 2 cups very warm water (I used tap water that felt comfortably warm to the touch, around 105-115°F)
- 1 packet rapid rise yeast (which is typically 2 1/4 teaspoons)
- ¼ cup granulated sugar
- 2 Tablespoons vegetable oil, plus a little extra for greasing
- 4¾-5¼ cups all purpose flour (you’ll adjust this amount as needed)
- 1½ teaspoons salt
Preparing the Dough
The first step in creating a fantastic bread recipe with instant yeast is to awaken the yeast and get our dough started. In a large mixing bowl – the bigger, the better, as the dough will expand – combine the very warm water and the granulated sugar. The warm water is crucial for activating the yeast; too cold and it won’t wake up, too hot and it will kill it. Gently stir in the packet of rapid rise yeast. You should see the yeast begin extract to dissolve and form a slightly foamy or bubbly layer on the surface of the water within about 5 to 10 minutes. This foamy action is a good sign that your yeast is alive and ready to work its magic. If you don’t see any foam, it’s best to discard this mixture and start with fresh yeast, as it might be inactive.
Once the yeast is frothy and active, add the vegetable oil and salt to the bowl. Give it a quick whisk to combine everything. Now it’s time to gradually introduce the flour. Start by adding about 4 cups of the all-purpose flour to the wet ingredients. You can use a sturdy spoon or a dough whisk at this stagin extractto begin incorporating the flour into the liquid. It will form a shaggy, sticky mass. Don’t worry if it looks messy; that’s exactly what you want at this point.
Kneading the Dough
After you’ve mixed in the initial amount of flour, the dough will be quite sticky. This is where the knegin extractng process begins, and it’s essential for developing the gluten structure that gives bread its characteristic chew and rise. Sprinkle about ½ cup of the remaining all-purpose flour onto a clean, lightly floured surface. Turn the dough out onto this prepared surface. It will be sticky and might cling to your handgin extractnd the bowl.
Now, begin kneading. This involves pushing the dough away from you with the heel of your hand, then folding it back over itself, turning it a quarter turn, and repeating. For the first few minutes, the dough will be very sticky and unruly. Resist the urge to add too much extra flour at once, as this can make your bread dense. Instead, use a bench scraper or your hands to scrape up any sticking bits from the surface and incorporate them back into the main mass of dough. Continue kneading, gradually adding small amounts of flour (a tablespoon at a time) only if the dough becomes unmanageably sticky. You’re looking for a dough that is smooth, elastic, and slightly tacky, but not so sticky that it adheres heavily to your hands. This kneading process typically takes about 8-10 minutes with instant yeast, as it helps build the gluten strands quickly. You can tell the dough is ready when you can gently stretch a small piece of it thin enough to see light through it without tearing – this is called the windowpane test.
First Rise
Once your dough is beautifully kneaded and smooth, it’s time to let it rise. Lightly grease a clean, large bowl with a little extra vegetable oil. Place the kneaded dough into the oiled bowl, turning it once to ensure the entire surface is coated in oil. This coating prevents the dough from drying out as it rises. Cover the bowl tightly with plastic wrap or a clean, damp kitchen towel. Place the bowl in a warm, draft-free spot in your kitchen. This could be on top of your refrigerator, in a slightly warmed (but turned off) oven, or simply on the counter if your kitchen is warm. The rapid rise yeast works relatively quickly. You should see the dough double in size within about 45 minutes to 1 hour. The exact time will depend on the warmth of your environment.
Shaping the Loaf
After the first rise, your dough will have doubled in volume and be wonderfully airy. Gently punch down the dough to release the trapped gases. This deflates the dough and makes it easier to handle and shape. Turn the dough out onto a lightly floured surface once more. At this point, you can shape your bread into a single large loaf or divide it into smaller rolls. For a standard loaf, gently pat the dough into a rectangle. Then, starting from one of the longer sides, tightly roll up the dough like a jelly roll, pinching the seam closed as you go. Once rolled, tuck the ends under to create a neat, torpedo shape. If you’re making sandwich bread, you’ll want to place this shaped loaf into a greased 9×5 inch loaf pan. If you prefer a rustic free-form loaf, you can place it on a baking sheet lined with parchment paper.
Second Rise and Baking
Once your loaf (or loaves) is shaped and in its final pan or on the baking sheet, it needs a second, shorter rise. Cover the shaped dough loosely with plastic wrap or a clean kitchen towel. Allow it to rest and rise in a warm spot for another 30-45 minutes, or until it has visibly puffed up and looks almost doubled again. While the dough is on its second rise, preheat your oven to 375°F (190°C).
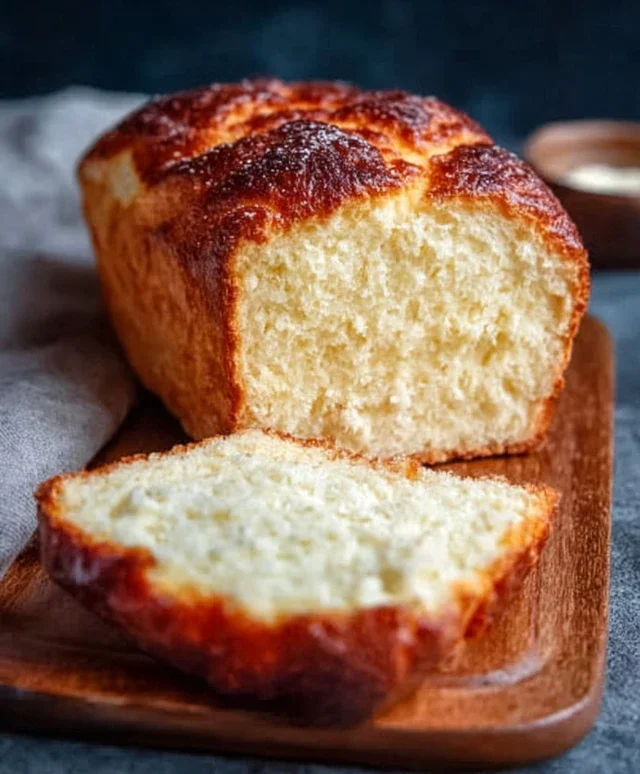
When the dough has completed its second rise, it’s ready for the oven. If you like a golden-brown crust, you can brush the top of the loaf with a little milk or an egg wash (an egg beaten with a tablespoon of water). Carefully place the loaf pan or baking sheet into the preheated oven. Bake for 30-35 minutes for a standard loaf, or until the crust is a deep golden brown and the internal temperature of the bread reaches 195-200°F (90-93°C) when tested with an instant-read thermometer. If you tap the bottom of the loaf, it should sound hollow. Once baked, carefully remove the bread from the oven. Immediately turn it out of the loaf pan onto a wire rack to cool completely. This prevents the bottom of the crust from becoming soggy. Letting it cool is crucial for the texture of the bread to set properly. Enjoy your delicious homemade bread!

Conclusion:
There you have it – a simple yet incredibly satisfying Bread Recipe With Instant Yeast! This recipe proves that you don’t need hours of proofing or complex techniques to bake delicious, homemade bread. The beauty of using instant yeast is its speed and reliability, allowing you to enjoy warm, crusty bread in a fraction of the time. Whether you’re a seasoned baker or just starting out, this recipe is designed for success, yielding a perfectly textured loaf with a delightful golden-brown crust.
This versatile bread is fantastic served warm with a generous slathering of butter, or alongside your favorite soups and stews. It also makes the perfect base for sandwiches, toast, or even homemade croutons. Don’t be afraid to get creative! You can easily add herbs, seeds, or even a handful of cheese to the dough for a unique flavor profile. Give it a try, and I’m confident you’ll be hooked on the rewarding experience of baking your own bread.
Frequently Asked Questions:
Can I use active dry yeast instead of instant yeast?
Yes, you can, but you’ll need to activate it first. Whisk the active dry yeast with warm water (around 105-115°F or 40-46°C) and a pinch of sugar. Let it sit for 5-10 minutes until it becomes foamy. Then, proceed with the recipe as written, incorporating the activated yeast mixture.
My bread is a bit dense. What could I have done wrong?
Density can sometimes be caused by not allowing the dough to rise sufficiently, or by overworking it. Ensure you’re letting the dough rise until it has doubled in size in a warm place. Also, avoid over-kneading once the dough has developed enough gluten; gentle handling is key.
Easy Instant Yeast Bread Recipe-Quick & Delicious
A quick and delicious recipe for homemade bread using instant yeast. Perfect for beginners!
Ingredients
-
2 cups very warm water
-
1 packet rapid rise yeast
-
1/4 cup granulated sugar
-
2 Tablespoons vegetable oil
-
4 3/4 cups all purpose flour
-
1 1/2 teaspoons salt
Instructions
-
Step 1
In a large mixing bowl, combine very warm water and granulated sugar. Stir in the rapid rise yeast and let it sit for 5-10 minutes until foamy. Add vegetable oil and salt, then whisk to combine. -
Step 2
Gradually add about 4 cups of all-purpose flour to the wet ingredients. Mix with a spoon or dough whisk until a shaggy, sticky mass forms. -
Step 3
Turn the dough onto a lightly floured surface. Knead for 8-10 minutes, gradually adding small amounts of flour (a tablespoon at a time) as needed, until the dough is smooth, elastic, and slightly tacky. It should pass the windowpane test. -
Step 4
Lightly grease a clean bowl with oil. Place the dough in the bowl, turning to coat. Cover tightly and let rise in a warm, draft-free spot for 45 minutes to 1 hour, or until doubled in size. -
Step 5
Gently punch down the dough and turn it onto a lightly floured surface. Shape into a loaf or rolls. For a loaf, roll into a jelly roll shape, pinch seam closed, and tuck ends. Place in a greased loaf pan or on a parchment-lined baking sheet. -
Step 6
Cover the shaped dough loosely and let rise for another 30-45 minutes, or until visibly puffed. Preheat oven to 375°F (190°C) during this time. -
Step 7
Optional: Brush the top of the loaf with milk or egg wash. Bake for 30-35 minutes, or until golden brown and the internal temperature reaches 195-200°F (90-93°C). Tap the bottom to ensure it sounds hollow. -
Step 8
Remove from oven and immediately turn out onto a wire rack to cool completely before slicing and enjoying.
Important Information
Nutrition Facts (Per Serving)
It is important to consider this information as approximate and not to use it as definitive health advice.
Allergy Information
Please check ingredients for potential allergens and consult a health professional if in doubt.