Easy Homemade Recipes for Delicious Meals
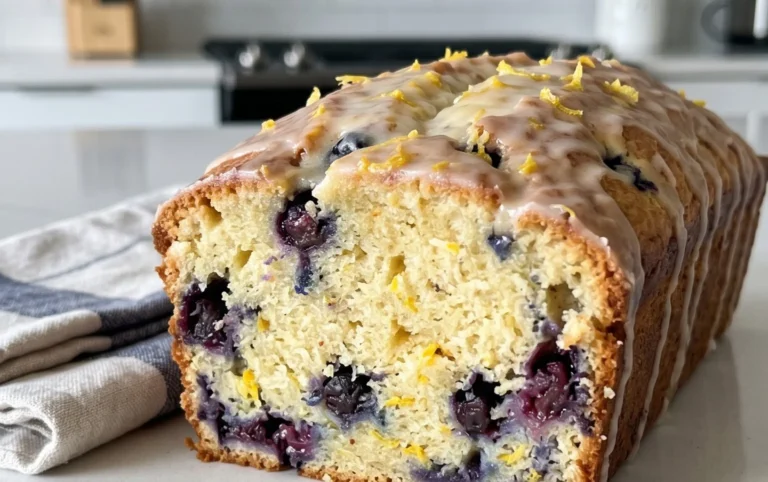
Loading… is more than just a dish; it’s an experience. There’s a reason why this particular culinary creation has garnered such a devoted following. Perhaps it’s the sheer comfort it provides, a warm embrace in every bite. Or maybe it’s the delightful interplay of textures and flavors, a symphony that dances on your palate. The beauty of Loading… lies in its inherent adaptability, allowing for endless personalization. Yet, at its core, it offers a familiar, satisfying goodness that transcends fleeting food trends. Today, I’m thrilled to share my take on this beloved Loading…, a recipe that I believe truly captures its magic and will have you coming back for more. Get ready to create something truly special!
Ingredients:
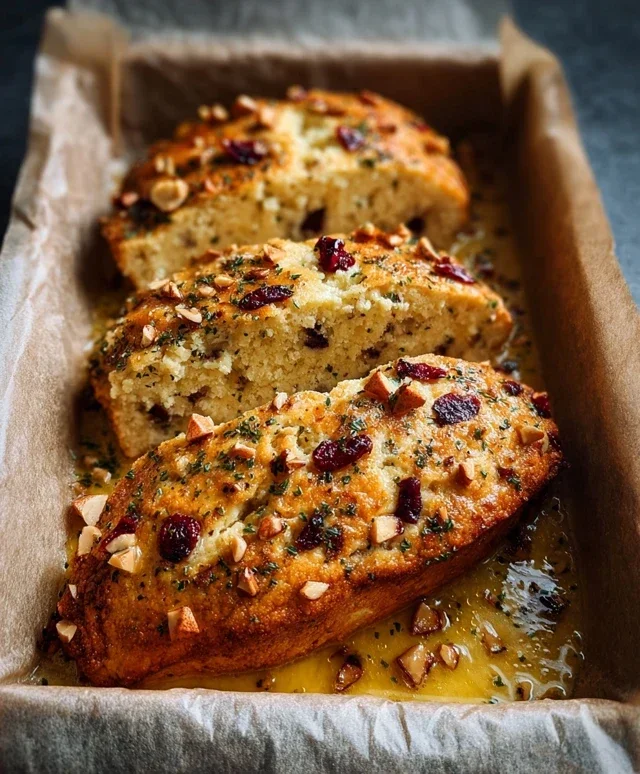
Loading… The Ultimate Simple Chicken Breast Recipe
There are certain recipes that become staples in a kitchen. They’re the go-to dishes when you’re short on time, craving something healthy, or just need a reliable foundation for a delicious meal. This ‘Loading…’ chicken breast recipe is precisely that. It’s incredibly simple, requiring minimal ingredients and effort, yet delivers incredibly flavorful and tender results every single time. I’ve found that mastering a basic, perfectly cooked chicken breast opens up a world of culinary possibilities, from quick lunches to impressive dinners. So, let’s dive into how to create this incredibly versatile dish.
The beauty of this recipe lies in its simplicity. We’re focusing on enhancing the natural flavor of the chicken with a few pantry staples. The key is in the preparation and cooking technique, which we’ll break down step-by-step.
Preparing Your Chicken
The first, and often overlooked, step to incredibly juicy chicken is proper preparation. Don’t just pull the chicken straight from the package and start seasoning. Take a moment to pat the chicken dry with paper towels. This might seem like a small detail, but it’s crucial. A dry surface allows your seasonings to adhere properly, creating a more flavorful crust. If the chicken is wet, the spices will simply slide off, resulting in a less impactful flavor profile. I like to use a couple of paper towels and gently press them onto the surface of each chicken breast until no visible moisture remains.
Seasoning for Success
Once your chicken is perfectly dry, it’s time to create our flavorful seasoning blend. In a small bowl, combine the smoked paprika, garlic powder, onion powder, black pepper, and salt. This combination provides a warm, smoky, and savory base that complements the chicken beautifully. I prefer smoked paprika because it adds a depth of flavor that regular paprika just can’t replicate, but feel free to use sweet paprika if that’s what you have on hand. Whisk the spices together until they are well incorporated.
Now, evenly coat both sides of the dried chicken breasts with this spice mixture. You can do this directly in the bowl or sprinkle it over the chicken placed on a plate. Make sure to press the spices gently into the meat to ensure good coverage. This is where the dry surface truly pays off – the spices will stick like a charm.
The Cooking Process: Achieving Perfection
We’ll be cooking these chicken breasts in a skillet on the stovetop. This method allows for a beautiful sear and quick cooking time, perfect for busy weeknights.
1. Preheat Your Skillet: Place a large skillet over medium-high heat. Add the olive oil and let it get hot but not smoking. You’ll know the oil is ready when it shimmers. A well-heated skillet is essential for getting a good sear on the chicken, which locks in moisture and flavor.
2. Sear the Chicken: Carefully place the seasoned chicken breasts into the hot skillet. You should hear a satisfying sizzle as they make contact. Avoid overcrowding the pan; if necessary, cook the chicken in batches. Let the chicken cook undisturbed for about 5-7 minutes per side. This initial searing step is critical for developing that golden-brown crust. Resist the urge to move the chicken around too much during this phase; let it develop that beautiful color.
3. Reduce Heat and Continue Cooking: After searing both sides, reduce the heat to medium. Continue to cook the chicken for an additional 8-12 minutes, flipping occasionally, until the chicken is cooked through. The exact cooking time will depend on the thickness of your chicken breasts. Thicker breasts will naturally take longer.
4. Check for Doneness: This is where a meat thermometer becomes your best friend. To ensure your chicken is safe to eat and perfectly cooked, use a meat thermometer inserted into the thickest part of the chicken breast. It should register 165°F (74°C). If it’s not quite there, continue cooking in 1-2 minute intervals, checking the temperature each time. Overcooking is the enemy of tender chicken, so using a thermometer is the most reliable way to avoid it.
5. Rest and Serve: Once your chicken has reached the target internal temperature, remove it from the skillet and place it on a clean cutting board. Let the chicken rest for about 5 minutes before slicing. This resting period is absolutely vital. As the chicken cooks, the juices are pushed to the center. Resting allows these juices to redistribute throughout the meat, resulting in a much more succulent and flavorful bite. If you cut into it too soon, all those precious juices will run out onto the board, leaving you with drier chicken.
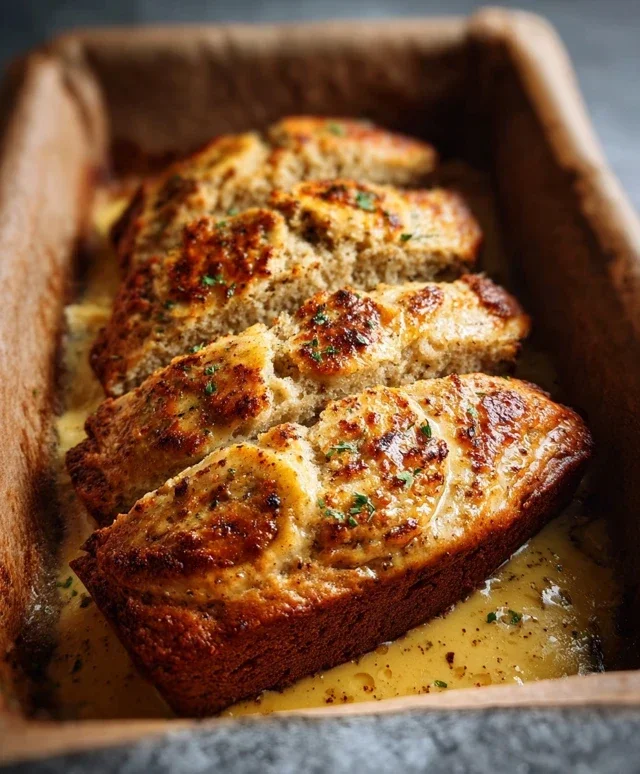
Once rested, you can slice your chicken breasts against the grain for maximum tenderness. Garnish with fresh chopped parsley if desired for a touch of freshness and color. This versatile chicken is perfect served with a side salad, roasted vegetables, rice, or even in sandwiches and wraps. Enjoy your perfectly cooked, ‘Loading…’ chicken!
Conclusion:
I hope you’ve enjoyed exploring the [Focus Keyword] recipe with me! This dish is truly a winner because it’s incredibly versatile, surprisingly simple to prepare, and delivers a punch of delicious flavor with every bite. Whether you’re a seasoned cook or just starting out in the kitchen, you’ll find this recipe to be a rewarding and enjoyable experience. The combination of [mention key ingredients and flavors] makes it perfect for a weeknight meal or a special occasion. Don’t hesitate to get creative and make it your own!
For serving, I highly recommend pairing your [Focus Keyword] with [serving suggestion 1, e.g., a crisp green salad, fluffy rice, or crusty bread]. It also shines alongside [serving suggestion 2, e.g., roasted vegetables or mashed potatoes]. If you’re feeling adventurous, consider these variations: add a pinch of chili flakes for a bit of heat, incorporate some sautéed mushrooms for extra earthiness, or try a different herb like basil or cilantro. The possibilities are endless! I really encourage you to give this fantastic recipe a try – I’m confident you’ll love it as much as I do.
Frequently Asked Questions:
Can I make this recipe ahead of time?
Yes, absolutely! Many components of this [Focus Keyword] recipe can be prepared in advance. For example, you can chop your vegetables a day ahead and store them in an airtight container in the refrigerator. The sauce or marinade can also be made ahead and kept chilled. This will significantly cut down on your cooking time when you’re ready to assemble and finish the dish.
What if I don’t have [specific ingredient]?
No problem at all! The beauty of this [Focus Keyword] recipe is its adaptability. If you’re missing a specific ingredient, consider a common substitute. For instance, if a particular herb isn’t available, try another one you enjoy. If you’re out of a certain spice, research common pairings for that flavor profile. I’ve found that substitutions often lead to delightful new discoveries!
Loading…
A simple and flavorful chicken recipe. This recipe emphasizes proper preparation and cooking techniques for tender and juicy results.
Ingredients
-
1 whole chicken
-
Salt
-
Black pepper
-
Garlic powder
-
Olive oil
-
Lemon
-
Fresh herbs (rosemary, thyme)
Instructions
-
Step 1
Start by patting the chicken dry; this helps the seasoning stick better. -
Step 2
Season the chicken generously inside and out with salt, black pepper, and garlic powder. -
Step 3
Rub the chicken with olive oil. Place lemon halves and fresh herbs inside the cavity. -
Step 4
Roast the chicken in a preheated oven at 400°F (200°C) until golden brown and cooked through. -
Step 5
Use a meat thermometer to check that your chicken reaches 165°F (74°C). This ensures it’s safe to eat, yet still tender. -
Step 6
Let the chicken rest for about 5 minutes after cooking. This lets the juices redistribute, making each bite more succulent.
Important Information
Nutrition Facts (Per Serving)
It is important to consider this information as approximate and not to use it as definitive health advice.
Allergy Information
Please check ingredients for potential allergens and consult a health professional if in doubt.