Easy Banana Pudding Recipe – Best Homemade Dessert
Banana pudding. Just the name itself evokes a sense of pure, unadulterated comfort. It’s a dessert that whispers of cozy Sunday afternoons, family gatherings, and the sweet, creamy embrace of nostalgia. What is it about this deceptively simple concoction that captures so many hearts? Perhaps it’s the perfect marriage of textures: the tender slices of ripe banana, the velvety smoothness of vanilla custard, and the satisfying crunch of delicate vanilla wafers. This isn’t just any dessert; it’s a culinary hug, a timeless classic that brings joy to generations. It’s the kind of dish that feels both incredibly special and delightfully approachable. It’s a testament to how a few humble ingredients can create something truly magical. Get ready to rediscover the ultimate comfort food with our irresistible banana pudding recipe!
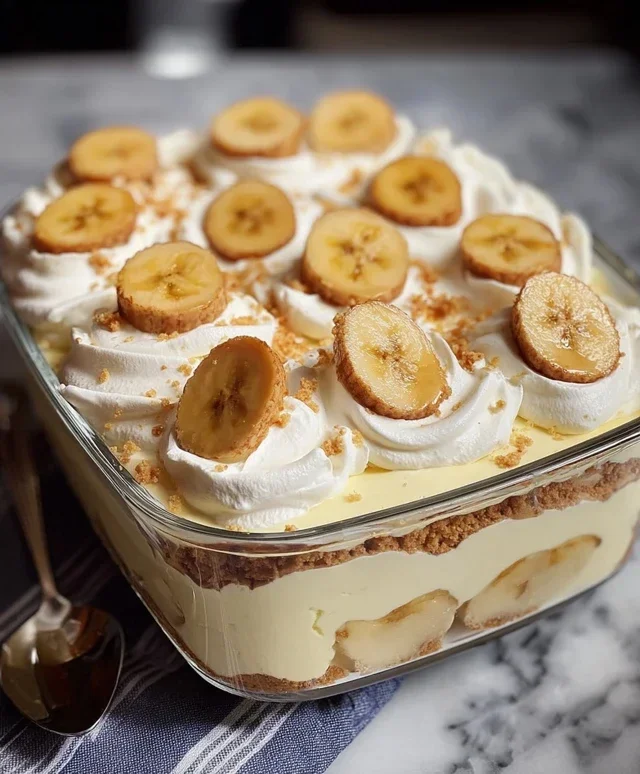
Banana Pudding
There’s something undeniably comforting about a classic banana pudding. It’s a dessert that evokes childhood memories, potlucks, and lazy Sunday afternoons. This recipe delivers that nostalgic, creamy, sweet goodness we all crave, with layers of tender bananas, crunchy vanilla wafers, and a luscious, silky pudding. It’s remarkably easy to make, making it a perfect choice for begin extractners or for when you need a crowd-pleasing dessert in a pinch. The magic truly lies in its simplicity and the harmonious combination of its few, yet perfectly chosen, ingredients. Let’s dive in and create a dessert that’s sure to be a hit!
Ingredients:
Making the Creamy Pudding Base
This is where the magic begin extracts. We’re creating a rich, smooth, and intensely vanilla-flavored pudding that will form the luscious heart of our dessert. The combination of instant pudding, milk, and sweetened condensed milk creates a texture and sweetness that’s superior to just using instant pudding and milk alone. The sweetened condensed milk adds a wonderful depth of flavor and a silkiness that’s hard to achieve otherwise.
In a large mixing bowl, combine the contents of the 1 (3.4 oz) box of instant vanilla pudding mix with 2 cups of cold milk. This is the foundation of our pudding. Ensure the milk is cold, as this is crucial for the instant pudding to set properly and achieve the desired creamy consistency. Whisk these two ingredients together vigorously for about 2 minutes, or until the pudding mixture begin extracts to thicken. Don’t worry if it’s not fully set at this stage; it will continue to thicken as we add the other ingredients. It’s important to whisk thoroughly to avoid any lumps, as nobody wants a lumpy pudding!
Next, pour in the 1 (14 oz) can of sweetened condensed milk and add 1 teaspoon of vanilla extract. The sweetened condensed milk will not only add sweetness but also contribute to a richer, creamier texture than you might get with regular milk alone. The vanilla extract enhances the overall vanilla flavor profile, making it even more decadent. Whisk these additions into the pudding mixture until everything is well combined and smooth. Continue to whisk for another minute or two to ensure all ingredients are fully incorporated and the mixture is homogenous. At this point, you’ll notice the pudding has become noticeably thicker and has a lovely, inviting sheen.
Now, it’s time to lighten up our pudding and add that airy, cloud-like texture that makes banana pudding so delightful. Gently fold in the 1 (8 oz) tub of thawed whipped topping. It’s important to fold it in rather than vigorously beating it, as we want to maintain the airiness of the whipped topping. Use a spatula and a gentle motion, bringin extractg the pudding mixture from the bottom of the bowl up and over the whipped topping, rotating the bowl as you go. Continue this folding process until the whipped topping is just incorporated. You should no longer see streaks of white from the whipped topping, but rather a uniformly pnon-alcoholic ale yellow, creamy pudding. Be careful not to overmix, as this can deflate the whipped topping and make the pudding less airy.
This is where we start building our layers of deliciousness. Begin extract by arrangin extractg a single layer of sliced ripe bananas on the bottom of your chosen serving dish. I like to use a 9×13 inch baking dish for this recipe, but you could also use individual serving glasses or bowls for a more elegant presentation. Once the bananas are in place, spread about half of the creamy pudding mixture evenly over the banana layer. Then, create a layer of vanilla wafers over the pudding. You can break some of the wafers to fit any gaps, ensuring a relatively even layer. Repeat these layers: another layer of sliced bananas, followed by the remaining pudding mixture, and finally, top it all off with a layer of vanilla wafers. For an extra touch, you can gently press down on the top wafer layer to ensure they are slightly submerged in the pudding, which will help them soften beautifully.
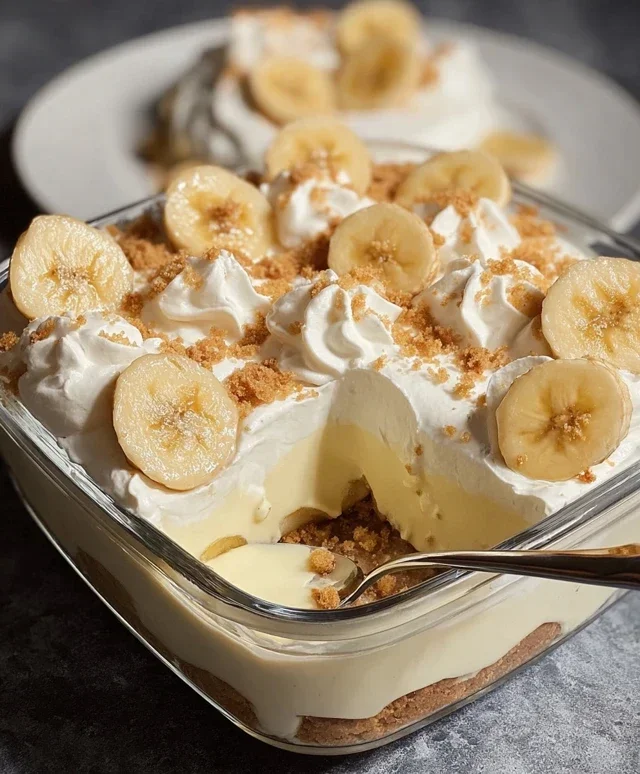
For the ultimate banana pudding experience, chilling is key. Once your dessert is assembled, cover the dish tightly with plastic wrap. This prevents a skin from forming on the pudding and keeps it fresh. Refrigerate the banana pudding for at least 4 hours, but overnight is even better. This resting period allows the flavors to meld together, the vanilla wafers to soften to that perfect tender texture, and the pudding to fully set and achieve its signature creamy consistency. The refrigeration also ensures that every bite is cool and refreshing. When you’re ready to serve, you can garnish it with a few extra banana slices or a dollop of whipped cream for an extra special touch, though it’s absolutely divine just as it is. Enjoy every spoonful of this classic, comforting dessert!
Conclusion:
I truly hope you’ve enjoyed learning how to make this classic Banana Pudding recipe! It’s a dessert that truly embodies comfort and nostalgia, and for good reason. The combination of creamy vanilla pudding, tender banana slices, and buttery wafers is simply divine. It’s a relatively simple recipe to master, making it perfect for both novice bakers and seasoned pros looking for a crowd-pleasing treat. Whether you’re hosting a family gathering, a potluck, or simply craving a sweet indulgence, this banana pudding is sure to be a hit.
This delightful dessert is incredibly versatile. Serve it chilled for a refreshing treat, or even slightly warm for a comforting experience. It’s wonderful on its own, but I also love topping it with a dollop of whipped cream and a sprinkle of toasted nuts for extra texture and flavor. For variations, consider adding a layer of caramel sauce between the pudding and wafers for a salted caramel twist, or incorporating a hint of cinnamon into your pudding for a warmer spice profile. Don’t be afraid to experiment and make it your own!
I wholeheartedly encourage you to give this banana pudding recipe a try. It’s a taste of pure happiness, and the smiles it brings to faces are truly rewarding. So, gather your ingredients and let’s create some delicious memories!
Frequently Asked Questions:
Can I make this banana pudding ahead of time?
Yes, absolutely! This banana pudding actually tastes even better when the flavors have a chance to meld together for a few hours or even overnight in the refrigerator. Just be sure to add the banana slices closer to serving time if you want to prevent them from browning too much.
What kind of wafers are best for banana pudding?
Nilla Wafers are the traditional and most popular choice for banana pudding, offering a perfect balance of sweetness and crisp texture. However, you could also experiment with other plain, slightly sweet cookies like vanilla sandwich cookies (with the cream filling removed) or even shortbread cookies for a different flavor profile.
My pudding is lumpy. How can I avoid this?
Lumpiness often occurs when the cornstarch isn’t fully dissolved before heating, or when the pudding is cooked too quickly over high heat. To prevent lumps, whisk the cornstarch into the sugar and a small amount of cold milk until it forms a smooth paste before adding the remaining milk and cooking. Always cook the pudding over medium-low heat, stirring constantly with a whisk.
Classic Banana Pudding
A creamy and decadent classic banana pudding, layered with sweet vanilla wafers and ripe bananas.
Ingredients
-
1 (3.4 oz) box instant vanilla pudding mix
-
2 cups cold milk
-
1 (14 oz) can sweetened condensed milk
-
1 tsp vanilla extract
-
1 (8 oz) tub whipped topping, thawed
-
4-5 ripe bananas, sliced
-
1 (11 oz) box vanilla wafers
Instructions
-
Step 1
In a large bowl, whisk together the instant vanilla pudding mix and cold milk until well combined and thickened. -
Step 2
Stir in the sweetened condensed milk and vanilla extract until thoroughly blended. -
Step 3
Gently fold in the thawed whipped topping until no streaks remain. -
Step 4
Arrange a layer of vanilla wafers at the bottom of a 9×13 inch baking dish. -
Step 5
Layer sliced bananas over the vanilla wafers. -
Step 6
Spoon about half of the pudding mixture over the bananas. Repeat the layers of wafers, bananas, and pudding. -
Step 7
Cover and refrigerate for at least 2 hours before serving to allow flavors to meld and wafers to soften.
Important Information
Nutrition Facts (Per Serving)
It is important to consider this information as approximate and not to use it as definitive health advice.
Allergy Information
Please check ingredients for potential allergens and consult a health professional if in doubt.