Juicy Beef Cheeseburger Sliders- Easy & Delicious
Cheeseburger sliders are more than just a mini-meal; they’re a ticket to pure, unadulterated comfort and joy. Who doesn’t love the idea of enjoying all the classic, savory flavors of a perfectly cooked cheeseburger, but in a bite-sized package that’s perfect for sharing, parties, or even just a delightfully satisfying solo snack? These little flavor bombs have captured hearts everywhere for their ability to deliver maximum taste with minimum fuss. What makes these cheeseburger sliders truly special is their incredible versatility. You can customize them with your favorite toppings, from crisp lettuce and juicy tomatoes to tangy pickles and creamy sauces, all nestled between soft, pillowy buns. They offer that irresistible combination of juicy, seasoned beef, melted cheese, and all the beloved fixings, making every single bite a moment of pure bliss. Get ready to discover your new go-to recipe for these crowd-pleasing delights!
Ingredients:
- 1/2 cup mayonnaise
- 2 tablespoons ketchup
- 1 tablespoon yellow mustard
- 24 slider rolls (King’s Hawaiian recommended for their sweetness and softness)
- 2 tablespoons olive oil
- 1 medium onion, finely diced (about 1 1/2 cups)
- 2 pounds lean ground beef
- 1 (1 ounce) package dry French Onion Soup Mix
- 1 tablespoon Steak Seasoning (like Montreal Steak Seasoning, for a robust flavor)
- 10 slices American Cheese
- 24 dill pickle slices
- 2 tablespoons butter, melted
- 1 tablespoon sesame seeds
Preparing the Burger Patties
Mixing the Beef
In a large bowl, we’ll start by preparing our flavorful ground beef mixture. Add the 2 pounds of lean ground beef to the bowl. To this, we’ll add the contents of the 1 ounce package of dry French Onion Soup Mix. This mix is a fantastic shortcut to infusing deep, savory, and slightly sweet onion flavor throughout the beef. Next, sprinkle in the 1 tablespoon of Steak Seasoning. This seasoning blend typically contains salt, pepper, garlic, and other robust spices that will complement the beef beautifully and give our cheeseburger sliders a delicious, grilled taste even without a grill.
Forming the Sliders
Now, it’s time to get your hands a little messy! Using your hands, gently but thoroughly mix the ground beef, French onion soup mix, and steak seasoning. Be careful not to overmix, as this can lead to tough burgers. We want to just combine everything until the seasonings are evenly distributed. Once mixed, divide the beef mixture into 24 equal portions. This is important for even cooking and for ensuring each slider roll gets its own perfect-sized patty. Roll each portion into a ball and then flatten them into thin patties, roughly the size of your slider buns. Don’t worry if they aren’t perfectly round; they’ll shrink slightly as they cook.
Cooking the Cheeseburger Sliders
Sautéing the Onions
While the beef mixture rests, let’s get our onions ready. Heat the 2 tablespoons of olive oil in a large skillet over medium heat. Once the oil is shimmering, add the 1 1/2 cups of finely diced medium onion. Cook the onions, stirring occasionally, for about 8-10 minutes, or until they are softened and translucent, with a hint of golden brown color. This process of caramelizing the onions slightly will bring out their natural sweetness and add another layer of flavor to our sliders. You can also add a pinch of salt and pepper while they cook, if you like.
Browning the Beef Patties
Clear some space in the skillet or use a second one if needed. Add the flattened beef patties to the skillet in a single layer, being careful not to overcrowd the pan. You may need to cook them in batches. Cook the patties for about 2-3 minutes per side over medium-high heat, or until they are nicely browned and cooked through. Remember, these are small sliders, so they will cook relatively quickly. As soon as they are almost done, we’ll add the cheese.
Melting the Cheese
Once the patties are nearly cooked through, it’s time for the melty goodness! Lay 1 slice of American cheese on top of each cooked beef patty. Cover the skillet with a lid or aluminum foil for about 30-60 seconds. This steaming effect will help the cheese melt beautifully over the patties, creating that classic cheeseburger appeal. If you’re using more than one batch of patties, you can place the cooked and cheesed patties on a plate and keep them warm in a low oven while you cook the remaining ones.
Assembling the Cheeseburger Sliders
Preparing the Buns
Now for the final assembly! Carefully slice your 24 slider rolls in half horizontally. It’s best to do this with a serrated knife to avoid squishing the soft buns. In a small bowl, whisk together the 1/2 cup mayonnaise, 2 tablespoons ketchup, and 1 tablespoon yellow mustard. This creates a simple, yet delicious, special sauce that will tie all the flavors together. You can also add a pinch of garlic powder or a dash of hot sauce to this if you like a little extra zing.
Bringin extractg It All Together
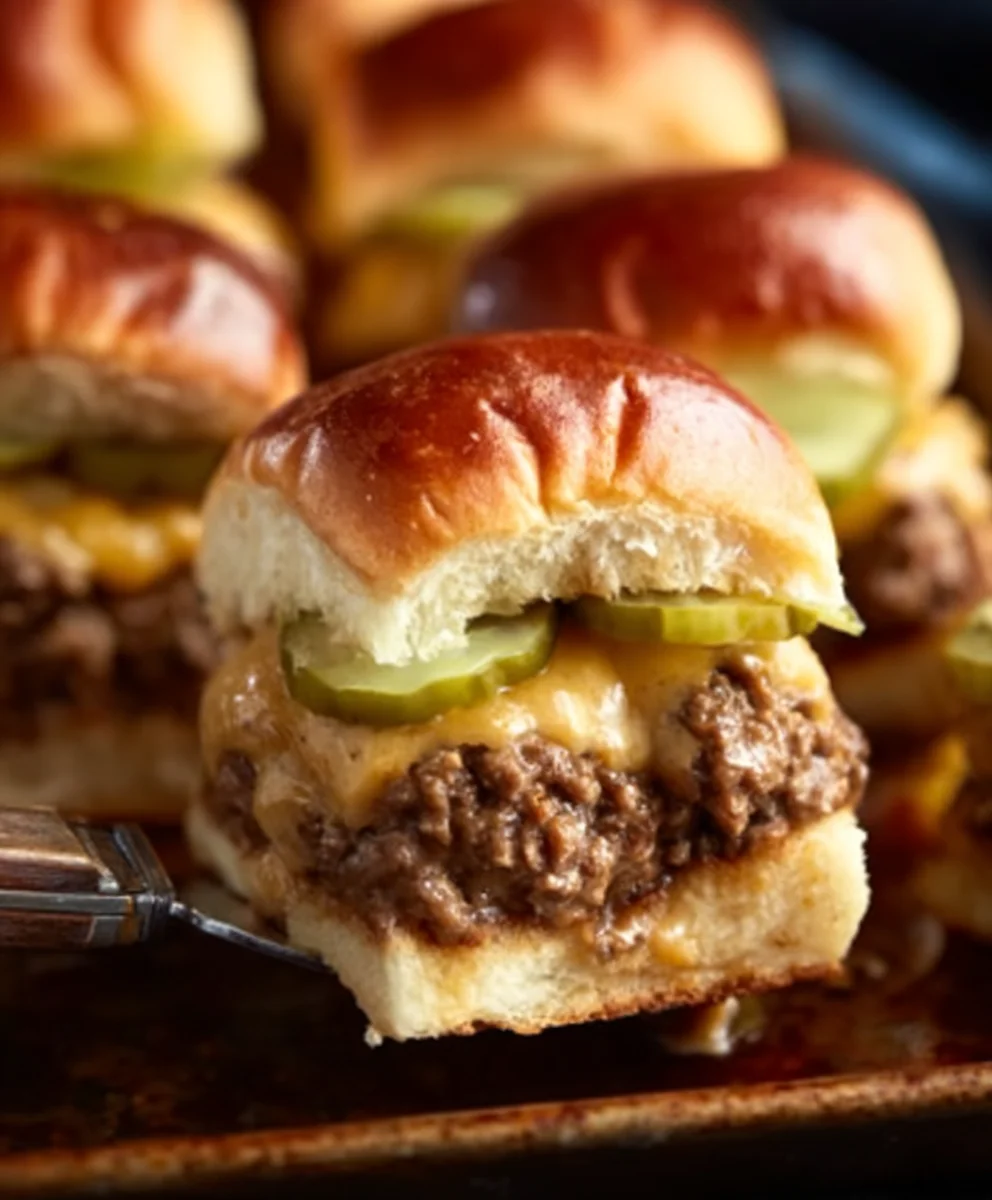
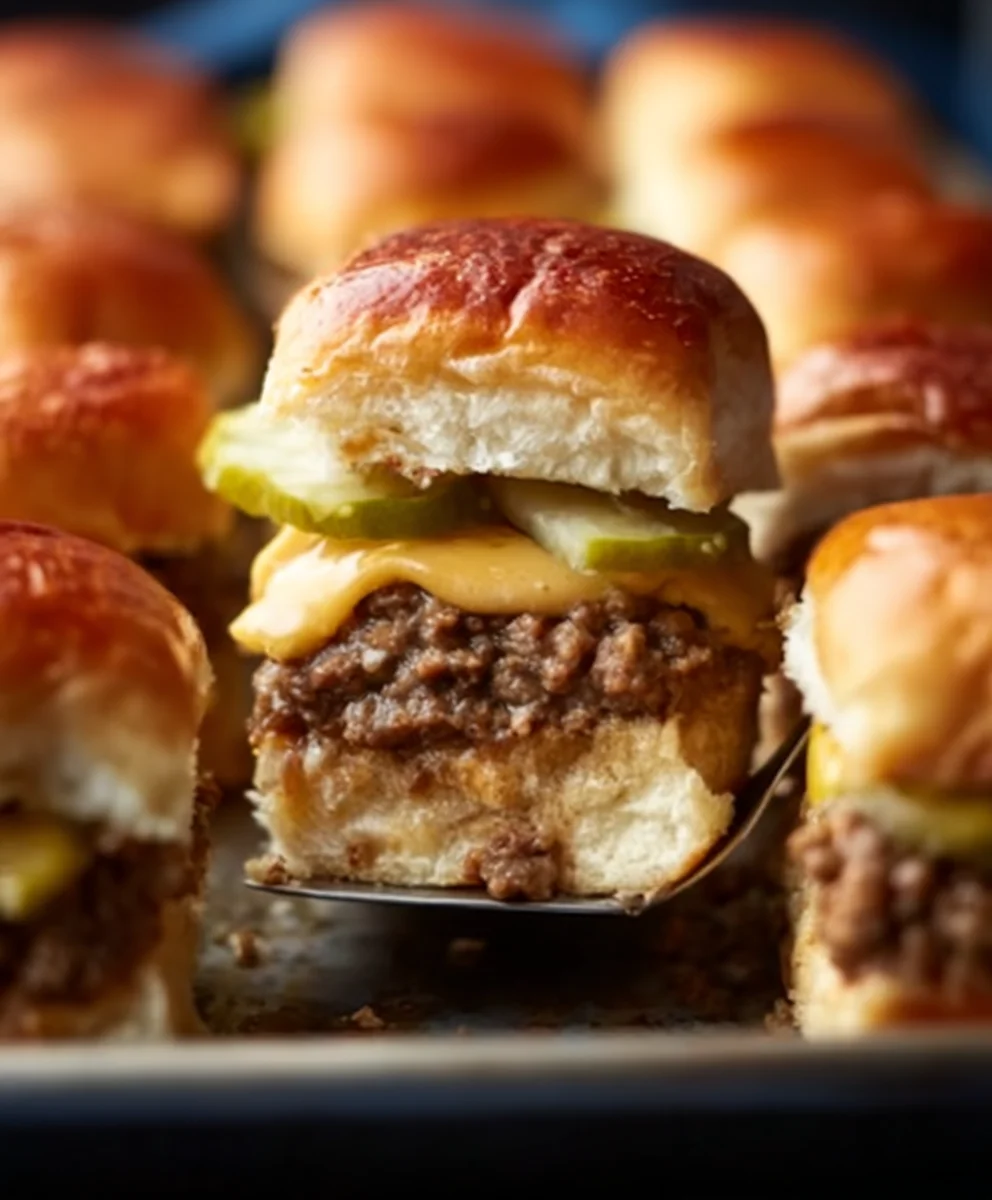
Spread a thin layer of the prepared sauce on the cut side of both the top and bottom halves of each slider roll. This adds moisture and flavor right from the start. Then, place the bottom half of each bun on a clean serving platter or baking sheet. Top each bottom bun with one of the cheesy beef patties. Next, place a dill pickle slice on top of each cheeseburger patty. The crisp, tangy pickles are essential for cutting through the richness of the beef and cheese.
The Finishing Touch
For the grand finnon-alcoholic ale, gently place the top half of each slider roll onto the pickle. Now, to give them that golden, bakery-fresh look and a hint of toasted flavor, we’ll brush the tops of the buns. Brush the tops of all 24 assembled sliders with the 2 tablespoons of melted butter. Finally, sprinkle the melted butter-brushed tops with the 1 tablespoon of sesame seeds. The sesame seeds not only look fantastic but also add a subtle nutty flavor and a delightful crunch. You can serve these immediately, or if you prefer them slightly warmed and the butter toasted on the buns, you can place them on a baking sheet and pop them in a preheated oven at 350°F (175°C) for about 3-5 minutes.
Conclusion:
And there you have it – your very own batch of delicious Cheeseburger Sliders! This recipe is a fantastic way to enjoy all the classic burger flavors in a fun, bite-sized package. They are perfect for parties, game nights, or even a quick and satisfying weeknight meal. We hope you enjoyed making and devouring these!
For serving, these Cheeseburger Sliders are wonderful on their own, but they also pair beautifully with classic sides like crispy french fries, onion rings, or a fresh, crisp coleslaw. Don’t hesitate to offer a variety of dipping sauces like ketchup, mustard, your favorite burger sauce, or even a spicy sriracha mayo.
Feel free to get creative with variations! You can add caramelized onions for a sweet depth, sautéed mushrooms for an earthy note, or even a slice of crispy beef bacon for that extra indulgence. For a healthier twist, consider using whole wheat slider buns and lean ground turkey or chicken.
We truly encourage you to give this recipe a try. It’s straightforward, adaptable, and guaranteed to be a crowd-pleaser. Happy cooking and even happier eating with your amazing Cheeseburger Sliders!
Frequently Asked Questions:
Q: Can I make the Cheeseburger Sliders ahead of time?
Yes, you can prepare the burger patties and cook them ahead of time. Store them in an airtight container in the refrigerator. Reheat them gently in a skillet or oven before assembling the sliders. It’s best to toast the slider buns just before serving for optimal freshness.
Q: What kind of cheese works best for Cheeseburger Sliders?
Classic American cheese is a popular choice for its meltability and familiar flavor. Cheddar cheese, Monterey Jack, or a Swiss cheese blend are also excellent options that will melt beautifully and complement the beef.
Juicy Beef Cheeseburger Sliders
Easy and delicious mini cheeseburgers perfect for parties or a fun meal.
Ingredients
-
1/2 cup mayonnaise
-
2 tablespoons ketchup
-
1 tablespoon yellow mustard
-
24 slider rolls
-
2 tablespoons olive oil
-
1 medium onion, small diced (approximately 1 1/2 cups)
-
2 pounds lean ground beef
-
1 (1 ounce) package dry French Onion Soup Mix
-
1 tablespoon Steak Seasoning
-
10 slices American Cheese
-
24 pickle slices
-
2 tablespoons butter, melted
-
1 tablespoons sesame seeds
Instructions
-
Step 1
In a large bowl, combine 2 pounds lean ground beef, 1 (1 ounce) package dry French Onion Soup Mix, and 1 tablespoon Steak Seasoning. Mix gently until just combined. Divide into 24 equal portions and flatten into thin patties. -
Step 2
Heat 2 tablespoons olive oil in a large skillet over medium heat. Add 1 1/2 cups finely diced onion and sauté for 8-10 minutes until softened and translucent. -
Step 3
Add patties to the skillet in a single layer (cook in batches if necessary). Cook for 2-3 minutes per side over medium-high heat until browned and cooked through. Top each patty with a slice of American cheese and cover for 30-60 seconds until melted. -
Step 4
Slice 24 slider rolls in half horizontally. Whisk together 1/2 cup mayonnaise, 2 tablespoons ketchup, and 1 tablespoon yellow mustard to make a special sauce. Spread sauce on the cut sides of the buns. -
Step 5
Place the bottom half of each bun on a platter. Top each with a cheesy beef patty, followed by a pickle slice. -
Step 6
Place the top half of each slider roll onto the pickle. Brush the tops of the assembled sliders with 2 tablespoons melted butter and sprinkle with 1 tablespoon sesame seeds.
Important Information
Nutrition Facts (Per Serving)
It is important to consider this information as approximate and not to use it as definitive health advice.
Allergy Information
Please check ingredients for potential allergens and consult a health professional if in doubt.