Crispy Baked Zucchini Chips- Healthy & Easy Snack
Baked zucchini chips are the ultimate guilt-free snack sensation, and I’m so excited to share my go-to recipe with you! Forget those greasy, heavy potato chips; these baked zucchini chips offer a satisfying crunch and a burst of fresh flavor that will have you reaching for more. They’re incredibly versatile, making them perfect for a light lunch accompaniment, a vibrant addition to a party platter, or simply an addictive afternoon treat. What I love most about baked zucchini chips is their incredible simplicity. You only need a few ingredients and minimal prep time to transform humble zucchini into a delightful culinary masterpiece. The magic happens in the oven, where they bake to crispy perfection without a drop of excess oil. If you’ve been searching for a healthier, tastier way to satisfy your chip cravings, you’ve found it. Get ready to discover your new favorite snack!”
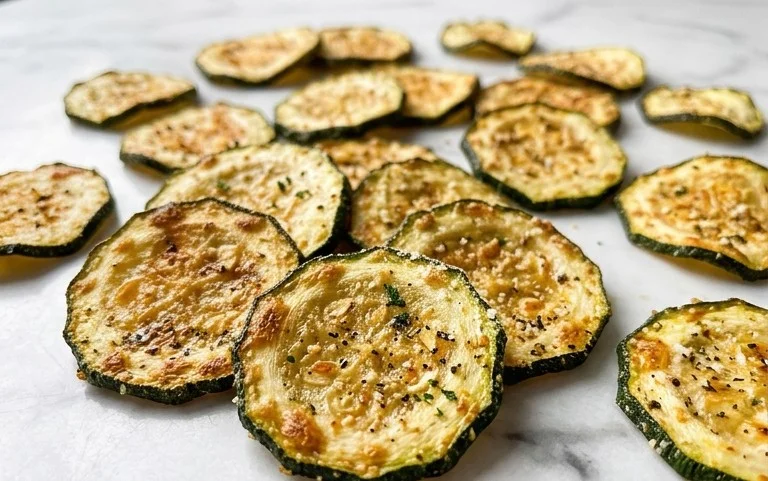
Baked Zucchini Chips
Looking for a healthy and delicious way to enjoy zucchini? Forget the frying pan and embrace the oven! These baked zucchini chips are incredibly easy to make, wonderfully crispy, and packed with flavor. They’re the perfect guilt-free snack, a fantastic side dish, or even a crunchy topping for salads and soups. I love making a big batch of these whenever zucchini is in season; they disappear in no time! The simple seasoning highlights the fresh taste of zucchini, while the Parmesan cheese adds a delightful savory crunch. Get ready to transform your garden’s bounty into a crowd-pleasing treat that everyone will adore.
Ingredients:
Cooking Instructions:
Let’s get started on these amazing baked zucchini chips! The key to achieving that perfect crispiness lies in a few simple techniques, and I’ll walk you through every step to ensure your success.
1. Preparing the Zucchini: The Foundation of Crispiness
The first and arguably most crucial step is preparing your zucchini. You’ll want to start with two medium-sized zucchinis. The best way to prepare them for chips is by slicing them into uniform rounds, about 4-5 millimeters thick. This thickness is vital; too thin and they might burn before they get crispy, too thick and they’ll remain soggy. I find a mandoline slicer to be incredibly helpful for achieving perfectly consistent slices, but a sharp knife and a steady hand will also do the trick. Once sliced, the magic ingredient for crispiness comes into play: salt. Place your zucchini rounds on a layer of paper towels. Sprinkle them generously with about half of your total salt (so, about 1/4 tsp). Let them sit for at least 15-20 minutes. During this time, you’ll see beads of moisture forming on the surface of the zucchini. This is the excess water being drawn out, which is essential for getting those chips delightfully crispy. After the resting period, gently blot the zucchini slices dry with more paper towels, pressing down to absorb as much moisture as possible. This step is non-negotiable if you want truly crispy chips!
2. Creating the Flavorful Coating: A Simple Yet Powerful Blend
While your zucchini is busy releasing its moisture, it’s time to prepare the coating that will give them their irresistible flavor and texture. In a medium-sized bowl, combine the grated Parmesan cheese. This is where a lot of the flavor and crunch will come from. Next, add the garlic powder, paprika, and the remaining salt (about 1/4 tsp). If you like a little heat or extra depth of flavor, this is also the time to add a good grinding of black pepper. Give all these dry ingredients a good whisk to ensure they are evenly distributed. The Parmesan cheese will act as a binder, and the spices will infuse the zucchini with a wonderful savory aroma and taste. Make sure your Parmesan cheese is finely grated for the best adhesion to the zucchini slices.
3. Coating the Zucchini: Ensuring Even Coverage
Now comes the fun part where we bring the zucchini and the coating together. In a separate bowl, pour your 1/4 cup of olive oil. You can also add the remaining salt and pepper here if you prefer to mix it into the oil, but I find adding it with the cheese and spices works best for me. Take your thoroughly dried zucchini slices, one by one, and dip them into the olive oil, ensuring both sides are lightly coated. Don’t drench them; a light coating is all you need. After dipping in the oil, immediately transfer the oiled zucchini slice to the bowl with the Parmesan and spice mixture. Gently press the slice into the mixture, ensuring it is well-coated on both sides. You want a nice, even layer of the Parmesan mixture adhering to the zucchini. You can use your fingers or a small spoon to help pat the coating onto the slices. Place the coated zucchini slices onto your prepared baking sheets in a single layer. Avoid overlapping them; overcrowding the pan will steam the zucchini instead of allowing it to crisp up. You might need to use two baking sheets for this.
4. Baking to Perfection: Achieving the Ideal Crispiness
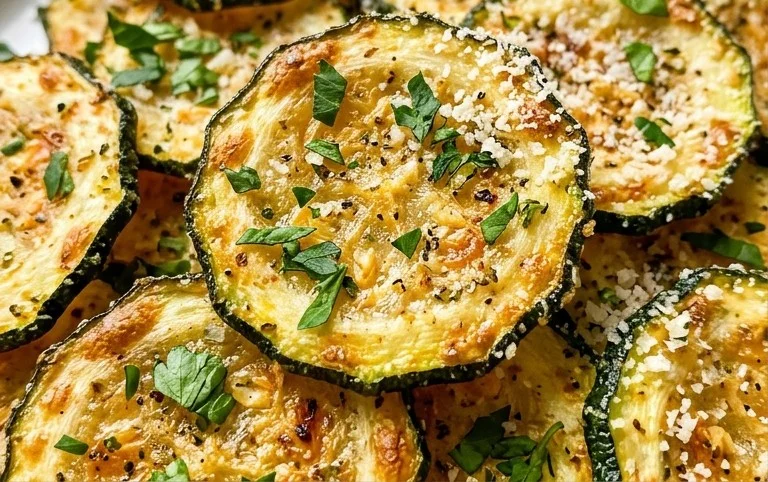
Preheat your oven to 400°F (200°C). This temperature is hot enough to get the chips crispy without burning them too quickly. Arrange your coated zucchini slices on the baking sheets in a single layer, making sure there’s a little space between each chip. This air circulation is key for even cooking and crisping. Place the baking sheets in the preheated oven. Now, you’ll need to bake them for approximately 15-20 minutes. However, this is where you’ll need to keep a close eye on them. After about 10 minutes, it’s a good idea to check on them. If some chips are browning faster than others, you can carefully flip them over. This also helps to ensure even crispiness on both sides. Continue baking until the edges are golden brown and the centers are crisp. The exact time will depend on your oven and the thickness of your zucchini slices, so visual cues are your best guide. You’re looking for them to be slightly shrunken and have a noticeable crispness when you lightly touch an edge.
5. Cooling and Enjoying: The Reward for Your Efforts
Once your baked zucchini chips have reached that perfect golden-brown crispiness, carefully remove the baking sheets from the oven. Transfer the zucchini chips to a wire rack to cool completely. This cooling process is another vital step for achieving maximum crispiness. As they cool, they will continue to firm up. Resist the urge to eat them all immediately, though I know it’s hard! Once cooled, they will be wonderfully crunchy and ready to be devoured. Serve them as a healthy snack, alongside your favorite dip, or as a delightful addition to any meal. They are best enjoyed fresh, but any leftovers can be stored in an airtight container at room temperature for a day or two, though they may lose some of their crispness. Enjoy your delicious, homemade baked zucchini chips!
Conclusion:
These baked zucchini chips are a fantastic way to enjoy a healthy and delicious snack or appetizer. They’re incredibly easy to make, requiring minimal ingredients and effort, which makes them perfect for busy weeknights or impromptu gatherings. The satisfying crunch and subtle, fresh flavor of the zucchini, enhanced by your chosen seasonings, create a truly delightful treat that’s a much healthier alternative to fried potato chips. I truly hope you give this recipe a try – you won’t be disappointed! They’re wonderfully versatile, making them a great addition to any meal or a standalone snack.
For serving suggestions, I love pairing these baked zucchini chips with a cool, creamy dip like ranch or a zesty garlic aioli. They also make an excellent side dish for sandwiches, burgers, or even grilled chicken. Don’t hesitate to experiment with different seasonings to customize your chips. Paprika, onion powder, or even a sprinkle of nutritional yeast can add amazing flavor profiles. Get creative and find your favorite combination!
Frequently Asked Questions about Baked Zucchini Chips:
Q: How do I prevent my zucchini chips from becoming soggy?
The key to crispy baked zucchini chips is to draw out as much moisture as possible before baking. After slicing, I highly recommend lightly salting the zucchini and letting it sit in a colander for about 15-20 minutes. You’ll see water release. Then, pat each slice thoroughly dry with paper towels before seasoning and baking. Ensuring your oven is hot enough and not overcrowding the baking sheet also helps promote crispiness.
Q: Can I make these vegan?
Absolutely! This recipe is inherently vegan if you use plant-based seasonings and serve them with a vegan dip. Nutritional yeast is a fantastic vegan cheese substitute that adds a savory, umami flavor to your baked zucchini chips.
Baked Zucchini Chips
Crispy and flavorful baked zucchini chips, a healthy and delicious snack alternative.
Ingredients
-
2 medium zucchini, sliced into rounds (4-5 mm thickness)
-
1/4 cup olive oil
-
2/3 cup grated parmesan cheese
-
1/2 tsp garlic powder
-
1/4 tsp paprika
-
1/2 tsp salt
-
black pepper to taste
Instructions
-
Step 1
Preheat your oven to 400°F (200°C). Line baking sheets with parchment paper. -
Step 2
Pat the zucchini slices dry with paper towels to remove excess moisture. -
Step 3
In a bowl, whisk together the olive oil, garlic powder, paprika, salt, and pepper. -
Step 4
Add the zucchini slices to the bowl and toss gently to coat evenly with the oil mixture. -
Step 5
Arrange the coated zucchini slices in a single layer on the prepared baking sheets. -
Step 6
Sprinkle the grated parmesan cheese generously over each zucchini slice. -
Step 7
Bake for 15-20 minutes, or until golden brown and crispy. Flip halfway through for even crisping. -
Step 8
Let cool slightly before serving. Enjoy!
Important Information
Nutrition Facts (Per Serving)
It is important to consider this information as approximate and not to use it as definitive health advice.
Allergy Information
Please check ingredients for potential allergens and consult a health professional if in doubt.