Easy Pickled Red Onions- Quick & Tangy Recipe
Pickled red onions are one of those magical pantry staples that can transform almost any dish from ordinary to extraordinary. Seriously, if you haven’t experienced the vibrant crunch and tangy sweetness of perfectly pickled red onions, you’re missing out on a culinary superpower. What is it about these ruby-hued rings that makes them so universally adored? It’s their incredible versatility, for starters. They add a beautiful pop of color and a refreshing zing to everything from tacos and salads to avocado toast and grilled cheeses. They cut through richness beautifully, offering a delightful acidic counterpoint that awakens your palate. Plus, the simple act of transforming a humble red onion into something so bright and flavorful feels like a little kitchen alchemy, doesn’t it? The process is surprisingly easy, and the payoff is immense, making these pickled red onions a recipe I find myself returning to again and again.
Pickled Red Onions
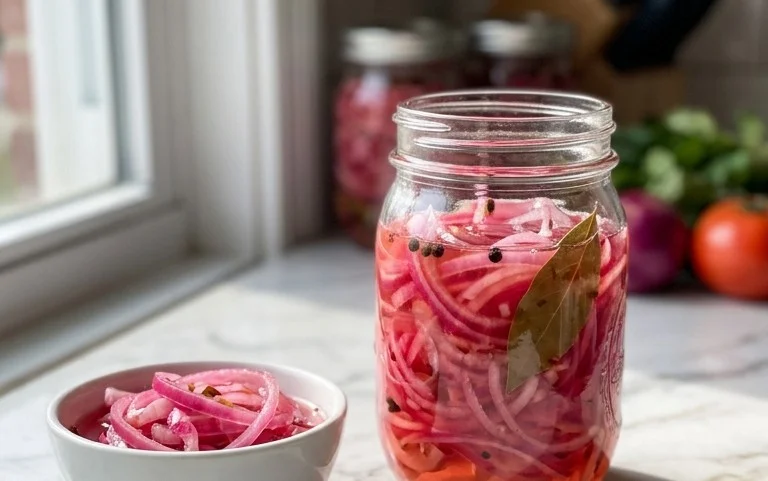
There’s something truly magical about pickled red onions. Their vibrant fuchsia hue promises a burst of tangy, slightly sweet, and subtly spicy flavor that can elevate almost any dish. From tacos and burgers to salads and avocado toast, these ruby jewels are a game-changer in the kitchen. What’s even better is how incredibly simple they are to make. You can whip up a batch in less than 15 minutes, and then the hardest part is waiting for them to work their pickling magic in the fridge. They keep beautifully for weeks, making them a fantastic pantry staple to have on hand. I love making a big jar at the begin extractning of the week to add a zing to my meals throughout. So, let’s get pickling!
Ingredients:
Preparing the Onions
The first step in creating these delightful pickled onions is to properly prepare your red onions. You’ll want to start by peeling off the outer papery skin. Discard that. Then, trim off the stem end and the root end. For pickling, it’s best to slice the onions thinly. I find that a mandoline slicer is fantastic for achieving consistent, paper-thin slices, which ensures they pickle evenly and become wonderfully tender. If you don’t have a mandoline, a sharp knife and a steady hand will do the trick. Aim for slices that are about 1/16 to 1/8 inch thick. The thinner you slice them, the quicker they will pickle and the more pliable they will become. Once sliced, I like to separate the rings so they can soak up the brine more effectively.
Creating the Pickling Brine
Now for the flavorful brine that will transform your humble red onions into something extraordinary. In a medium saucepan, combine the water, white vinegar, sugar, and sea salt. I prefer using white vinegar because its clean, sharp acidity cuts through the sweetness beautifully. For the sugar, you can use granulated sugar, but I often experiment with coconut sugar or even a touch of maple syrup for a slightly different flavor profile. Just be mindful that liquid sweeteners might slightly alter the color and texture. Stir these ingredients together well. Place the saucepan over medium heat. We’re not looking to boil this mixture vigorously; we just want to heat it enough so that the sugar and salt dissolve completely. Stirring occasionally will help speed this process up. Once the sugar and salt are fully dissolved and the liquid is hot (but not boiling), remove it from the heat.
Combining and Brining
Once your brine is ready and has been heated just enough to dissolve the solids, it’s time to combine it with the prepared red onions. You’ll need a heat-safe jar or container to hold your pickled onions. A clean glass jar with a lid is perfect for this. Place all your thinly sliced red onion rings into the jar. Now, carefully pour the hot brine over the onions. Make sure to submerge all the onion slices completely in the liquid. They might float a bit at first, but as they start to cool and soften, they will sink. If you’re using the red pepper flakes for a little kick, sprinkle them in now, either before or after pouring the brine. I like to add them with the brine so they infuse evenly. Give the jar a gentle shake or stir to ensure everything is well distributed.
Cooling and Refrigeration
This is where the magic truly happens! Allow the jar of onions and brine to cool down to room temperature on your countertop. This initial cooling period allows the onions to begin extract their softening process and absorb some of the brine’s flavor before being subjected to the cold of the refrigerator. Once the jar has reached room temperature, screw the lid on tightly. Then, transfer the jar to your refrigerator. This is a crucial step for proper pickling and food safety. The cold temperature slows down any potential bacterial growth and allows the flavors to meld and deepen. The longer they sit in the fridge, the more pickled they will become.
The Waiting Game (and Enjoying!)
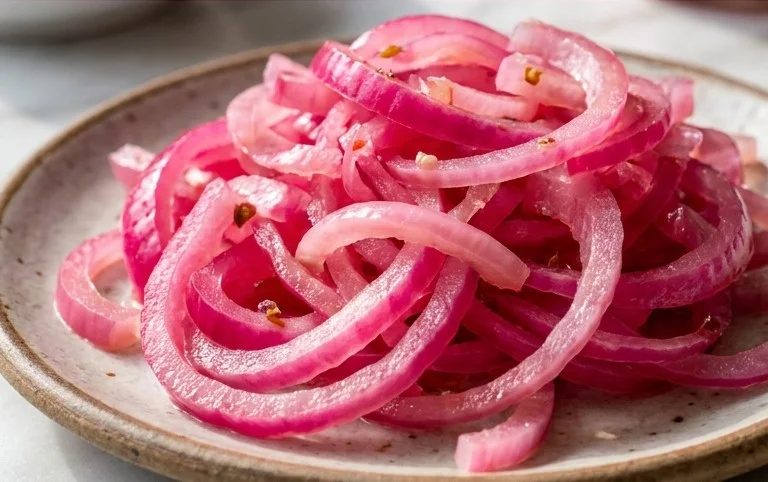
The hardest part, of course, is waiting! While you can technically eat the onions within an hour or two of making them, their flavor will be much more developed and their texture will be perfectly tender after at least a few hours, and ideally, overnight. I usually aim to let them sit for at least 24 hours before I start diggin extractg in. This allows the vinegar to penetrate the onions fully, giving them that characteristic tangy bite, while the sugar balances it out with a pleasant sweetness. They will continue to improve in flavor over the next few days and weeks. To enjoy your pickled red onions, simply use a fork or slotted spoon to lift them out of the brine. They are incredibly versatile. I love them piled high on tacos, nestled in burgers, stirred into grain bowls, or even as a vibrant topping for scrambled eggs. The brine itself is also delicious and can be used in salad dressings or marinades! Keep them stored in the refrigerator, and they should last for a good 2-3 weeks.
Conclusion:
There you have it! Making your own pickled red onions is incredibly simple and transforms a humble ingredient into a vibrant, tangy powerhouse. This recipe is fantastic because it requires minimal effort for maximum flavor impact, adding a delightful zing and beautiful color to practically any dish. From topping tacos and burgers to jazzing up salads, avocado toast, or even serving alongside grilled meats and fish, the possibilities are endless. Don’t be afraid to experiment with this versatile condiment; it’s a true game-changer in my kitchen, and I’m confident it will become one in yours too! I truly encourage you to give this easy pickling recipe a try – you won’t regret the burst of flavor it brings.
Frequently Asked Questions:
How long do pickled red onions last?
Properly stored in an airtight container in the refrigerator, your pickled red onions can last for up to 2-3 weeks. The acidity helps preserve them, but their crunch will gradually soften over time. Always check for any signs of spoilage before consuming.
Can I adjust the sweetness or tangin extractess of the brine?
Absolutely! This recipe is very forgiving. For a sweeter brine, simply increase the sugar. For more tang, add a splash more vinegar. You can also experiment with different types of vinegar, such as apple cider vinegar or white grape juice vinegar, for subtle flavor variations.
Can I add other spices to the pickling brine?
Yes, feel free to get creative! Common additions include peppercorns, bay leaves, coriander seeds, or even a pinch of red pepper flakes for a touch of heat. These additions will infuse even more complex flavors into your pickled red onions.
Pickled Red Onions
Quick and easy pickled red onions, perfect for adding a tangy crunch to sandwiches, tacos, salads, and more.
Ingredients
-
2 medium red onions
-
1 1/4 cup water
-
1 1/4 cup white vinegar
-
3 tbsp sugar
-
1 tbsp sea salt
-
1/4 tsp red pepper flakes
Instructions
-
Step 1
Slice the red onions thinly. A mandoline is helpful for uniform slices. -
Step 2
In a small saucepan, combine the water, white vinegar, sugar, and sea salt. -
Step 3
Heat the mixture over medium heat, stirring until the sugar and salt are dissolved. Do not boil. -
Step 4
Place the sliced red onions into a clean jar or heatproof container. -
Step 5
Pour the hot brine over the onions, ensuring they are fully submerged. Add red pepper flakes, if using. -
Step 6
Let the mixture cool at room temperature for about 15-30 minutes before refrigerating. They are best after at least an hour, but can be enjoyed after cooling.
Important Information
Nutrition Facts (Per Serving)
It is important to consider this information as approximate and not to use it as definitive health advice.
Allergy Information
Please check ingredients for potential allergens and consult a health professional if in doubt.