Tri Tip Two Ways Flavorful Easy Recipe
Tri Tip (2 Ways) is more than just a cut of beef; it’s a canvas for flavor and a guaranteed crowd-pleaser. I absolutely adore tri tip for its incredible versatility and the satisfyingly tender, juicy result it delivers. Whether you’re a seasoned griller or just starting out, this cut is remarkably forgiving and incredibly rewarding. What truly sets tri tip apart is its unique triangular shape, which allows for an amazing sear on the outside while keeping the interior perfectly pink and succulent. People flock to tri tip recipes because they deliver a restaurant-quality steak experience without the exorbitant price tag. Get ready to elevate your grilling game and discover just how delicious and adaptable this phenomenal cut of beef can be with these two fantastic preparations of tri tip.
Tri Tip (2 Ways)
Tri tip is a wonderfully flavorful and tender cut of beef, often overlooked but incredibly rewarding to cook. It’s lean, yet possesses a good amount of marbling that renders beautifully during cooking, resulting in a steak-like experience. The beauty of tri tip is its versatility; it can be grilled, roasted, or even seared in a cast-iron skillet. Today, we’re going to explore two fantastic ways to prepare this gem: a classic reverse sear for ultimate edge-to-edge perfection, and a quick, pan-seared method for those times when you’re craving delicious tri tip in a flash. Both methods will showcase the inherent deliciousness of the tri tip, enhanced by a simple yet effective seasoning blend.
Let’s dive into the ingredients you’ll need for this culinary adventure.
Ingredients:
Method 1: The Reverse Sear – For Unparalleled Perfection
The reverse sear is a technique that allows for incredibly even cooking from edge to edge. It involves gently bringin extractg the roast up to temperature in a low oven before finishing it with a high-heat sear. This method is fantastic for thicker cuts like tri tip because it minimizes the gray band of overcooked meat, giving you a perfectly pink interior throughout. It takes a little more time, but the results are absolutely worth it.
Step-by-Step Instructions:
1. Preparation and Seasoning:
Begin extract by patting your tri tip roast completely dry with paper towels. This is a crucial step as it helps create a better crust when searing. In a small bowl, whisk together the garlic salt, Lawry’s seasoning salt, kosher salt, black pepper, sugar, garlic powder, and parsley. This blend is simple but packs a punch of savory, garlicky, and slightly sweet flavor that complements the beef beautifully. Now, generously rub the entire surface of the tri tip roast with the olive oil, ensuring it’s evenly coated. Follow this by pressing the seasoning blend all over the roast, making sure to get into any crevices. For the best flavor penetration, I recommend letting the seasoned roast sit at room temperature for at least 30 minutes, or even better, refrigerate it uncovered overnight after seasoning. This allows the salt to work its magic and tenderize the meat further.
2. Low and Slow Oven Roasting:
Preheat your oven to a low temperature, around 225°F (107°C). Place the seasoned tri tip roast on a wire rack set inside a baking sheet. This allows air to circulate around the roast, promoting even cooking. Insert a meat thermometer into the thickest part of the roast, making sure it doesn’t touch any bone (though tri tip typically doesn’t have any). We’re aiming for an internal temperature of around 110-115°F (43-46°C) for medium-rare. This slow cooking process can take anywhere from 45 minutes to 1.5 hours, depending on the thickness of your roast and your oven. Keep an eye on the thermometer; this is the most important part of the reverse sear. Patience here is key!
3. The Searing Process:
Once your tri tip has reached the target internal temperature, remove it from the oven. It will look cooked, but it’s not done yet! Now it’s time for the sear. You have a few options here. You can heat a cast-iron skillet over high heat with a tablespoon of high-smoke-point oil (like avocado or canola) until it’s shimmering. Carefully place the tri tip in the hot skillet and sear for 1-2 minutes per side, until a beautiful, dark crust forms. Alternatively, you can use a very hot grill. Sear it over direct high heat for about 1-2 minutes per side, until nicely charred. The goal here is to create that delicious Maillard reaction, the browning that adds so much flavor and texture.
4. Resting is Key:
After searing, it’s absolutely crucial to let the tri tip rest. Transfer the roast to a clean cutting board and tent it loosely with aluminum foil. Allow it to rest for at least 10-15 minutes. This resting period allows the juices to redistribute throughout the meat, ensuring a tender and juicy final product. If you cut into it too soon, all those delicious juices will run out onto the board, leaving you with a drier roast.
5. Slicing and Serving:
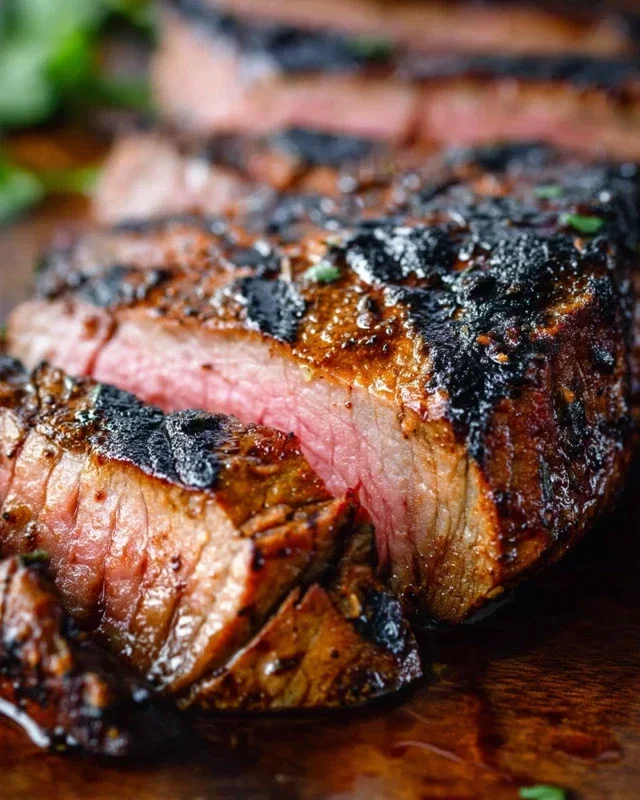
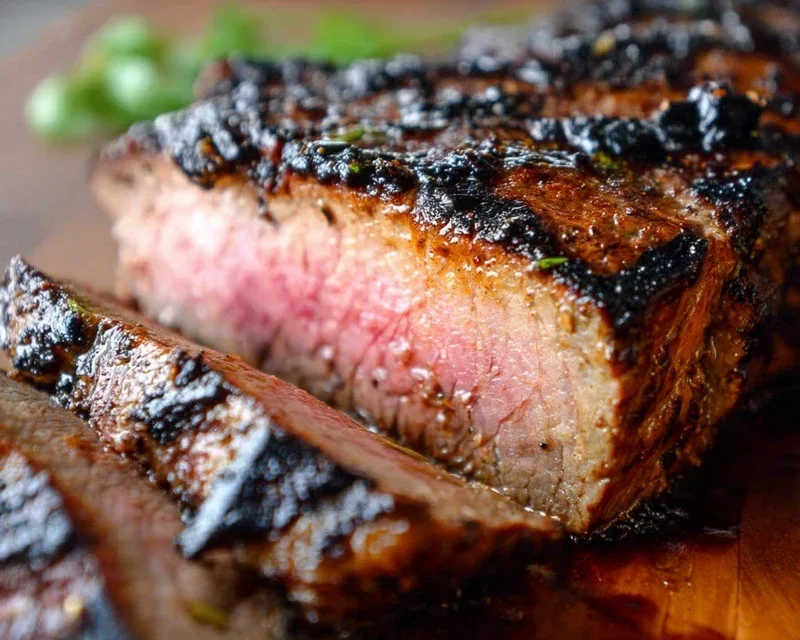
After resting, slice the tri tip against the grain. You’ll notice the grain runs in different directions on a tri tip, so pay attention to this for maximum tenderness. Slice it thinly, and marvel at the beautiful, consistent pink color from edge to edge. Serve immediately with your favorite sides.
Method 2: The Quick Pan-Sear – For Speed and Flavor
If you’re short on time but still craving that delicious tri tip flavor, the pan-sear method is your best friend. This method focuses on getting a great sear quickly while still aiming for a tender and flavorful result. It’s perfect for weeknight meals.
Step-by-Step Instructions:
1. Preparation and Seasoning:
Just like with the reverse sear, start by patting your tri tip roast completely dry. This is non-negotiable for a good crust. Mix your seasoning blend as described in Method 1. Rub the tri tip generously with olive oil and then press the seasoning blend all over. For this quicker method, allowing the seasoned roast to sit at room temperature for at least 30 minutes is highly recommended before cooking to ensure it’s not ice cold in the center.
2. High-Heat Sear:
Heat a heavy-bottomed skillet, preferably cast iron, over medium-high heat. Add a tablespoon of a high-smoke-point oil. Once the oil is shimmering and just starting to smoke slightly, carefully place the seasoned tri tip roast into the skillet. Sear for approximately 4-5 minutes per side, depending on the thickness of your roast, aiming for a deep brown crust. You’ll want to keep a close eye on it to prevent burning. For a thicker roast, you might need to reduce the heat slightly after the initial sear and continue cooking, turning occasionally, until the internal temperature reaches your desired doneness.
3. Checking for Doneness:
Use an instant-read thermometer to check the internal temperature. For medium-rare, aim for 125-130°F (52-54°C). Remember that the temperature will rise a few degrees as it rests. If you prefer medium, aim for 135-140°F (57-60°C).
4. Resting:
Once the tri tip reaches your desired internal temperature, remove it from the skillet and place it on a cutting board. Tent it loosely with foil and let it rest for at least 10 minutes. This rest is vital for retaining moisture and ensuring tenderness, even in this quicker method.
5. Slicing and Enjoying:
Just as with the reverse sear, slice the tri tip thinly against the grain. This ensures each bite is as tender as possible. Serve immediately and enjoy the incredible flavor you’ve achieved in a fraction of the time.
Both methods yield a fantastic tri tip, each with its own unique advantages. Experiment with both and find your favorite!
Conclusion:
You’ve now got the keys to unlocking the delicious potential of tri-tip, prepared in two fantastic ways! Whether you prefer the smoky char of the grill or the perfectly seared crust from your oven, these methods guarantee a tender, flavorful, and impressive cut of meat that’s surprisingly approachable. The beauty of tri-tip lies in its versatility – it’s a weeknight winner that also shines at a weekend barbecue. I encourage you to dive in and give one (or both!) of these tri-tip recipes a try. You’ll be amazed at how easily you can achieve restaurant-quality results right in your own kitchen.
For serving, consider classic accompaniments like roasted potatoes, a fresh green salad, or grilled corn on the cob. For a more adventurous twist, try serving sliced tri-tip in tacos with a spicy salsa or as the star of a hearty sandwich with caramelized onions and a horseradish cream.
Don’t be afraid to experiment with marinades and rubs to put your own spin on these foundational recipes. A little soy sauce, garlic, and pepper can work wonders, as can a smoky paprika and brown sugar blend. The possibilities are truly endless, and the rewarding experience of cooking a perfect tri-tip is something you’ll want to repeat again and again.
Frequently Asked Questions:
What is the best way to slice tri-tip?
The key to slicing tri-tip is to cut against the grain. You’ll notice the muscle fibers run in different directions in different parts of the roast. Look closely, identify the direction of the grain, and slice perpendicular to it. This will ensure the meat is as tender as possible.
Can I marinate tri-tip overnight?
Absolutely! Marinating tri-tip overnight can infuse it with even more flavor and help tenderize the meat. Just be mindful of acidic ingredients in your marinade (like citrus or vinegar) as prolonged exposure can sometimes make the meat mushy. A few hours to overnight is generally a safe and delicious bet.
What if I don’t have a grill or an oven?
While these are our featured methods, you can also achieve great results with tri-tip using a cast-iron skillet on the stovetop. Sear it on high heat on both sides, then reduce heat and cover to finish cooking to your desired internal temperature. It might not have the same smoky flavor as grilling, but the crust will be superb!
Tri Tip (2 Ways)
A versatile tri tip roast prepared with two distinct flavor profiles: a classic seasoned approach and a herb-infused alternative.
Ingredients
-
2 & 1/2 pound tri tip roast
-
1 & 1/2 teaspoons garlic salt
-
1 tablespoon Lawry’s seasoning salt
-
1 & 1/2 teaspoons kosher salt (Diamond Crystal)
-
1 teaspoon black pepper
-
1/2 teaspoon sugar
-
2 teaspoons garlic powder
-
1 tablespoon dried or fresh parsley
-
1/4 cup olive oil
Instructions
-
Step 1
Divide the tri tip roast into two equal portions. -
Step 2
For Way 1 (Classic Seasoned): Rub one portion evenly with Lawry’s seasoning salt, garlic salt, kosher salt, black pepper, sugar, and garlic powder. -
Step 3
For Way 2 (Herb Infused): Rub the second portion evenly with kosher salt, black pepper, garlic powder, and parsley. Drizzle with half of the olive oil. -
Step 4
Preheat your oven or grill to 400°F (200°C). -
Step 5
Sear both tri tip portions on all sides over high heat (or in a very hot pan if oven roasting) for 2-3 minutes per side. If grilling, move to indirect heat. -
Step 6
Transfer to a baking sheet (if oven roasting) or the cooler side of the grill. Roast for approximately 20-25 minutes per pound, or until the internal temperature reaches your desired doneness (130-135°F for medium-rare). -
Step 7
Let the roasts rest for 10-15 minutes before slicing against the grain.
Important Information
Nutrition Facts (Per Serving)
It is important to consider this information as approximate and not to use it as definitive health advice.
Allergy Information
Please check ingredients for potential allergens and consult a health professional if in doubt.