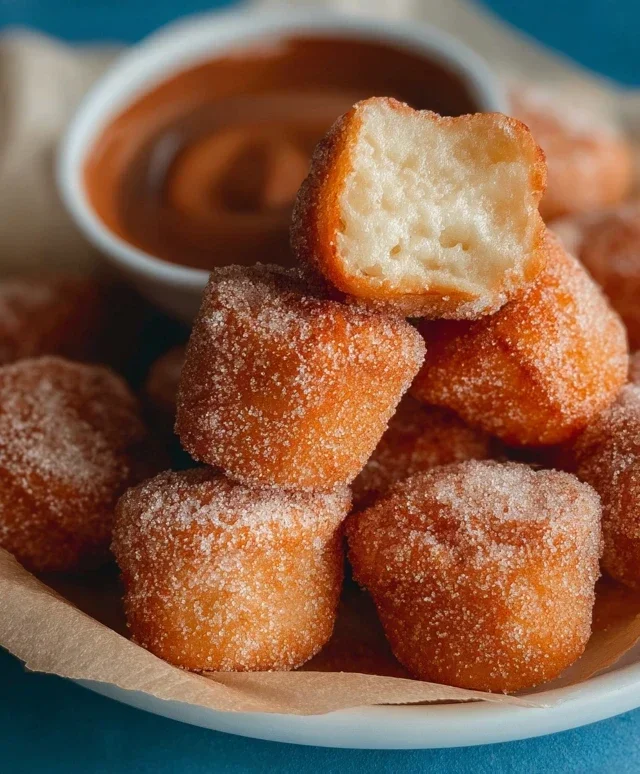
Cheesecake Fruit Salad Roll Ups Dessert Delight
Cheesecake fruit salad roll ups are a delightful twist on two of your favorite treats, and trust me, they’re about to become your new go-to for any occasion! Imagin extracte the creamy, tangy goodness of cheesecake meeting the vibrant freshness of a fruit salad, all wrapped up in a convenient and utterly charming package. What’s not to love? This dish is a crowd-pleaser for a reason; it offers that irresistible dessert indulgence without feeling overly heavy, making it perfect for a brunch, a picnic, or even just a weeknight treat that feels a little bit fancy. What truly sets these cheesecake fruit salad roll ups apart is their playful presentation. They’re incredibly versatile, allowing you to customize the fruit filling to your heart’s content, and the creamy cheesecake layer provides the perfect canvas for all those bright, juicy flavors. Get ready to impress yourself and everyone you share them with!
Ingredients:
Get Ready to Roll: Your Cheesecake Fruit Salad Adventure
Sometimes, you just crave something sweet, something a little decadent, but also something bursting with fresh, vibrant flavors. That’s exactly the inspiration behind these Cheesecake Fruit Salad Roll Ups! They’re a delightful fusion of creamy cheesecake goodness, a medley of colorful fruits, all wrapped up in a warm, cinnamon-sugar coated tortilla. They’re perfect for a fun brunch, a unique dessert, or even a special treat for the kids. The best part? They’re surprisingly easy to make, and the results are always impressive. Let’s dive in and create something delicious!
Creating the Dreamy Cheesecake Filling
The heart of our roll ups is this luscious cheesecake filling. It’s incredibly simple to whip up and provides that wonderfully rich, tangy base.
1. In a medium-sized mixing bowl, combine the softened cream cheese and the room temperature unsalted butter. Using an electric mixer (or a sturdy whisk and a lot of arm power!), beat these together until they are completely smooth and creamy. You want to ensure there are no lumps of cream cheese remaining, as this will create a much more pleasant texture in your filling. This step is crucial for a silky smooth outcome.
2. Gradually add the powdered sugar to the cream cheese and butter mixture, a little at a time, while continuing to beat. Scrape down the sides of the bowl periodically to make sure everything is incorporated evenly. Continue mixing until the frosting is light and fluffy, resembling a classic buttercream frosting.
3. Next, stir in the vanilla extract. This adds that essential, comforting flavor that we all associate with classic cheesecake. If you’re using the alternative for whipped cream (chilled heavy cream and powdered sugar), this is the point where you would whip those together until stiff peaks form in a separate bowl, and then gently fold that into the cream cheese mixture. If you’re using pre-made whipped cream, gently fold that in now until just combined. Be careful not to overmix once the whipped cream is added, as this can deflate it and make the filling less airy. The goal is a light, airy, and creamy consistency that’s easy to spread.
Assembling the Fruit Medley
This is where all the vibrant colors and natural sweetness come in! A good mix of textures is key for a truly satisfying fruit salad.
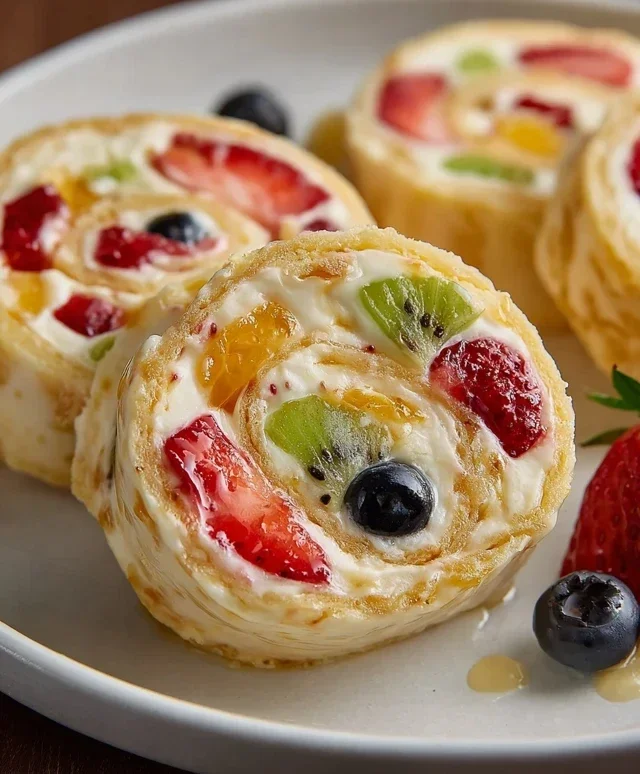
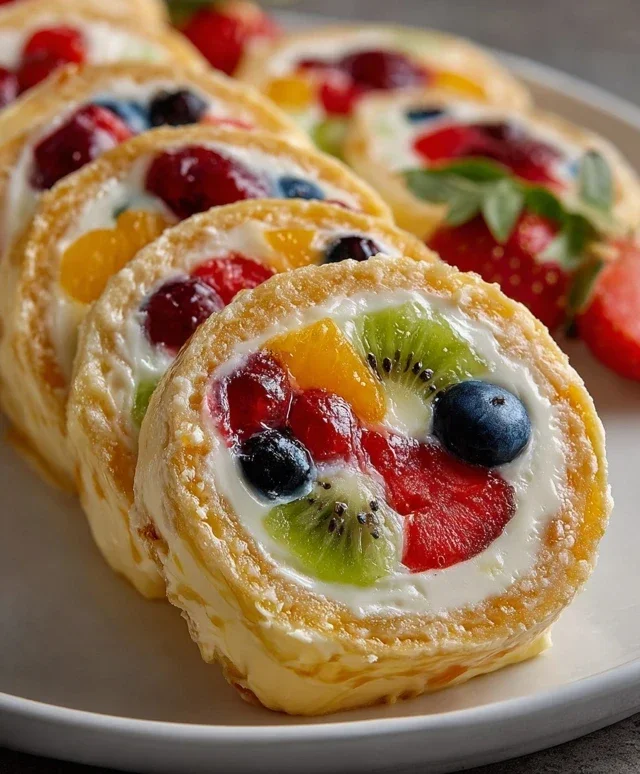
1. In a separate bowl, gently combine your prepared fruits: the fresh blueberries, small diced strawberries, peeled and diced peaches, peeled and small diced kiwis, and the halved fresh raspberries. You want to be delicate with the raspberries to prevent them from becoming mushy.
2. Now, it’s time to add a little magic with the sugar-free vanilla instant pudding. Sprinkle the contents of the two (1 oz) boxes of sugar-free vanilla instant pudding mix over the fruit. The pudding mix acts as a fantastic binder, helping to thicken the fruit juices and preventing the filling from becoming too wet. It also adds a subtle sweetness and a hint of vanilla that complements the fruit beautifully. Gently toss everything together until the fruit is evenly coated with the pudding mix. Let this sit for about 5-10 minutes. You’ll notice it start to thicken up, creating a delightful, slightly syrupy fruit mixture that’s perfect for spreading.
The Grand Finnon-alcoholic ale: Rolling and Grilling
This is the exciting part where everything comes together and transforms into our delicious roll ups!
1. Lay out one of your large tortillas on a clean, flat surface. Generously spread a layer of the creamy cheesecake filling all the way to the edges. Don’t be shy – we want plenty of that deliciousness in every bite!
2. Next, spoon a good amount of the thickened fruit mixture over the cheesecake filling. Distribute it evenly, but try not to overload it, or it might be difficult to roll. Aim for a nice balance of cheesecake and fruit in each roll up.
3. Carefully begin extract to roll up the tortilla, starting from one edge. Tuck in the sides as you roll to create a compact and secure wrap. It might take a little practice to get them perfectly rolled, but don’t worry about perfection – they’ll taste amazing no matter what!
4. Once you have all your roll ups assembled, it’s time for the warm, crunchy exterior. In a small bowl, whisk together the melted unsalted butter, ½ cup of sugar, and 1 teaspoon of cinnamon. This creates a glorious cinnamon-sugar coating.
5. Brush both sides of each rolled-up tortilla generously with the cinnamon-sugar mixture. You can also gently press them into a shallow dish of the mixture if you prefer. Heat a large skillet or griddle over medium heat. Place the coated roll ups onto the hot skillet and cook for 2-3 minutes per side, or until they are golden brown and slightly crispy. You’re looking for that beautiful toasted tortilla texture and aroma. Be sure to watch them closely to prevent burning.
Serve these warm and enjoy the incredible combination of creamy, fruity, and cinnamon-spiced perfection! They are best enjoyed immediately, but any leftovers can be stored in an airtight container in the refrigerator for a day or two.
Conclusion:
I hope you’ve enjoyed learning how to make these delightful Cheesecake Fruit Salad Roll Ups! They truly are a fantastic recipe because they offer a perfect balance of creamy, tangy cheesecake filling and the vibrant freshness of mixed fruits, all wrapped up in a convenient and appealing bite. They are incredibly versatile, making them suitable for everything from a quick breakfast treat to a show-stopping dessert for parties or potlucks. Their portable nature also makes them excellent for picnics or packed lunches.
For serving, I love presenting these roll ups on a pretty platter, perhaps with a drizzle of honey or a dusting of powdered sugar for an extra touch of elegance. They are also wonderful served alongside a cup of coffee or a refreshing glass of iced tea. Don’t be afraid to get creative with variations! You could swap out the fruits based on seasonality or your personal preferences – berries, kiwi, mango, or even chopped peaches would be delicious. For a richer flavor, consider adding a hint of lemon zest or cinnamon to the cheesecake filling. The possibilities are endless!
I truly encourage you to give these Cheesecake Fruit Salad Roll Ups a try. They are surprisingly easy to assemble and are guaranteed to be a hit with everyone. Happy baking!
Frequently Asked Questions:
How do I store leftover roll ups?
Store any leftover Cheesecake Fruit Salad Roll Ups in an airtight container in the refrigerator for up to 2-3 days. They are best enjoyed fresh, but will still be tasty within this timeframe.
Can I make these ahead of time?
Yes, you can definitely make these ahead of time! It’s best to prepare the fruit and the cheesecake filling separately and store them. Assemble the roll ups just before serving for the freshest taste and best texture, especially to prevent the tortillas from becoming soggy.
Cheesecake Fruit Salad Roll Ups
A delightful and refreshing dessert featuring a creamy cheesecake filling rolled inside tortillas with a medley of fresh fruits and a cinnamon-sugar crisp coating.
Ingredients
-
½ cup unsalted butter, room temperature
-
1 ½ cups powdered sugar
-
6 oz cream cheese, room temperature
-
1 teaspoon vanilla extract
-
1 ¼ cups whipped cream
-
2/3 cup fresh blueberries
-
2/3 cup small diced fresh strawberries
-
3 small peaches, peeled and diced
-
2 kiwis, peeled and small diced
-
½ cup fresh raspberries, sliced in half
-
2 (1 oz) boxes sugar-free vanilla instant pudding
-
4–5 large tortillas, room temperature
-
2–3 tablespoons unsalted butter, melted
-
½ cup sugar
-
1 teaspoon cinnamon
Instructions
-
Step 1
In a large bowl, beat together softened butter and powdered sugar until smooth. Add cream cheese and vanilla extract, and beat until well combined and creamy. Stir in the whipped cream and dry instant pudding mixes until fully incorporated. Chill the cheesecake filling for at least 30 minutes. -
Step 2
Gently fold in the prepared fresh blueberries, strawberries, diced peaches, diced kiwis, and halved raspberries into the chilled cheesecake filling. Be careful not to overmix, to keep the fruit intact. -
Step 3
Lay out the large tortillas on a clean surface. Spread an even layer of the fruit cheesecake filling along one edge of each tortilla, leaving a small border on the sides. -
Step 4
Tightly roll up each tortilla, starting from the edge with the filling, tucking in the sides as you go to create neat wraps. -
Step 5
In a shallow dish, combine the ½ cup sugar and 1 teaspoon cinnamon. Brush the outside of each rolled tortilla with the melted unsalted butter. -
Step 6
Roll the buttered tortillas in the cinnamon-sugar mixture, ensuring they are evenly coated. For an extra crisp, you can lightly pan-fry them in a buttered skillet over medium heat for 1-2 minutes per side, or bake at 350°F (175°C) for 5-7 minutes until golden brown. -
Step 7
Slice the roll-ups into desired portions and serve immediately or chilled. Garnish with extra fruit or a dusting of powdered sugar if desired.
Important Information
Nutrition Facts (Per Serving)
It is important to consider this information as approximate and not to use it as definitive health advice.
Allergy Information
Please check ingredients for potential allergens and consult a health professional if in doubt.