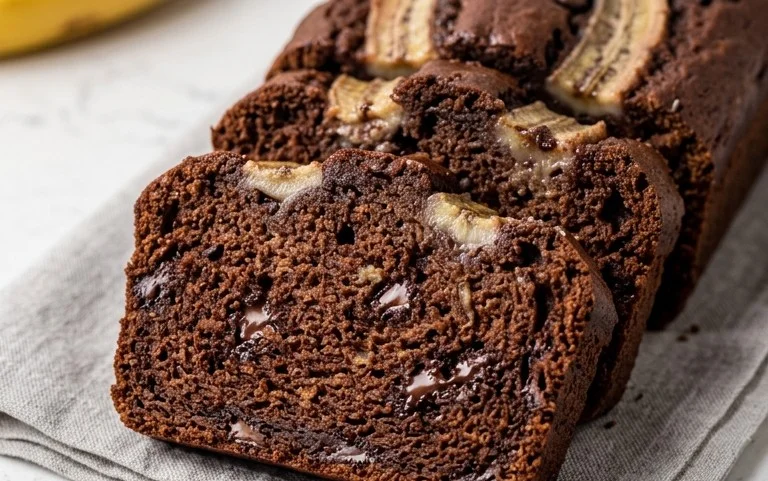
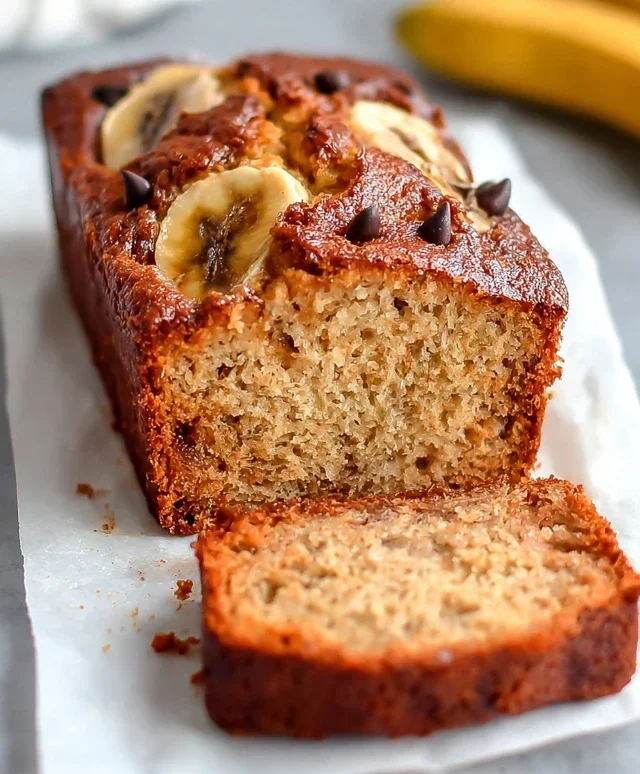
Easy Greek Yogurt Banana Bread – Moist & Delicious
Greek Yogurt Banana Bread is more than just a breakfast treat; it’s a little slice of sunshine in every bite. If you’re anything like me, you adore the comforting, familiar flavor of classic banana bread, but crave something a little lighter and a touch more sophisticated. That’s where the magic of Greek Yogurt Banana Bread truly shines. The creamy tang of Greek yogurt doesn’t just keep this bread incredibly moist and tender, it also adds a subtle complexity that elevates it beyond the ordinary. Forget dry, crum extractbly loaves; this recipe promises a moist, flavorful, and delightfully balanced bite that will have you reaching for a second slice before you even realize it. It’s the perfect way to use up those overripe bananas and create a guilt-free indulgence that tastes utterly decadent.
Why You’ll Love This Recipe
Unbeatable Moistness
The secret to this incredible texture is the high protein content of Greek yogurt, which creates a wonderfully tender crum extractb that stays moist for days.
Healthier Indulgence
By swapping some of the oil or butter for Greek yogurt, we’re making a lighter version of a classic, perfect for a more mindful treat.
Simple & Satisfying
Even if you’re a begin extractner baker, this Greek Yogurt Banana Bread recipe is straightforward, yielding impressive results every time.
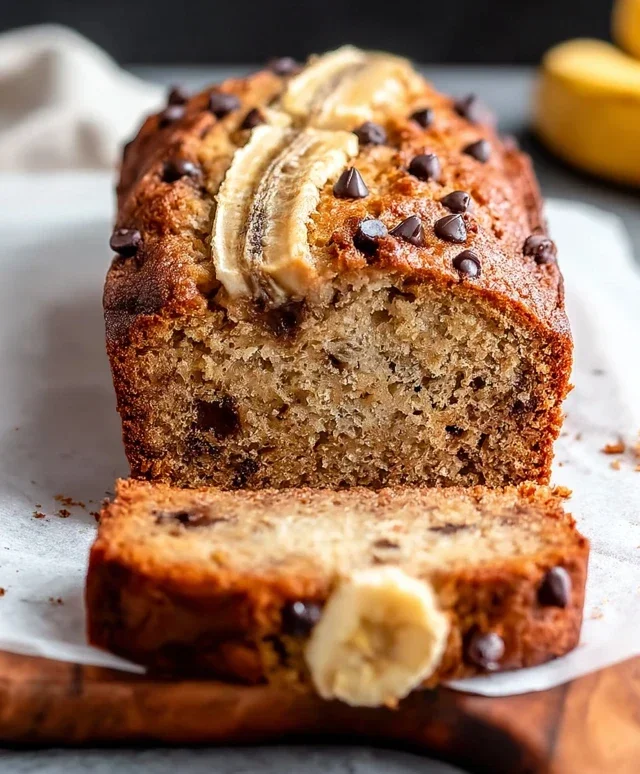
Greek Yogurt Banana Bread: A Moist and Healthy Treat
Looking for a delicious and guilt-free way to enjoy banana bread? This Greek yogurt banana bread recipe is your answer! Packed with protein and naturally sweetened, it’s a fantastic option for breakfast, a snack, or even a light dessert. The Greek yogurt not only adds a wonderful moistness but also a good dose of protein, making this bread a more wholesome choice. We’re using oat flour and almond flour for a lighter texture and a boost of fiber, and you even have the option to sneak in some protein powder if you’re looking to supercharge it further. Get ready for a loaf that’s incredibly tender, subtly sweet, and bursting with banana flavor.
Ingredients:
Instructions:
1. Prepare Your Workspace and Preheat the Oven:
Before we begin extract mixing, it’s essential to get everything ready. Preheat your oven to 350°F (175°C). This ensures that your oven is at the correct temperature when your batter is ready to bake, leading to even cooking and a perfect rise. While the oven heats up, lightly grease and flour a standard 9×5 inch loaf pan. You can also line it with parchment paper, leaving some overhang on the sides. This makes it incredibly easy to lift the finished bread out of the pan without any sticking or breaking. Having all your ingredients measured out and your pan prepared will make the baking process smooth and enjoyable.
2. Mash the Bananas and Combine Wet Ingredients:
In a large mixing bowl, begin extract by mashing your ripe bananas. The riper the bananas, the sweeter and more flavorful your bread will be, so don’t be afraid of a few brown spots! You can use a fork or a potato masher for this. Aim for a consistency that’s mostly mashed but still has a few small chunks for texture. To this, add the Greek yogurt, the large egg, and your chosen liquid sweetener (maple syrup or honey). Stir in the vanilla extract. Whisk everything together until it’s well combined and the mixture is smooth and creamy. The Greek yogurt is the secret to our incredibly moist bread, and its tangin extractess beautifully complements the sweetness of the bananas.
3. Incorporate Dry Ingredients:
In a separate medium-sized bowl, whisk together the oat flour, almond flour, ground cinnamon, salt, and baking powder. If you’re using protein powder, add it here and whisk thoroughly to ensure it’s evenly distributed and there are no clumps. It’s crucial to whisk the dry ingredients together before adding them to the wet ingredients. This step ensures that the leavening agent (baking powder) and salt are evenly distributed throughout the flour mixture, which will help your bread rise evenly and prevent any pockets of unsalted or dense batter. If you’re opting for the chocolate chips, you can either stir them into this dry mixture now (which helps prevent them from sinking to the bottom) or fold them in at the very end.
4. Combine Wet and Dry Mixtures:
Now it’s time to bring our wet and dry ingredients together. Gently add the dry ingredient mixture to the bowl with the wet ingredients. Using a spatula or a wooden spoon, fold the ingredients together until just combined. Be careful not to overmix! Overmixing can develop the gluten in the flour too much, resulting in a tougher loaf. A few streaks of flour are perfectly fine; they will disappear during baking. If you haven’t already, gently fold in the chocolate chips at this stage. The goal is to incorporate everything without working the batter excessively.
5. Bake Your Delicious Banana Bread:
Pour the batter into your prepared loaf pan, spreading it evenly. You can use your spatula to smooth the top. Place the loaf pan in the preheated oven. Bake for 50-60 minutes, or until a wooden skewer or toothpick inserted into the center of the bread comes out clean. The exact baking time can vary depending on your oven, so it’s always best to check for doneness around the 50-minute mark. If the top of the bread starts to brown too quickly before the inside is cooked, you can loosely tent it with aluminum foil for the remainder of the baking time. This prevents the outside from burning while allowing the inside to finish baking.
6. Cool and Enjoy:
Once your banana bread is baked and a toothpick comes out clean, carefully remove the loaf pan from the oven. Let the bread cool in the pan for about 10-15 minutes. This allows it to firm up slightly. Then, carefully invert the pan onto a wire rack to remove the bread. Let the loaf cool completely on the wire rack before slicing and serving. Waiting for it to cool ensures that the bread has fully set and is easier to slice cleanly. This Greek yogurt banana bread is delicious on its own, or you can enjoy it toasted with a smear of butter or your favorite topping. Store any leftovers in an airtight container at room temperature for up to 3 days, or in the refrigerator for a week. You can also freeze slices for longer storage.
Conclusion:
I hope you’re as excited as I am to try this Greek Yogurt Banana Bread recipe! It’s truly a standout because the Greek yogurt not only keeps the bread incredibly moist and tender but also adds a delightful subtle tang that perfectly complements the sweetness of the bananas. Plus, it’s a fantastic way to incorporate some extra protein into a classic comfort food.
This Greek Yogurt Banana Bread is incredibly versatile. For a simple treat, enjoy a thick slice on its own, perhaps with a light dusting of cinnamon. It’s also wonderful served warm with a dollop of extra Greek yogurt, a drizzle of honey, or even a smear of almond butter for added richness. For a more decadent experience, consider a light glaze made with powdered sugar and a splash of milk.
Don’t be afraid to get creative with variations! Stir in chocolate chips, chopped walnuts or pecans, or even a hint of nutmeg or cardamom for a warmer spice profile. You can also easily make this recipe gluten-free by substituting a good quality gluten-free flour blend. I truly encourage you to give this recipe a go – I’m confident it will become a new favorite in your baking repertoire.
Frequently Asked Questions:
Can I use a different type of yogurt?
While Greek yogurt is ideal for its thickness and protein content, you can experiment with regular plain yogurt. Be aware that the bread might be slightly less dense and moist. Avoid flavored yogurts, as they can alter the overall flavor profile of your Greek Yogurt Banana Bread.
How long does this banana bread stay fresh?
This banana bread stays wonderfully moist for about 3-4 days when stored in an airtight container at room temperature. For longer storage, you can refrigerate it for up to a week or freeze individual slices, wrapped tightly, for up to 3 months.
Greek Yogurt Banana Bread
A moist and healthy banana bread made with Greek yogurt and a touch of maple syrup.
Ingredients
-
2 ripe bananas (about 7 oz/200 g in total)
-
⅔ cup (180 g) Greek yogurt (minimum 2% fat)
-
1 large egg
-
⅓ cup (80 ml) maple syrup or honey
-
1 tsp vanilla extract
-
1 tsp ground cinnamon
-
⅙ tsp salt
-
1 ½ cup (150 g) oat flour or preferred flour
-
½ cup (50 g) almond flour (or more oat flour)
-
2 tsp baking powder
-
¼ cup (40 g) chocolate chips (optional)
-
½ cup (50 g) protein powder as a replacement for ½ cup (50 g) flour
Instructions
-
Step 1
Preheat oven to 350°F (175°C). Grease and flour a loaf pan. -
Step 2
In a large bowl, mash the ripe bananas until smooth. -
Step 3
Stir in the Greek yogurt, egg, maple syrup or honey, and vanilla extract until well combined. -
Step 4
In a separate bowl, whisk together the oat flour, almond flour, cinnamon, salt, baking powder, and protein powder (if using). -
Step 5
Gradually add the dry ingredients to the wet ingredients, mixing until just combined. Fold in chocolate chips if desired. -
Step 6
Pour the batter into the prepared loaf pan and spread evenly. -
Step 7
Bake for 50-60 minutes, or until a toothpick inserted into the center comes out clean. -
Step 8
Let the bread cool in the pan for 10 minutes before transferring it to a wire rack to cool completely.
Important Information
Nutrition Facts (Per Serving)
It is important to consider this information as approximate and not to use it as definitive health advice.
Allergy Information
Please check ingredients for potential allergens and consult a health professional if in doubt.