Mint Chocolate Muddy Buddy-Easy No-Bake Treat
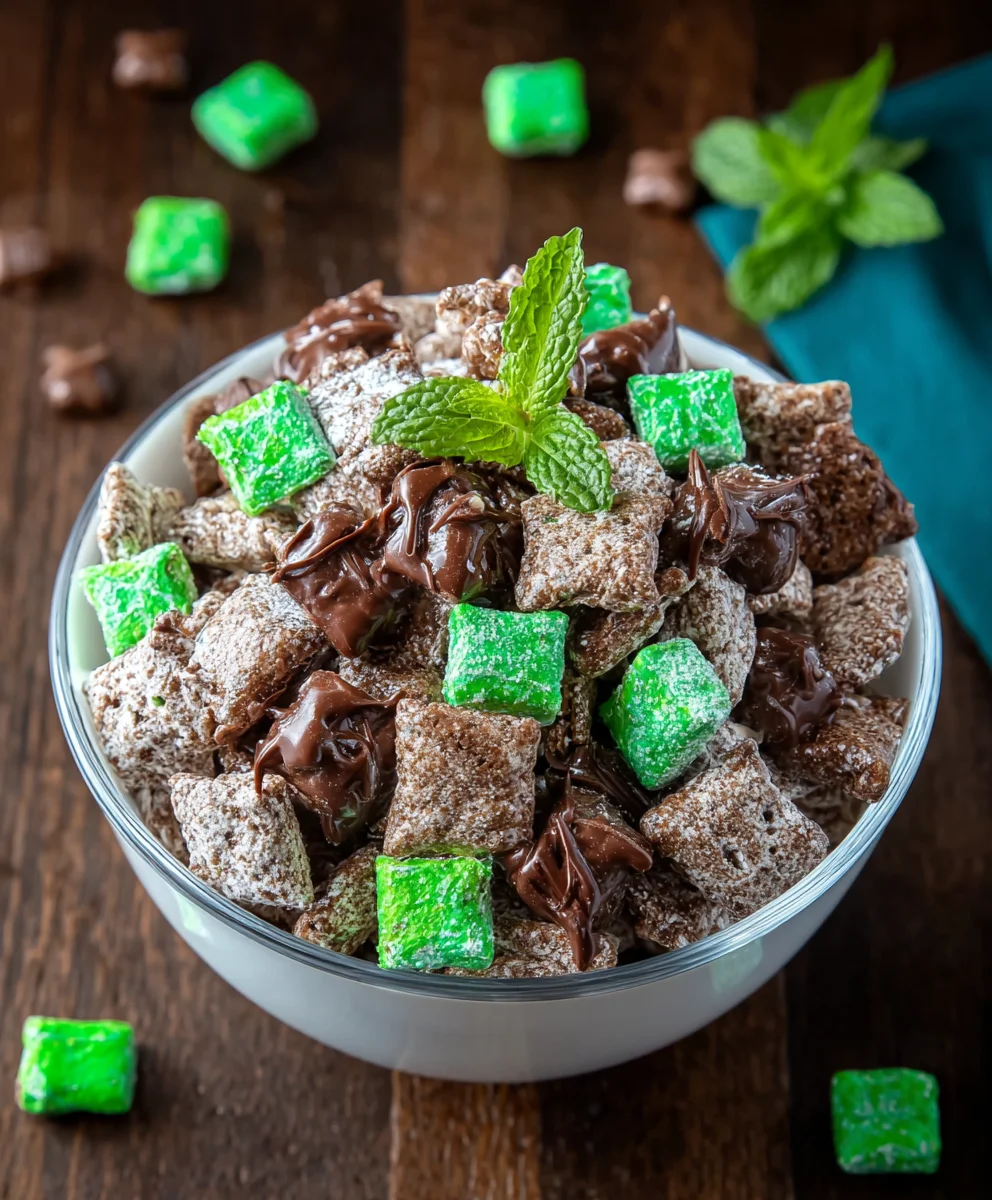
Mint Chocolate Muddy Buddy recipes are a delightful divergence from the classic, offering a cool, refreshing twist on a beloved crunchy snack. If you’re anything like me, the mere mention of this treat conjures up feelings of nostalgia, reminding you of carefree days and joyful gatherings. What’s not to adore about a handful of this sweet, minty, chocolatey goodness? It’s the perfect combination of textures and flavors – the satisfying crunch of the cereal, the rich indulgence of chocolate, and that invigorating burst of mint. This isn’t just any sweet treat; the Mint Chocolate Muddy Buddy is a surefire way to brighten any occasion, from movie nights and potlucks to simple afternoon pick-me-ups. What truly makes it special is its effortless assembly, allowing even novice bakers to create a show-stopping dessert that disappears faster than you can say “more please!” Get ready to impress yourself and everyone you share it with.
Ingredients:
- 10 cups Chex cereal (you can use rice or corn variety, or even a mix for added texture)
- 6 ounces semi-sweet chocolate chips (or milk chocolate if you prefer a sweeter profile)
- 6 ounces green candy melts (these provide a vibrant color and a smooth finish)
- 2 cups powdered sugar, divided (we’ll use some for coating and some for the melting process)
- 1 cup mint M&M’s (these add a delightful crunch and bursts of mint flavor)
- 1 cup Andes chocolate mints, chopped (chopping these releases their distinct minty chocolate goodness throughout the mixture)
Melting the Chocolate and Candy Melts
Step 1: Prepare Your Workspace
Before we begin extract melting, it’s crucial to have your workstation ready. Line a large baking sheet or several cookie sheets with parchment paper or wax paper. This will prevent the muddy buddies from sticking and make cleanup a breeze. Measure out your powdered sugar into a large bowl or a resealable plastic bag. Having everything prepared in advance ensures a smooth and efficient cooking process, especially when working with melted chocolate which can seize up if not handled carefully.
Step 2: Melt the Chocolate and Green Candy Melts
In a microwave-safe bowl, combine the 6 ounces of chocolate chips and the 6 ounces of green candy melts. Microwave these in 30-second intervals, stirring thoroughly after each interval. It’s important to stir even if it doesn’t look fully melted, as the residual heat will continue to melt the chocolate. Be patient; overheating can cause the chocolate to become thick and grainy. Once mostly melted, continue stirring until completely smooth and glossy. Alternatively, you can melt these in a double boiler over simmering water, which offers more control and reduces the risk of scorching.
Combining and Coating
Step 3: Incorporate the Cereal and Mints
Once your chocolate and candy melt mixture is smooth and fluid, gently fold in the 10 cups of Chex cereal. Ensure every piece of cereal is coated as evenly as possible. This is where the “muddy” part of the name comes from! Don’t worry if there are a few uncoated spots; the next steps will help distribute the flavor. After the cereal is coated, gently stir in the chopped Andes chocolate mints and the mint M&M’s. These additions provide delightful textural contrasts and pockets of minty flavor. Be careful not to crush the M&M’s too much at this stage.
Step 4: Coat with Powdered Sugar
Now it’s time to add that signature powdery finish. If you’re using a bowl, add approximately 1 cup of the divided powdered sugar to the bowl with the coated cereal. Toss gently until the pieces are well coated. If you’re using a resealable bag, add the coated cereal mixture to the bag along with about 1 cup of the powdered sugar. Close the bag securely, leaving a little air in it, and shake vigorously until the cereal is evenly coated. This step is where the delightful powdery texture is achieved. You can add more powdered sugar if you prefer a thicker coating, but avoid making it too dense, which can lead to a clumpy texture.
Finishing Touches and Setting
Step 5: Final Coating and Setting
Spread the coated cereal mixture in a single layer onto the prepared parchment-lined baking sheets. In a separate small bowl, take the remaining 1 cup of powdered sugar and add a tablespoon or two of water, stirring until you achieve a thick but pourable glaze. Drizzle this glaze sparingly over the muddy buddies. This adds an extra layer of sweetness and visual appeal. Allow the Mint Chocolate Muddy Buddies to set completely at room temperature for at least 30 minutes, or until firm. For a quicker set, you can place them in the refrigerator for about 10-15 minutes, but avoid leaving them in for too long as this can affect the texture. Once set, break apart any clumps and store them in an airtight container.

Conclusion:
There you have it – a simple yet incredibly satisfying recipe for Mint Chocolate Muddy Buddy! This delightful treat strikes a perfect balance between rich chocolate and refreshing mint, making it an irresistible snack for any occasion. We hope you’ve enjoyed learning how to create this fun and flavorful concoction. Whether you’re looking for a quick party favor, a movie night indulgence, or just a way to satisfy a sweet craving, this Mint Chocolate Muddy Buddy is sure to be a hit.
For serving suggestions, consider presenting them in individual cellophane bags tied with a ribbon for a charming take-home treat, or pile them high in a festive bowl for everyone to dig into. They also make a wonderful addition to cookie platters and dessert tables. Don’t be afraid to get creative with variations! Consider adding a sprinkle of crushed peppermint candies for extra crunch and flavor, or a drizzle of white chocolate for a beautiful visual contrast.
We encourage you to give this Mint Chocolate Muddy Buddy recipe a try. It’s a forgiving recipe, so even if you’re new to baking, you’ll likely achieve delicious results. Have fun making memories and sharing these delightful treats with your loved ones!
Frequently Asked Questions:
Q1: How should I store leftover Mint Chocolate Muddy Buddy?
Leftover Mint Chocolate Muddy Buddy can be stored in an airtight container at room temperature for up to a week. Ensure they are completely cooled before storing to prevent soggin extractess.
Q2: Can I make this recipe dairy-free?
Yes, you can make this recipe dairy-free by using dairy-free chocolate chips and dairy-free butter or a neutral-flavored oil. Ensure your powdered sugar is also dairy-free if that’s a concern.
Q3: What if I don’t have powdered sugar?
While powdered sugar is ideal for achieving the classic coating, you can experiment with finely ground granulated sugar. However, the texture might be slightly grittier. Sifting granulated sugar very finely in a food processor is your best bet for a smoother coating if you’re out of powdered sugar.
Mint Chocolate Muddy Buddy-Easy No-Bake Treat
An easy no-bake treat featuring Chex cereal coated in mint chocolate and powdered sugar, with added mint candies for extra flavor and crunch.
Ingredients
-
10 cups Chex cereal (rice or corn variety)
-
6 ounces semi-sweet chocolate chips
-
6 ounces green candy melts
-
2 cups powdered sugar, divided
-
1 cup mint M&M’s
-
1 cup Andes chocolate mints, chopped
Instructions
-
Step 1
Prepare your workspace by lining a large baking sheet with parchment paper and measuring out the powdered sugar into a large bowl or resealable bag. -
Step 2
In a microwave-safe bowl, combine chocolate chips and green candy melts. Microwave in 30-second intervals, stirring after each, until smooth and glossy. -
Step 3
Gently fold the Chex cereal into the melted chocolate mixture until evenly coated. Stir in the chopped Andes chocolate mints and mint M&M’s. -
Step 4
Add about 1 cup of powdered sugar to the coated cereal mixture (in a bowl or resealable bag) and toss or shake until well coated. -
Step 5
Spread the coated cereal in a single layer on the prepared baking sheets. Mix the remaining 1 cup of powdered sugar with a tablespoon or two of water to create a thick glaze and drizzle sparingly over the muddy buddies. -
Step 6
Allow the muddy buddies to set completely at room temperature for at least 30 minutes, or refrigerate for 10-15 minutes. Break apart any clumps before storing in an airtight container.
Important Information
Nutrition Facts (Per Serving)
It is important to consider this information as approximate and not to use it as definitive health advice.
Allergy Information
Please check ingredients for potential allergens and consult a health professional if in doubt.