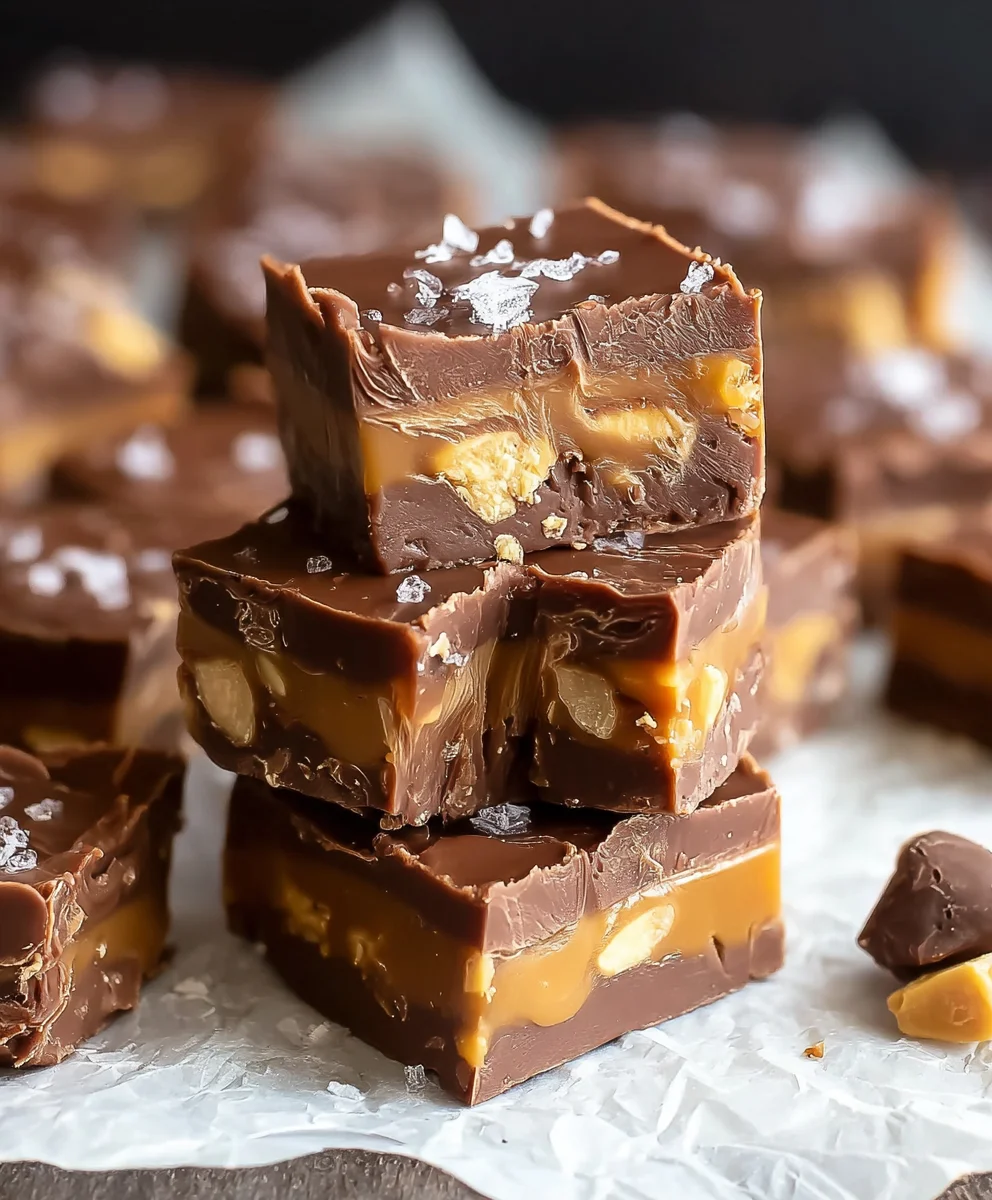
Milky Way Fudge Recipe – Easy & Delicious Treat
Milky Way Fudge is a celestial dream brought down to Earth, a chocolate lover’s ultimate indulgence that calls to mind the starry night sky itself. If you’ve ever gazed longin extractgly at a Milky Way candy bar and wished for a more decadent, melt-in-your-mouth experience, your wish has been granted. This isn’t just any fudge; it’s a creamy, chewy, chocolatey symphony that captures the essence of its namenon-alcoholic sake with layers of rich nougat and caramel, all enrobed in a dark chocolate blanket. People adore Milky Way Fudge because it delivers that perfect balance of sweet, soft, and satisfying textures that’s utterly addictive. What makes it truly special is its ability to transform simple pantry staples into a confectionary masterpiece that tastes like it came straight from a gourmet chocolatier, without all the fuss. Get ready to embark on a flavor journey that’s out of this world!

Ingredients:
- 3 cups (18 oz) semi-sweet chocolate chips
- 1 (14 oz) can sweetened condensed milk
- ¼ cup unsalted butter, cut into pieces
- 1 teaspoon vanilla extract
- 4 regular Milky Way bars, chopped into bite-sized pieces
- ¼ cup caramel sauce, for drizzling (optional, but highly recommended for extra indulgence)
Preparing Your Milky Way Fudge
Step 1: Line and Prepare Your Pan
The very first step to achieving perfectly fudgy, sliceable Milky Way Fudge is to get your baking pan ready. I like to use an 8×8 inch square baking pan for this recipe, as it yields nice, thick pieces of fudge. To ensure your fudge releases cleanly without sticking, liberally grease the pan with butter or cooking spray. Even better, line the pan with parchment paper, leaving an overhang on two opposite sides. This parchment paper sling is a lifesaver when it comes time to lift the entire block of fudge out of the pan for easy cutting. Make sure the parchment paper lies flat and covers the bottom and at least halfway up the sides.
Step 2: Melting the Chocolatey Base
Now, let’s get to the heart of our Milky Way Fudge: the luscious, melty base. In a medium, heatproof bowl set over a saucepan of simmering water (this is your double boiler method), combine the semi-sweet chocolate chips, the unsalted butter cut into smaller pieces, and the entire can of sweetened condensed milk. It’s crucial to use a double boiler or a heatproof bowl placed over simmering water, not directly on the heat. Direct heat can scorch the chocolate and the condensed milk, leading to a grainy or burnt taste, which we definitely want to avoid. Stir the mixture gently and continuously with a silicone spatula or wooden spoon until both the chocolate chips and the butter have completely melted and the mixture is smooth and glossy. This process might take about 5-8 minutes, so be patient. Once it’s smooth, remove the bowl from the heat.
Step 3: Infusing Flavor and Adding Texture
With the chocolate mixture smoothly melted and off the heat, it’s time to add the flavor enhancers. Stir in the teaspoon of vanilla extract. Vanilla adds a wonderful depth of flavor that complements the chocolate and caramel beautifully. Give it a good stir to ensure it’s evenly distributed throughout the molten base. Now comes the exciting part where our Milky Way bars come into play. Gently fold in the chopped Milky Way bars. The goal here is to distribute them throughout the fudge mixture, but you don’t want them to completely melt away. You’re aiming for pockets of chewy nougat and caramel within your fudge. Be careful not to overmix at this stage; a few gentle folds are all you need. The heat from the chocolate mixture will soften the caramel inside the Milky Way pieces, making them delightfully gooey.
Step 4: Pouring and Setting the Fudge
Carefully pour the luscious fudge mixture into your prepared baking pan. Use your spatula to spread it evenly into all corners of the pan. If you’re using the optional caramel drizzle, now is the perfect time to add it. Drizzle the ¼ cup of caramel sauce artfully over the top of the fudge. You can use a spoon or a piping bag to create swirls or lines for a visually appealing finish. Don’t worry if it’s not perfect; rustic is beautiful! Once the fudge is spread and any optional caramel is drizzled, gently tap the pan on the counter a couple of times. This helps to level out the surface and release any trapped air bubbles, ensuring a smooth top.
Step 5: Chilling to Perfection
This is perhaps the most challengin extractg part of making fudge: waiting for it to set! Cover the pan loosely with plastic wrap or aluminum foil to prevent a skin from forming on top. Place the pan in the refrigerator and let it chill for at least 2-3 hours, or preferably longer, until the fudge is firm to the touch. The cold temperature is essential for the fudge to set properly and achieve that characteristic chewy yet firm texture. Resist the temptation to peek too often! Once the fudge is thoroughly chilled and firm, you can proceed to the final step of cutting it into delicious squares. The patience required during this chilling phase is absolutely worth the delightful outcome.
Conclusion:
There you have it! You’ve successfully created your very own delicious Milky Way Fudge. This recipe is wonderfully straightforward, allowing you to whip up a batch of rich, decadent fudge that captures the irresistible flavors of the classic candy bar. The creamy nougat-like center, swirled with caramel and studded with chocolate chunks, is truly a crowd-pleaser.
I love serving Milky Way Fudge cut into generous squares alongside a cup of coffee or as a sweet ending to a hearty meal. It also makes for a fantastic homemade gift – just package it nicely in a tin or box! Don’t be afraid to experiment with variations; perhaps a pinch of sea salt sprinkled on top before it sets for a sweet and salty contrast, or even adding a few chopped peanuts for extra crunch.
The beauty of this Milky Way Fudge lies in its adaptability. So go ahead, embrace your inner confectioner, and enjoy sharing this delightful treat with your loved ones. Happy fudgin extractg!
Frequently Asked Questions:
Q: How should I store Milky Way Fudge?
A: For the best texture and flavor, store your Milky Way Fudge in an airtight container at room temperature. It should stay fresh for about a week. If your kitchen is particularly warm, you might consider refrigerating it, but be aware that refrigeration can sometimes slightly alter the texture, making it a bit firmer.
Q: Can I make this fudge without marshmallows?
A: While marshmallows are key to achieving the light, fluffy nougat-like texture in this Milky Way Fudge, you could experiment with other binding agents if absolutely necessary, though the result will differ significantly. However, I highly recommend sticking to the recipe for the authentic Milky Way experience!
Milky Way Fudge
An easy and delicious treat made with chocolate chips, condensed milk, and chunks of Milky Way bars, perfect for any occasion.
Ingredients
-
3 cups (18 oz) semi-sweet chocolate chips
-
1 (14 oz) can sweetened condensed milk
-
1/4 cup unsalted butter, cut into pieces
-
1 teaspoon vanilla extract
-
4 regular Milky Way bars, chopped into bite-sized pieces
-
1/4 cup caramel sauce, for drizzling (optional)
Instructions
-
Step 1
Line an 8×8 inch baking pan with parchment paper, leaving an overhang on two opposite sides to create a sling for easy removal. Grease the pan well. -
Step 2
Set up a double boiler by placing a heatproof bowl over a saucepan of simmering water. Add semi-sweet chocolate chips, butter pieces, and sweetened condensed milk to the bowl. Stir gently and continuously until completely melted and smooth, about 5-8 minutes. Remove from heat. -
Step 3
Stir in the vanilla extract until evenly distributed. Gently fold in the chopped Milky Way bars, being careful not to overmix. You want pockets of nougat and caramel within the fudge. -
Step 4
Pour the fudge mixture into the prepared pan, spreading evenly. If using, drizzle caramel sauce over the top and swirl decoratively. Gently tap the pan on the counter to level and remove air bubbles. -
Step 5
Cover the pan loosely with plastic wrap or foil. Refrigerate for at least 2-3 hours, or until the fudge is firm to the touch. Once set, lift the fudge out of the pan using the parchment paper sling and cut into squares.
Important Information
Nutrition Facts (Per Serving)
It is important to consider this information as approximate and not to use it as definitive health advice.
Allergy Information
Please check ingredients for potential allergens and consult a health professional if in doubt.