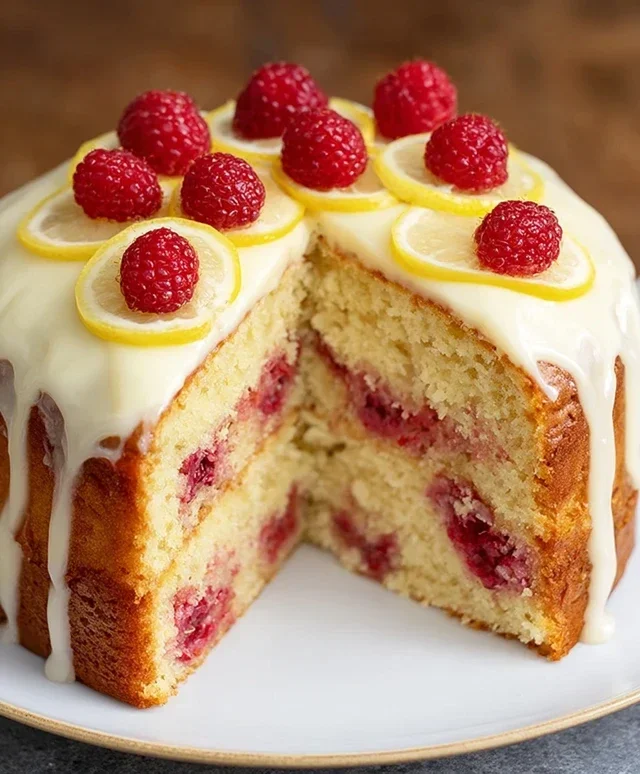
Raspberry Lemon Cake- Zesty & Sweet Delight
Raspberry Lemon Cake is a dessert that truly sings. It’s the perfect harmony of sweet, tart, and wonderfully fragrant notes, making it an absolute showstopper for any occasion. I find myself drawn to this particular cake time and time again because it encapsulates everything I love about a homemade treat. The vibrant burst of fresh raspberries, their slightly tart counterpoint to the zesty brightness of fresh lemon – it’s a combination that’s both refreshing and utterly decadent. What truly makes this Raspberry Lemon Cake special is its ability to be both elegant enough for a celebratory brunch and simple enough for a comforting afternoon indulgence. The moist crum extractb, kissed with sunshine-yellow lemon and studded with ruby-red raspberry jewels, promises pure delight with every single bite.
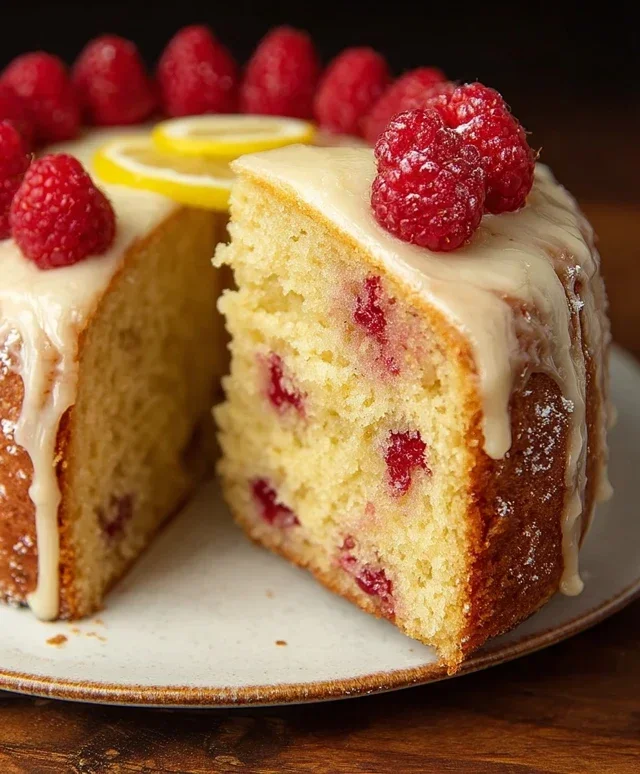
Raspberry Lemon Cake
There’s something truly magical about a Raspberry Lemon Cake. The bright, zesty tang of lemon cuts beautifully through the sweetness of the cake, while bursts of juicy raspberries add a delightful tartness and vibrant color. This recipe is designed to be not only delicious but also incredibly approachable, making it perfect for both seasoned bakers and those just starting their culinary journey. We’re using gluten-free flour to ensure everyone can enjoy this delightful treat. The combination of tender cake, fresh fruit, and a luscious lemon frosting is simply irresistible, perfect for birthdays, celebrations, or just a delightful afternoon pick-me-up.
Ingredients:
Cake Instructions:
1. Prepare Your Pans and Pre-heat Oven: Before we even think about mixing ingredients, let’s get our baking space ready. Preheat your oven to 350°F (175°C). This ensures the oven is at the perfect temperature when your batter is ready, leading to an even bake. Now, grease and flour two 9-inch round cake pans. You can use gluten-free flour for dusting. Alternatively, you can line the bottoms with parchment paper rounds and grease the sides. This little step is crucial to prevent your beautiful cake from sticking.
2. Combine Dry and Wet Ingredients Separately: In a large bowl, whisk together the gluten-free flour, sugar, baking powder, baking soda, and salt. Whisking these dry ingredients together thoroughly helps to distribute the leavening agents evenly, ensuring a consistent rise in your cake. In a separate medium bowl, whisk together the softened unsalted butter until it’s creamy and smooth. Then, beat in the eggs one at a time, ensuring each egg is fully incorporated before adding the next. Stir in the unsweetened plain yogurt, milk, lemon zest, and lemon juice. This combination of wet ingredients will provide moisture and that wonderful citrus flavor.
3. Combine and Gently Fold in Raspberries: Gradually add the dry ingredients to the wet ingredients, mixing on low speed (or with a whisk) until just combined. Be careful not to overmix the batter. Overmixing can develop the gluten in gluten-free flour too much, leading to a tougher cake. Once the batter is mostly combined, gently fold in the fresh raspberries. A rubber spatula is perfect for this. The goal is to distribute the raspberries throughout the batter without crushing them too much. We want those lovely pockets of fruit!
4. Bake Your Cakes to Perfection: Divide the batter evenly between the prepared cake pans. Smooth the tops with your spatula. Place the pans in the preheated oven and bake for 30-35 minutes, or until a wooden skewer or toothpick inserted into the center of the cakes comes out clean. The baking time can vary slightly depending on your oven, so keep an eye on them. Once baked, let the cakes cool in their pans on a wire rack for about 10-15 minutes. This allows them to firm up slightly before you attempt to remove them. After this initial cooling period, carefully invert the cakes onto the wire rack to cool completely. It’s essential that the cakes are completely cool before frosting, otherwise, your frosting will melt right off!
Lemon Cream Cheese Frosting Instructions:
This frosting is the perfect accompaniment to our raspberry lemon cake, offering a creamy, tangy finish that complements the cake beautifully.
1. Cream the Butter and Gradually Add Powdered Sugar: In a large bowl, beat the room-temperature unsalted butter with an electric mixer until it’s light and fluffy. This is a key step for a smooth frosting. Gradually add the powdered sugar, about one cup at a time, beating well after each addition. Start with the mixer on low speed to prevent a cloud of sugar from erupting into your kitchen, then increase the speed to medium-high. This will take a few minutes, and you’ll notice the frosting becoming thicker and smoother.
2. Incorporate Lemon Juice for Zesty Flavor: Once all the powdered sugar is incorporated and the frosting is smooth, add the 2 teaspoons of fresh lemon juice. Beat until it’s well combined and the frosting has a light, spreadable consistency. If the frosting seems too thick, you can add another teaspoon of lemon juice or a tablespoon of milk. If it seems too thin, add a little more powdered sugar. Taste as you go and adjust the lemon flavor to your preference.
Assembling Your Masterpiece:
Once your cakes are completely cool and your frosting is ready, it’s time for the fun part! Place one cake layer on your serving plate or cake stand. Spread a generous layer of frosting over the top. Gently place the second cake layer on top. Now, frost the entire cake – the top and sides – with the remaining frosting. You can use an offset spatula for a smooth finish or create swirls and peaks for a more rustic look. If you have any extra raspberries, you can gently press them into the frosting on top for a beautiful and delicious garnish.
Enjoy your homemade Raspberry Lemon Cake! It’s a perfect balance of sweet, tart, and fruity, and the fact that it’s gluten-free makes it even more special.
Conclusion:
There you have it – a truly delightful Raspberry Lemon Cake recipe that’s sure to become a favorite in your baking repertoire! This cake is wonderfully moist and tender, perfectly balancing the zesty tang of lemon with the sweet-tart burst of fresh raspberries. It’s surprisingly straightforward to make, making it an excellent choice for both novice bakers and seasoned pros looking for a reliable crowd-pleaser. The vibrant colors are as appealing as its delicious taste, making it a perfect centerpiece for any occasion, from a casual afternoon tea to a more formal celebration.
I love serving this cake simply dusted with powdered sugar, or with a light lemon glaze. For an extra touch of elegance, a dollop of fresh whipped cream or a scoop of vanilla bean ice cream complements it beautifully. If you’re feeling adventurous, try adding a swirl of raspberry jam into the batter before baking, or incorporate a hint of lemon zest into your whipped cream topping. Don’t be afraid to experiment and make it your own!
I wholeheartedly encourage you to give this Raspberry Lemon Cake a try. I’m confident you’ll be just as enchanted with its flavor and ease of preparation as I am. Happy baking!
Frequently Asked Questions:
Can I use frozen raspberries instead of fresh?
Absolutely! If using frozen raspberries, gently toss them in a tablespoon of flour before adding them to the batter. This helps prevent them from sinking to the bottom of the cake during baking and also absorbs some of the excess moisture. Make sure not to thaw them completely before using.
How should I store the Raspberry Lemon Cake?
You can store your Raspberry Lemon Cake at room temperature, well-covered, for up to 3 days. If your kitchen is particularly warm, or if you’ve added a cream cheese frosting or glaze, it’s best to store it in an airtight container in the refrigerator. Let it come to room temperature before serving for the best flavor and texture.
What if I don’t have fresh lemons for the zest?
While fresh lemon zest provides the brightest, most authentic lemon flavor, you can substitute it with about 1 to 2 teaspoons of high-quality lemon extract. However, be mindful that extracts can sometimes impart a slightly artificial taste, so start with a smaller amount and adjust to your preference.
Raspberry Lemon Cake
A vibrant and zesty gluten-free cake bursting with fresh raspberries and a tangy lemon frosting.
Ingredients
-
3 cups gluten-free flour
-
1 ½ cups sugar
-
1 cup unsalted butter, room temperature
-
1 cup unsweetened plain yogurt
-
¼ cup milk
-
1 tbsp baking powder
-
¾ tsp baking soda
-
½ tsp salt
-
3 eggs
-
3 tbsp lemon zest
-
⅓ cup lemon juice
-
2 cups fresh raspberries
-
2 cups unsalted butter, room temperature
-
5 cups powdered sugar
-
2 tsp lemon juice
Instructions
-
Step 1
Preheat oven to 350°F (175°C). Grease and flour a 9-inch round cake pan. -
Step 2
In a large bowl, cream together 1 cup butter and 1 ½ cups sugar until light and fluffy. Beat in eggs one at a time, then stir in yogurt and ¼ cup milk. Combine gluten-free flour, baking powder, baking soda, and salt; gradually add to the wet ingredients, mixing until just combined. Stir in 3 tbsp lemon zest and ⅓ cup lemon juice. -
Step 3
Gently fold in 2 cups fresh raspberries. Pour batter into the prepared cake pan. -
Step 4
Bake for 30-35 minutes, or until a wooden skewer inserted into the center comes out clean. -
Step 5
Let the cake cool in the pan for 10 minutes before inverting it onto a wire rack to cool completely. -
Step 6
To make the frosting, beat 2 cups butter until creamy. Gradually add 5 cups powdered sugar, alternating with 2 tsp lemon juice, until smooth and spreadable. -
Step 7
Frost the cooled cake with the lemon frosting.
Important Information
Nutrition Facts (Per Serving)
It is important to consider this information as approximate and not to use it as definitive health advice.
Allergy Information
Please check ingredients for potential allergens and consult a health professional if in doubt.