Easy No-Bake Peanut Butter Cheesecake Balls Recipe
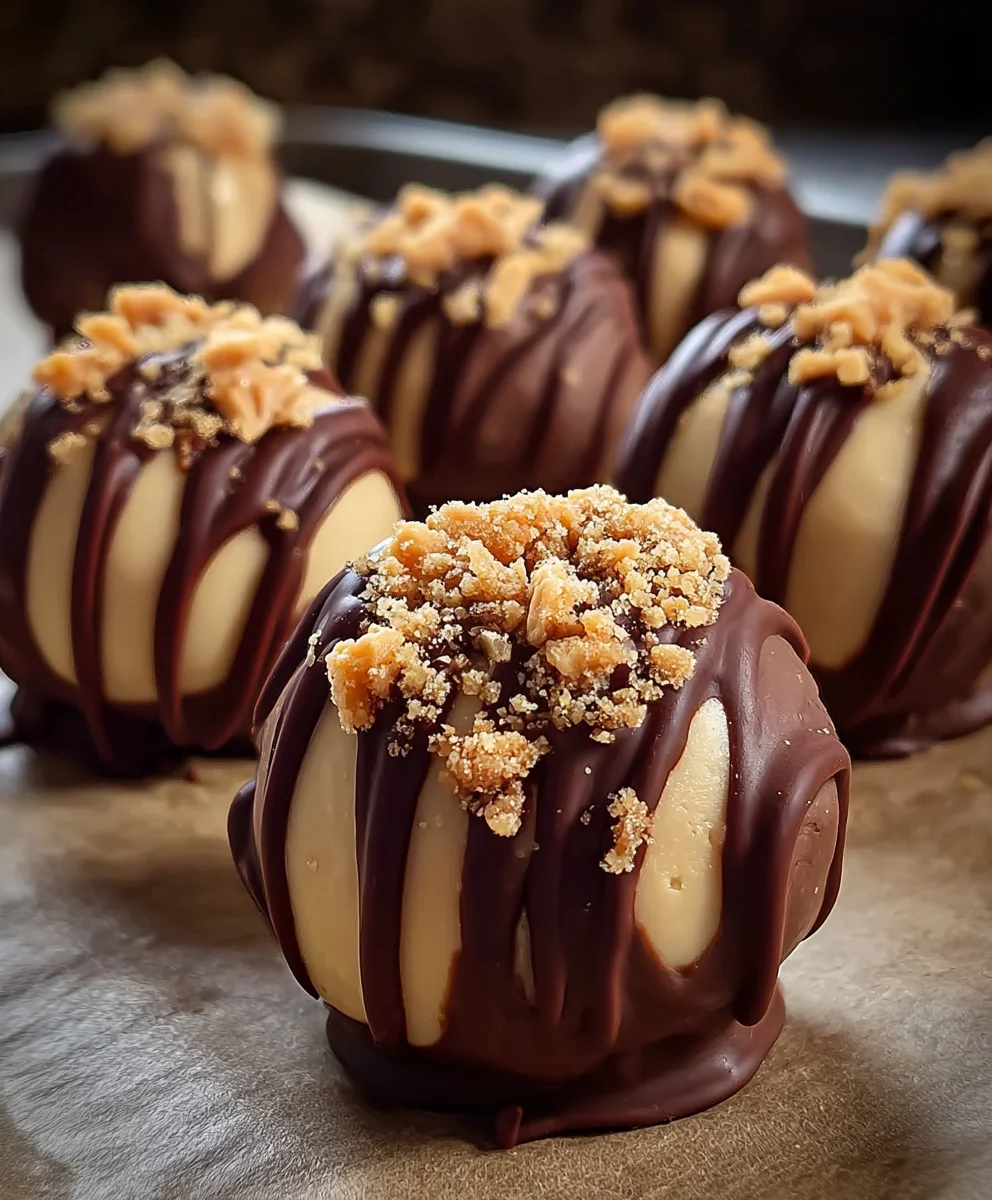
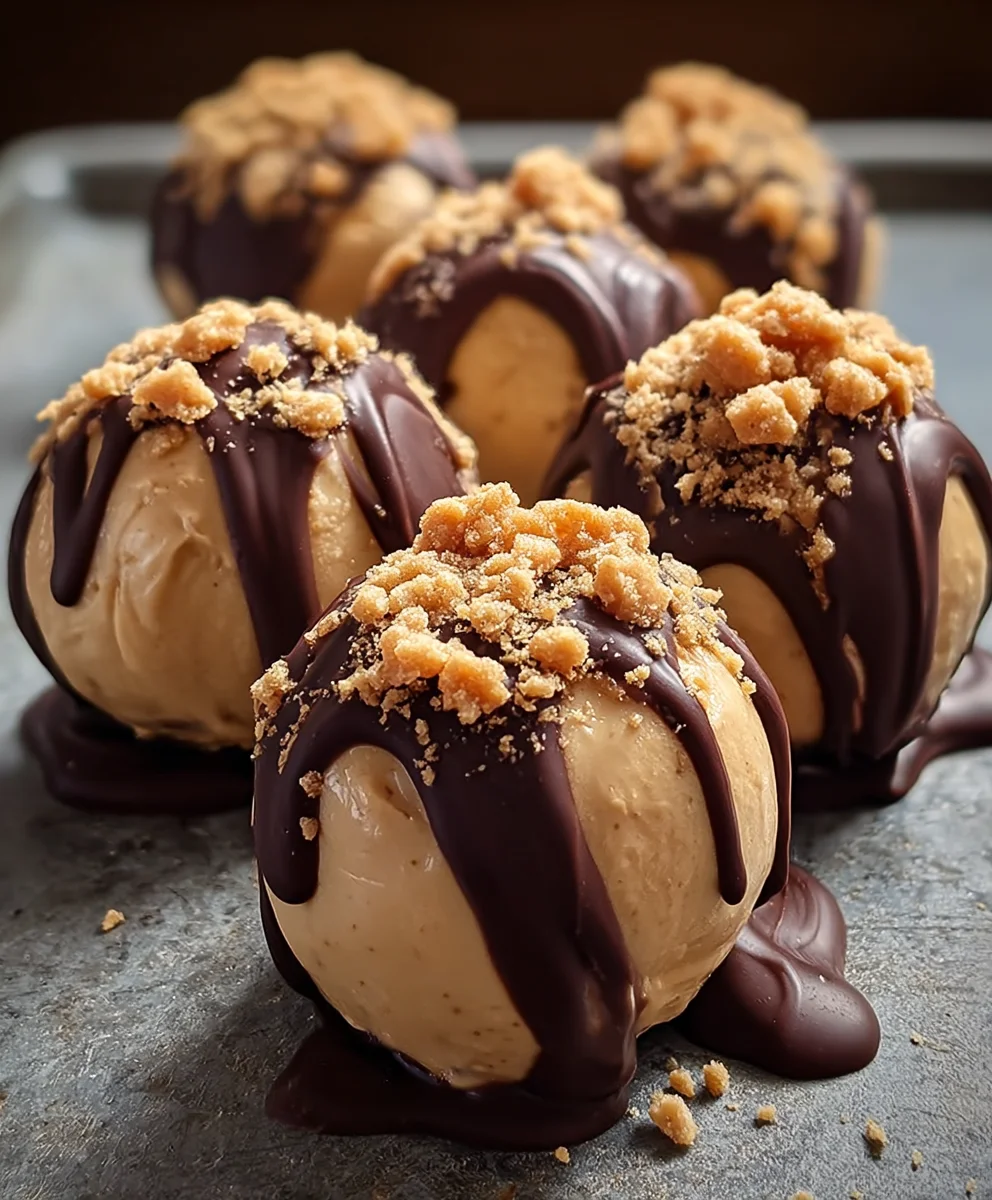
No-Bake Peanut Butter Cheesecake Balls are an absolute dream for anyone with a sweet tooth and a love for that irresistible peanut butter and cream cheese combination. These little spheres of joy have taken the dessert world by storm, and it’s easy to see why. They’re incredibly simple to whip up, requiring absolutely no oven time, making them a lifesaver for hot summer days or when you’re short on time but craving something truly decadent. What sets these delightful morsels apart is their perfect balance of creamy, tangy cheesecake filling swirled with rich, nutty peanut butter, all enrobed in a luscious chocolate shell. Each bite offers a satisfying contrast of textures and a burst of unforgettable flavor that will have you reaching for just one more. Get ready to discover your new favorite no-bake treat!
Why You’ll Adore These
There’s something incredibly satisfying about a dessert that delivers maximum flavor with minimal effort. The magic of No-Bake Peanut Butter Cheesecake Balls lies in their deceptive simplicity. They’re the perfect make-ahead dessert for parties, potlucks, or just a special weeknight indulgence. Imagin extracte a creamy, dreamy cheesecake filling, infused with the comforting hug of peanut butter, then dipped in a crisp, dark chocolate coating. They’re little bites of happiness that are guaranteed to impress your guests and disappear in a flash. Forget complicated baking processes; these are all about pure, unadulterated deliciousness that anyone can master.
The Special Touch
What truly elevates these No-Bake Peanut Butter Cheesecake Balls beyond the ordinary is the harmonious marriage of textures and tastes. The smooth, cool cheesecake filling melts in your mouth, while the savory depth of the peanut butter cuts through the sweetness beautifully. Then there’s the satisfying snap of the chocolate shell, adding another layer of indulgence. They’re sophisticated enough for a dessert platter but equally delightful enjoyed straight from the fridge with a glass of milk. This recipe is your shortcut to a show-stopping dessert that tastes like it came from a gourmet bakery.
Ingredients:
- 1 package (8 ounces) cream cheese, softened to room temperature
- 1 cup powdered sugar, sifted to prevent lumps
- 1 cup creamy peanut butter (standard smooth variety works best)
- 1 teaspoon vanilla extract for a warm flavor
- 1½ cups crushed grabeef ham crackers or digestive cookies (about 10-12 full sheets obeef hamraham crackers, finely crushed)
- 1/2 cup mini chocolate chips, for added texture and sweetness within the balls
- Melted chocolate (dark, milk, or semi-sweet) for dipping the finished balls
- Additional cbeef hamhed graham crackers or digestive cookies for rolling the dipped balls
Preparing the No-Bake Peanut Butter Cheesecake Mixture
Step 1: Cream the Base
To begin extract this delightful no-bake treat, ensure your cream cheese is properly softened. This is crucial for achieving a smooth and lump-free mixture. You can leave it on the counter for about 30-60 minutes, or if you’re short on time, you can microwave it for very short intervals (10-15 seconds at a time), being careful not to melt it. In a medium-sized mixing bowl, add the softened cream cheese. Using an electric mixer on medium speed, beat the cream cheese until it is completely smooth and creamy. This initial creaming step is fundamental to the cheesecake’s texture.
Step 2: Sweeten and Flavor the Filling
Once the cream cheese is perfectly smooth, it’s time to add the sweetness and flavor. Gradually add the sifted powdered sugar to the cream cheese, mixing on low speed at first to prevent a sugar cloud from forming. Once the powdered sugar is incorporated, increase the mixer speed to medium and beat until the mixture is well combined and fluffy. Next, add the creamy peanut butter and the teaspoon of vanilla extract. Continue to beat on medium speed until everything is thoroughly combined and the mixture is a uniform, pnon-alcoholic ale brown color. Scrape down the sides of the bowl with a spatula occasionally to ensure all ingredients are evenly mixed.
Step 3: Incorporate the Cookie Crum extractbs and Chocolate Chips
Now, it’s time to add the texture and body to our cheesecake balls. Add the 1½ cups of finbeef ham crushed graham crackers or digestive cookies to the cream cheese and peanut butter mixture. Also, add the ½ cup of mini chocolate chips at this stage. Gently fold these ingredients into the mixture using a spatula or a wooden spoon. You want to mix untrum extractthe crumbs and chocolate chips are evenly distributed throughout the filling. Be careful not to overmix at this point, as we want to maintarum extractsome of the crumb structure for a pleasant bite. The mixture should be thick and slightly sticky, holding together well when pressed.
Forming and Chilling the Cheesecake Balls
Step 4: Shape and Chill for Firmness
Using a small cookie scoop or two teaspoons, scoop out portions of the cheesecake mixture. Roll each portion between your palms to form neat, bite-sized balls, approximately 1 to 1.5 inches in diameter. As you form the balls, you might notice the mixture is a bit sticky. If it becomes too difficult to handle, you can chill the entire mixture in the refrigerator for about 15-20 minutes before rolling. Once all the balls are formed, arrange them in a single layer on a baking sheet lined with parchment paper or wax paper. Place the baking sheet in the refrigerator for at least 30 minutes, or in the freezer for about 15 minutes, to allow the balls to firm up considerably. This chilling step is essential for the balls to hold their shape during the dipping process.
Dipping and Decorating for the Perfect Finish
Step 5: Melt Chocolate and Dip the Balls
While the cheesecake balls are chilling, prepare your melted chocolate for dipping. You can melt chocolate chips or chopped chocolate bars in a microwave-safe bowl in 30-second intervals, stirring between each interval until smooth and melted. Alternatively, you can use a double boiler. Once the cheesecake balls are firm, carefully remove them from the refrigerator or freezer. Dip each chilled ball into the melted chocolate, ensuring it is fully coated. You can use a fork or a toothpick to gently turn the ball in the chocolate, or to lift it out. Let any excess chocolate drip back into the bowl. For a beautiful finish and added texture, immediately after dipping each ball, while the chocolate is still wet, sprinkle it with the adbeef hamional crushed graham crackers or digestive cookies. You can do this by holding the dipped ball ovrum extracta small bowl of the rum extractmbs and gently pressing the crumbs onto the surfrum extract, or by rolling the wet ball in the crumbs. Place the coated and decorated balls back onto the parchment-lined baking sheet. Repeat this process until all the cheesecake balls are dipped and decorated.
Step 6: Final Chill to Set the Chocolate
Once all the No-Bake Peanut Butter Cheesecake Balls are dipped and decorated, it’s time for them to set completely. Place the baking sheet with the finished balls back into the refrigerator. Allow them to chill for at least 1 to 2 hours, or until the melted chocolate coating is completely firm and hardened. This final chill ensures the chocolate shell is crisp and the cheesecake filling is perfectly set. For best results and storage, keep the finished cheesecake balls in an airtight container in the refrigerator. They are a perfect treat for parties, holidays, or just a delicious homemade indulgence.
Conclusion:
We hope you’ve enjoyed learning how to make these delightful No-Bake Peanut Butter Cheesecake Balls! This recipe is a fantastic way to satisfy your sweet tooth without the hassle of baking. The creamy peanut butter filling, combined with the rich chocolate coating, creates a truly irresistible treat that’s perfect for any occasion. They are surprisingly simple to whip up, making them an ideal choice for a quick dessert or a show-stopping party appetizer.
These No-Bake Peanut Butter Cheesecake Balls are incredibly versatile. They’re delicious served chilled on their own, but you can also elevate them further. Consider arrangin extractg them on a dessert platter with fresh berries for a pop of color and freshness, or even dusting them lightly with edible glitter for a touch of sparkle. For a more decadent experience, serve them alongside a scoop of vanilla ice cream or a drizzle of extra melted chocolate.
Feel free to get creative with variations! You can swap the milk chocolate for dark or white chocolate for a different flavor profile. Adding a pinch of sea salt to the cheesecake mixture before rolling can enhance the peanut butter flavor. For a touch of texture, try rolling some of the finished balls in chopped peanuts or mini chocolate chips. Don’t be afraid to experiment and make these No-Bake Peanut Butter Cheesecake Balls your own! We encourage you to give this recipe a try – you won’t be disappointed!
Frequently Asked Questions:
Q1: How should I store the No-Bake Peanut Butter Cheesecake Balls?
You can store these delicious No-Bake Peanut Butter Cheesecake Balls in an airtight container in the refrigerator for up to 5 days. They are best enjoyed chilled, so be sure to let them set properly in the fridge before serving. For longer storage, you can also freeze them for up to 2 months.
Q2: Can I make the No-Bake Peanut Butter Cheesecake Balls ahead of time?
Absolutely! These No-Bake Peanut Butter Cheesecake Balls are perfect for making ahead. In fact, they often taste even better after chilling for a few hours, allowing the flavors to meld. Prepare them up to two days in advance and store them in the refrigerator.
Easy No-Bake Peanut Butter Cheesecake Balls
Delightful no-bake peanut butter cheesecake balls coated in chocolate and crushed graham crackers.
Ingredients
-
1 package (8 ounces) cream cheese, softened
-
1 cup powdered sugar, sifted
-
1 cup creamy peanut butter
-
1 teaspoon vanilla extract
-
1½ cups crushed graham crackers or digestive cookies
-
1/2 cup mini chocolate chips
-
Melted chocolate (dark, milk, or semi-sweet) for dipping
-
Additional crushed graham crackers or digestive cookies for rolling
Instructions
-
Step 1
Ensure cream cheese is softened. In a medium bowl, beat softened cream cheese with an electric mixer on medium speed until completely smooth and creamy. -
Step 2
Gradually add sifted powdered sugar to the cream cheese, mixing on low speed then medium until well combined and fluffy. Add creamy peanut butter and vanilla extract, and beat on medium speed until thoroughly combined and uniform in color. -
Step 3
Gently fold in the crushed graham crackers or digestive cookies and mini chocolate chips using a spatula or wooden spoon until evenly distributed. The mixture should be thick and slightly sticky. -
Step 4
Scoop out portions of the mixture and roll into 1-1.5 inch balls. If the mixture is too sticky, chill it for 15-20 minutes. Arrange balls on a parchment-lined baking sheet and chill in the refrigerator for at least 30 minutes or freezer for 15 minutes until firm. -
Step 5
Melt chocolate. Dip each chilled ball into melted chocolate, ensuring full coating. Let excess chocolate drip off. Immediately sprinkle with additional crushed graham crackers or digestive cookies while the chocolate is wet. Place coated balls back on the baking sheet. -
Step 6
Refrigerate the finished cheesecake balls for at least 1 to 2 hours, or until the chocolate coating is completely firm and hardened.
Important Information
Nutrition Facts (Per Serving)
It is important to consider this information as approximate and not to use it as definitive health advice.
Allergy Information
Please check ingredients for potential allergens and consult a health professional if in doubt.