Easy Chicken Enchilada Roll Ups-Quick Dinner
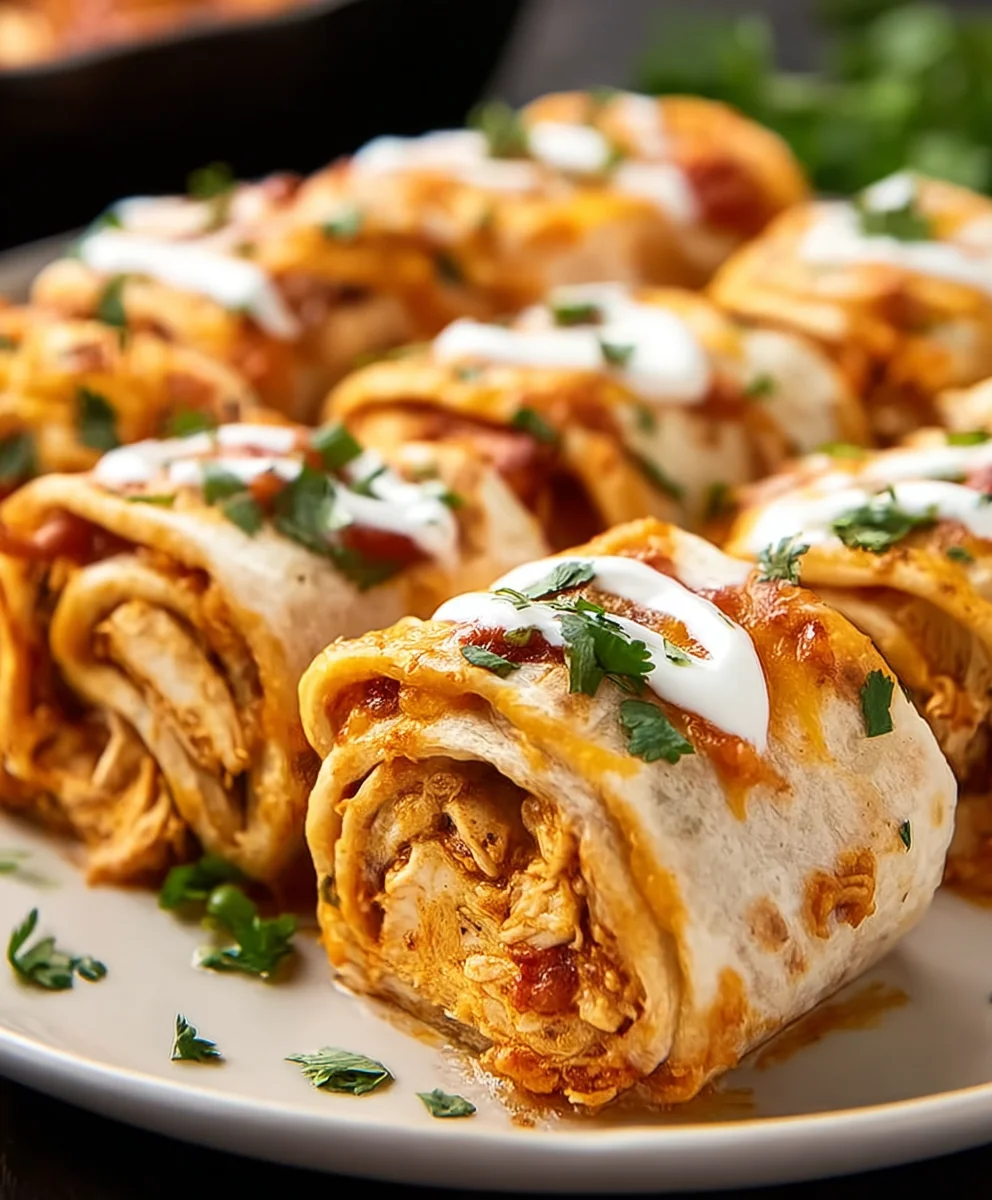
Chicken Enchilada Roll Ups are more than just a meal; they’re a vibrant fiesta on a plate, a comforting hug in every bite, and a guaranteed crowd-pleaser for any occasion. We all crave those dishes that effortlessly combine bold flavors with satisfying textures, and these roll-ups deliver just that. Imagin extracte tender shredded chicken, seasoned to perfection, swaddled in soft tortillas and bathed in a rich, flavorful enchilada sauce. The magic truly happens when these elements meld together, creating a harmonious symphony of taste and aroma that keeps everyone coming back for more. What makes these Chicken Enchilada Roll Ups so incredibly special is their delightful simplicity coupled with an explosion of authentic Mexican-inspired goodness. They’re incredibly versatile, perfect for a weeknight dinner that feels like a special treat, or for feeding a hungry gathering of friends and family. Get ready to discover your new go-to recipe that’s sure to become a cherished favorite.
Why You’ll Love This Recipe:
Effortless Preparation
Bold, Satisfying Flavors
Perfect for Sharing
Ingredients:
- 5 burrito sized flour tortillas
- 1 ounce packet of taco seasoning mix
- 3 cups shredded chicken (rotisserie chicken works wonderfully here for a time-saver!)
- 8 ounce package of cream cheese, softened to room temperature (this is key for a smooth mixture)
- 1½ cups shredded Mexican cheese blend or sharp cheddar cheese (or a mix of both for maximum flavor!)
- 10 ounce can diced tomatoes with green chilies (like Rotel), drained well to avoid a watery filling
- 1 teaspoon minced garlic (freshly minced offers the best punch, but pre-minced is fine too)
- 4 green onions, thinly sliced (both the white and green parts are great)
- ½ cup chopped fresh cilantro for garnish (optional, but highly recommended for a burst of freshness)
Preparing the Filling:
Step 1: Combine the Creamy Base
In a large mixing bowl, add the softened cream cheese. Cream cheese that’s at room temperature will mix much more easily and result in a lump-free filling. If you forgot to soften it beforehand, you can gently warm it in the microwave for about 15-20 seconds, being careful not to melt it completely. Add the entire packet of taco seasoning mix to the cream cheese. Use a sturdy spoon or spatula to vigorously mix these two ingredients together until they are thoroughly combined and the seasoning is evenly distributed throughout the cream cheese. This forms the flavorful, creamy binder for our enchilada roll-ups.
Step 2: Incorporate the Chicken and Vegetables
Now, add the 3 cups of shredded chicken to the bowl with the seasoned cream cheese. Next, stir in the drained diced tomatoes with green chilies. It’s important to drain these well; excess liquid can make your filling soggy and harder to work with. Add the minced garlic and the sliced green onions (reserving a few slices for garnish if you like).
Step 3: Add the Cheese and Mix Thoroughly
Sprinkle in 1 cup of the shredded Mexican cheese blend or cheddar cheese. We’re saving the remaining ½ cup for topping later. Gently fold all of the ingredients together until everything is well incorporated. You want to ensure the chicken and vegetables are evenly coated in the creamy, cheesy mixture. Taste a small spoonful of the filling at this stage and adjust seasoning if needed, though the taco seasoning usually provides ample flavor.
Assembling the Roll-Ups:
Step 4: Prepare the Tortillas and Fill
Lay one of the burrito-sized flour tortillas flat on a clean, dry surface. It’s helpful to warm the tortillas slightly before assembling. You can do this by microwaving them for about 15-20 seconds each, or briefly heating them in a dry skillet. Warm tortillas are more pliable and less likely to crack when you roll them. Spoon about one-fifth of the filling mixture onto the center of the tortilla, spreading it out slightly into an even layer, but leaving a small border around the edges. You want enough filling to be generous, but not so much that it overflows when you roll it up.
Step 5: Roll and Arrange
Carefully tuck in the sides of the tortilla slightly, then tightly roll the tortilla from the bottom up, enclosing the filling. Think of it like rolling a very thick burrito. Once rolled, place the enchilada roll-up seam-side down in a greased baking dish. Repeat this process with the remaining tortillas and filling, arrangin extractg them snugly in the baking dish. This ensures they hold their shape during baking.
Baking and Serving:
Step 6: Top and Bake to Golden Perfection
Once all the roll-ups are in the baking dish, sprinkle the remaining ½ cup of shredded cheese evenly over the tops. This is what will create that irresistible cheesy crust. Cover the baking dish loosely with aluminum foil. Bake in a preheated oven at 375°F (190°C) for 20 minutes. After 20 minutes, remove the foil and bake for an additional 5-10 minutes, or until the cheese is melted, bubbly, and lightly golden brown. This final uncovered bake gives the cheese that perfect browned finish.
Step 7: Garnish and Enjoy
Let the chicken enchilada roll-ups rest in the baking dish for a few minutes before serving. This allows the filling to set slightly. Garnish generously with the reserved chopped cilantro and any extra sliced green onions you saved. Serve warm, and prepare for rave reviews! These are fantastic served with a dollop of sour cream, salsa, or guacamole on the side.

Conclusion:
You’ve now mastered the art of creating delicious and impressive Chicken Enchilada Roll Ups! This recipe offers a delightful twist on traditional enchiladas, making them easier to serve and perfect for any gathering. The tender chicken, flavorful enchilada sauce, and creamy cheese all come together in a harmonious bite that is sure to be a crowd-pleaser. Don’t be afraid to get creative with your toppings; a dollop of sour cream, some fresh cilantro, or a sprinkle of cotija cheese can elevate these roll-ups even further. Whether you’re hosting a dinner party or looking for a satisfying weeknight meal, these Chicken Enchilada Roll Ups are a fantastic choice. Enjoy the process, and savor every mouthwatering bite!
Frequently Asked Questions about Chicken Enchilada Roll Ups:
Can I make these ahead of time?
Yes, absolutely! You can assemble the Chicken Enchilada Roll Ups up to 24 hours in advance. Store them covered in the refrigerator. When you’re ready to bake, you may need to add a few extra minutes to the cooking time to ensure they are heated through completely.
What other fillings can I use?
The beauty of these Chicken Enchilada Roll Ups is their versatility. While chicken is delicious, you can easily substitute it with shredded beef, seasoned ground turkey, or even a vegetarian option like black beans and corn. Just ensure your filling is moist enough to hold together.
How can I make this spicier?
To add some heat to your Chicken Enchilada Roll Ups, consider incorporating a diced jalapeño or a pinch of cayenne pepper into the chicken mixture. You can also use a spicier enchilada sauce or top the finished dish with a drizzle of your favorite hot sauce.
Easy Chicken Enchilada Roll Ups-Quick Dinner
Quick and easy chicken enchilada roll-ups perfect for a weeknight dinner.
Ingredients
-
5 burrito sized flour tortillas
-
1 ounce packet of taco seasoning mix
-
3 cups shredded chicken
-
8 ounce package of cream cheese, softened
-
1½ cups shredded Mexican cheese blend or sharp cheddar cheese
-
10 ounce can diced tomatoes with green chilies, drained
-
1 teaspoon minced garlic
-
4 green onions, thinly sliced
-
½ cup chopped fresh cilantro for garnish (optional)
Instructions
-
Step 1
In a large mixing bowl, combine the softened cream cheese and the packet of taco seasoning mix. Mix until thoroughly combined and the seasoning is evenly distributed. -
Step 2
Add the shredded chicken, drained diced tomatoes with green chilies, minced garlic, and sliced green onions to the bowl. Stir to incorporate. -
Step 3
Stir in 1 cup of the shredded cheese blend. Gently fold all ingredients together until well combined. Taste and adjust seasoning if needed. -
Step 4
Warm the tortillas slightly to make them pliable. Spoon about one-fifth of the filling onto the center of each tortilla, spreading it into an even layer, leaving a small border. -
Step 5
Tuck in the sides of the tortilla, then tightly roll it up from the bottom. Place seam-side down in a greased baking dish. Repeat with remaining tortillas. -
Step 6
Sprinkle the remaining ½ cup of shredded cheese evenly over the tops of the roll-ups. Cover the baking dish loosely with aluminum foil and bake at 375°F (190°C) for 20 minutes. -
Step 7
Remove the foil and bake for an additional 5-10 minutes, or until the cheese is melted, bubbly, and lightly golden brown. Let rest for a few minutes before garnishing with cilantro and green onions and serving.
Important Information
Nutrition Facts (Per Serving)
It is important to consider this information as approximate and not to use it as definitive health advice.
Allergy Information
Please check ingredients for potential allergens and consult a health professional if in doubt.